The alchemist code
The alchemist code
Welcome to AlchemistCodeDB.com
August 25th, 2022
*Database updated for August 25th patch.
August 18th, 2022
*Database updated for August 18th patch.
August 11th, 2022
*Database updated for August 11th patch.
August 4th, 2022
*Database updated for August 4th patch.
July 28th, 2022
*Database updated for July 28th patch.
July 21st, 2022
*Database updated for July 21st patch.
July 14th, 2022
*Database updated for July 14th patch.
July 7th, 2022
*Database updated for July 7th patch.
June 30th, 2022
*Database updated for June 30th patch.
June 23rd, 2022
*Database updated for June 23rd patch.
June 16th, 2022
*Database updated for June 16th patch.
June 9th, 2022
*Database updated for June 9th patch.
June 2nd, 2022
*Database updated for June 2nd patch.
May 26th, 2022
*Database updated for May 26th patch.
May 19th, 2022
*Database updated for May 19th patch.
May 12th, 2022
*Database updated for May 12th patch.
May 5th, 2022
*Database updated for May 5th patch.
April 28th, 2022
*Database updated for April 28th patch.
April 21st, 2022
*Database updated for April 21st patch.
April 14th, 2022
*Database updated for April 14th patch.
April 7th, 2022
*Database updated for April 7th patch.
March 31st, 2022
*Database updated for March 31st patch.
March 17th, 2022
*Database updated for March 17th patch.
March 10th, 2022
*Database updated for March 10th patch.
March 3rd, 2022
*Database updated for March 3rd patch.
February 24th, 2022
*Database updated for February 24th patch.
February 22nd, 2022
*Various data added to Raids, Guild Raids, World Raids, Advance Bosses, Genesis Bosses, and Point Quests.
February 17th, 2022
*Database updated for February 17th patch.
February 14th, 2022
*Ability change skill tabs removed and replaced with a list of skills on the triggering skill (Too many errors with the tabs, this way is easier and can still get to most skills without much clicking).
*A few site/data errors fixed.
February 10th, 2022
*Database updated for February 10th patch.
February 3rd, 2022
*Database updated for February 3rd patch.
January 29th, 2022
*Database updated for January 28th patch.
January 20th, 2022
*Database updated for January 20th patch.
January 13th, 2022
*Database updated for January 13th patch.
January 6th, 2022
*Database updated for January 6th patch.
December 31st, 2021
*Database updated for December 30th patch.
December 23rd, 2021
*Database updated for December 23rd patch.
December 16th, 2021
*Database updated for December 16th patch.
December 9th, 2021
*Database updated for December 9th patch.
December 2nd, 2021
*Database updated for December 2nd patch.
November 25th, 2021
*Database updated for November 25th patch.
November 18th, 2021
*Database updated for November 18th patch.
November 11th, 2021
*Database updated for November 11th patch.
November 3rd, 2021
*Database updated for November 3rd patch.
October 28th, 2021
*Database updated for October 28th patch.
October 21st, 2021
*Database updated for October 21st patch.
October 14th, 2021
*Database updated for October 14th patch.
October 7th, 2021
*Database updated for October 7th patch.
September 30th, 2021
*Database updated for September 30th patch.
September 23rd, 2021
*Database updated for September 23rd patch.
September 16th, 2021
*Database updated for September 16th patch.
September 10th, 2021
*Global search added, search by name and slug for the relevant sections, slug search also added to those index pages.
*Reworked some section index pages with perhaps more useful information, some other minor display issues fixed.
September 9th, 2021
*Database updated for September 9th patch.
September 7th, 2021
*Related Mementos added to Unit pages, Gear Abilities removed and replaced with Related Gear (Stats included minus abilities for both).
September 2nd, 2021
*Database updated for September 2nd patch.
August 26th, 2021
*Database updated for August 26th patch.
August 19th, 2021
*Database updated for August 19th patch.
August 12th, 2021
*Database updated for August 12th patch.
August 5th, 2021
*Database updated for August 5th patch.
July 29th, 2021
*Database updated for July 29th patch.
July 25th, 2021
*Unit planner updated to handle multiple job changes like J+ to J++.
July 22nd, 2021
*Database updated for July 22nd patch.
July 15th, 2021
*Database updated for July 15th patch.
July 9th, 2021
*Database updated for July 9th patch.
July 1st, 2021
*Database updated for July 1st patch.
June 24th, 2021
*Database updated for June 24th patch.
June 17th, 2021
*Database updated for June 17th patch.
June 10th, 2021
*Database updated for June 10th patch.
June 3rd, 2021
*Database updated for June 3rd patch.
May 27th, 2021
*Database updated for May 27th patch.
May 20th, 2021
*Database updated for May 20th patch.
May 12th, 2021
*Database updated for May 12th patch.
May 6th, 2021
*Database updated for May 6th patch.
April 29th, 2021
*Database updated for April 29th patch.
April 22nd, 2021
*Database updated for April 22nd patch.
April 15th, 2021
*Database updated for April 15th patch.
April 8th, 2021
*Database updated for April 8th patch.
April 1st, 2021
*Database updated for April 1st patch.
March 25th, 2021
*Database updated for March 25th patch.
March 18th, 2021
*Database updated for March 18th patch.
March 11th, 2021
*Database updated for March 11th patch.
March 4th, 2021
*Database updated for March 4th patch.
February 25th, 2021
*Database updated for February 25th patch.
February 18th, 2021
*Database updated for February 18th patch.
February 10th, 2021
*Database updated for February 10th patch.
February 4th, 2021
*Database updated for February 4th patch.
January 28th, 2021
*Database updated for January 28th patch.
January 21st, 2021
*Database updated for January 21st patch.
January 14th, 2021
*Database updated for January 14th patch.
January 7th, 2021
*Database updated for January 7th patch.
December 30th, 2020
*Database updated for December 30th patch.
December 23rd, 2020
*Database updated for December 23rd patch.
December 17th, 2020
*Database updated for December 17th patch.
December 10th, 2020
*Database updated for December 10th patch.
December 3rd, 2020
*Database updated for December 3rd patch.
November 26th, 2020
*Database updated for November 26th patch.
November 19th, 2020
*Database updated for November 19th patch.
November 12th, 2020
*Database updated for November 12th patch.
November 5th, 2020
*Database updated for November 5th patch.
October 29th, 2020
*Database updated for October 29th patch.
October 22nd, 2020
*Database updated for October 22nd patch.
October 15th, 2020
*Database updated for October 15th patch.
October 8th, 2020
*Database updated for October 8th patch.
October 1st, 2020
*Database updated for October 1st patch.
September 24th, 2020
*Database updated for September 24th patch.
September 17th, 2020
*Database updated for September 17th patch.
September 10th, 2020
*Database updated for September 10th patch.
September 3rd, 2020
*Database updated for September 3rd patch.
August 27th, 2020
*Database updated for August 27th patch.
August 20th, 2020
*Database updated for August 20th patch.
August 13th, 2020
*Database updated for August 13th patch.
August 6th, 2020
*Database updated for August 6th patch.
July 30th, 2020
*Database updated for July 30th patch.
July 23rd, 2020
*Database updated for July 23rd patch.
July 16th, 2020
*Database updated for July 16th patch.
July 9th, 2020
*Database updated for July 9th patch.
July 2nd, 2020
*Database updated for July 2nd patch.
June 25th, 2020
*Database updated for June 25th patch.
June 18th, 2020
*Database updated for June 18th patch.
June 11th, 2020
*Database updated for June 11th patch.
June 4th, 2020
*Database updated for June 4th patch.
May 28th, 2020
*Database updated for May 28th patch.
May 21st, 2020
*Database updated for May 21st patch.
*Various UI Elements updated with GL terminology (Probably still missed some but whatever).
*UI Revamp where you can change which locale you want for JP still being worked on (No ETA and like other stuff may never happen).
May 17th, 2020
*Fixed missing alternative requirements for equipping gears.
May 14th, 2020
*Database updated for May 14th patch.
May 13th, 2020
*Combat buffs/debuffs stats added next to the total value in unit planner.
*Gender filter added to unit index and jobs filter changed to or condition.
*A few site/data errors fixed.
May 7th, 2020
*Database updated for May 7th patch.
April 30th, 2020
*Database updated for April 30th patch.
April 23rd, 2020
*Database updated for April 23rd patch.
April 16th, 2020
*Database updated for April 16th patch.
*Map Display added to quest pages (Inspired/Copied from W0lf).
*Various data added to quest pages (Still bunch of stuff missing but better than before).
*Various site/data errors fixed.
April 9th, 2020
*Database updated for April 9th patch.
April 1st, 2020
*Database updated for April 1st patch.
March 26th, 2020
*Database updated for March 26th patch.
March 19th, 2020
*Database updated for March 19th patch.
March 12th, 2020
*Database updated for March 12th patch.
March 5th, 2020
*Database updated for March 5th patch.
February 27th, 2020
*Database updated for February 27th patch.
February 20th, 2020
*Database updated for February 20th patch.
February 13th, 2020
*Database updated for February 13th patch.
February 6th, 2020
*Database updated for February 6th patch.
January 30th, 2020
*Database updated for January 30th patch.
January 23rd, 2020
*Database updated for January 23rd patch.
January 16th, 2020
*Database updated for January 16th patch.
January 9th, 2020
*Database updated for January 9th patch.
January 2nd, 2020
*Database updated for January 2nd patch.
December 19th, 2019
*Database updated for December 19th patch.
December 12th, 2019
*Database updated for December 12th patch.
December 5th, 2019
*Database updated for December 5th patch.
November 28th, 2019
*Database updated for November 28th patch.
November 21st, 2019
*Database updated for November 21st patch.
November 14th, 2019
*Database updated for November 14th patch.
November 7th, 2019
*Database updated for November 7th patch.
October 31st, 2019
*Database updated for October 31st patch.
October 24th, 2019
*Database updated for October 24th patch.
October 17th, 2019
*Database updated for October 17th patch.
October 10th, 2019
*Database updated for October 10th patch.
October 3rd, 2019
*Database updated for October 3rd patch.
September 26th, 2019
*Database updated for September 26th patch.
September 19th, 2019
*Database updated for September 19th patch.
September 12th, 2019
*Database updated for September 12th patch.
September 5th, 2019
*Database updated for September 5th patch.
August 29th, 2019
*Database updated for August 29th patch.
August 22nd, 2019
*Database updated for August 22nd patch.
August 15th, 2019
*Database updated for August 15th patch.
August 8th, 2019
*Database updated for August 8th patch.
August 1st, 2019
*Database updated for August 1st patch.
July 25th, 2019
*Database updated for July 25th patch.
July 18th, 2019
*Database updated for July 18th patch.
July 11th, 2019
*Database updated for July 11th patch.
July 6th, 2019
*Database updated for July 4th patch.
June 27th, 2019
*Database updated for June 27th patch.
June 20th, 2019
*Database updated for June 20th patch.
June 13th, 2019
*Database updated for June 13th patch.
June 6th, 2019
*Database updated for June 6th patch.
May 23rd, 2019
*Database updated for May 23rd patch.
May 16th, 2019
*Database updated for May 16th patch.
May 9th, 2019
*Database updated for May 9th patch.
May 2nd, 2019
*Database updated for May 2nd patch.
April 25th, 2019
*Database updated for April 25th patch.
April 18th, 2019
*Database updated for April 18th patch.
April 11th, 2019
*Database updated for April 11th patch.
April 4th, 2019
*Database updated for April 4th patch.
March 28th, 2019
*Database updated for March 28th patch.
March 21st, 2019
*Database updated for March 21st patch.
March 14th, 2019
*Database updated for March 14th patch.
March 7th, 2019
*Database updated for March 7th patch.
February 28th, 2019
*Database updated for February 28th patch.
February 23rd, 2019
*Database updated for February 21st patch.
*Bunch of unreleased items, gear, and mementos added that are missing unreleased units data.
*Kamui also unreleased but went ahead and left him in.
February 14th, 2019
*Database updated for February 14th patch.
January 31st, 2019
*Database updated for January 31st patch.
January 24th, 2019
*Database updated for January 24th patch.
January 17th, 2019
*Database updated for January 17th patch.
January 3rd, 2019
*Database updated for January 3rd patch.
December 27th, 2018
*Database updated for December 27th patch.
December 22nd, 2018
*PvP stats on gear pages added.
December 20th, 2018
*Database updated for December 20th patch.
December 6th, 2018
*Database updated for December 6th patch.
November 29th, 2018
*Database updated for November 29th patch.
November 22nd, 2018
*Database updated for November 22nd patch.
November 15th, 2018
*Database updated for November 15th patch.
November 8th, 2018
*Database updated for November 8th patch.
November 1st, 2018
*Database updated for November 1st patch.
October 25th, 2018
*Database updated for October 25th patch.
October 18th, 2018
*Database updated for October 18th patch.
October 11th, 2018
*Database updated for October 11th patch.
October 4th, 2018
*Database updated for October 4th patch.
September 27th, 2018
*Database updated for September 27th patch.
September 20th, 2018
*Database updated for September 20th patch.
September 13th, 2018
*Database updated for September 13th patch.
September 6th, 2018
*Database updated for September 6th patch.
August 30th, 2018
*Database updated for August 30th patch.
August 16th, 2018
*Database updated for August 16th patch.
August 2nd, 2018
*Database updated for August 2nd patch.
July 26th, 2018
*Database updated for July 26th patch.
July 19th, 2018
*Database updated for July 19th patch.
July 12th, 2018
*Database updated for July 12th patch.
July 7th, 2018
*Unit planner revamped, full customization now available.
July 5th, 2018
*Database updated for July 5th patch.
July 2nd, 2018
*New site design, dark theme is now considered the default theme.
June 28th, 2018
*Database updated for June 28th patch.
June 14th, 2018
*Database updated for June 14th patch (Updated).
June 7th, 2018
*Database updated for June 7th patch.
May 24th, 2018
*Database updated for May 24th patch.
May 10th, 2018
*Database updated for May 10th patch.
May 3rd, 2018
*Database updated for May 3rd patch.
April 26th, 2018
*Database updated for April 26th patch.
April 19th, 2018
*Database updated for April 19th patch.
April 12th, 2018
*Database updated for April 12th patch.
April 5th, 2018
*Database updated for April 5th patch.
March 29th, 2018
*Database updated for March 29th patch.
March 19th, 2018
*Gear fixes to unit planner.
March 15th, 2018
*Database updated for March 15th patch.
March 1st, 2018
*Database updated for March 1st patch.
February 22nd, 2018
*Ads added to help pay server costs.
February 12th, 2018
*Database updated for February 12th patch and unit planner added under Tools.
February 1st, 2018
*Database updated for February 1st patch.
January 25th, 2018
*Dark theme added, theme can be switched from link in footer.
January 18th, 2018
*Database updated for January 18th patch.
January 16th, 2018
*Title list added under Tools, Chg Job for units fixed, and search by slug added for units index.
January 5th, 2018
*Skills added.
January 4th, 2018
*Database updated for January 4th patch.
January 3rd, 2018
*Unit stats and skills added to quests.
December 21st, 2017
*Database updated for December 21st patch and experience chart added under Tools.
December 15th, 2017
*Missions added.
December 7th, 2017
*Database updated for December 7th patch.
November 30th, 2017
*Database updated for November 30th patch.
November 27th, 2017
*Quests added.
November 19th, 2017
*Database updated with JP version data.
November 15th, 2017
*Items added.
November 14th, 2017
*Database updated for November 14th patch.
November 13th, 2017
*Gear added.
November 9th, 2017
*Initial launch of site.
World
In the Continent where the Tower of Babel stands, Nimul and Emmel devised Alchemy in their ambition to become like the gods
Humanity was in danger of annihilation as Alchemy became a tool of war used by the ambitious for dominance over the lands.
Sensing its threat to humankind and seeing its devastating powers. the kingdoms of Babel formed the Alliance of the Seven Kingdoms.
Headed by the suzerain state of Northern Pride, Alchemy was branded as the Forbidden Art.
For the following few centuries, a delicate balance and peace was maintained by the Seven Kingdoms.
In the year 911 of Babel, the fragile peace crumbled. The Western Kingdom of Wratharis, the Nation of Wrath, revived Alchemy once again as an instrument of warfare.
This antagonistic act enveloped the whole continent in an atmosphere of unrest. In retaliation, the remaining Kingdoms formed a United Suppression Army, with Envylia as their vanguard.
Wratharis was overthrown and Alchemy was once again sealed in darkness.
Twenty years have passed since then.
As if to answer the call of the Continent’s agitation.
the Forbidden Art’s Seal started to show signs of weakening.
Characters
Logi Crowley
(Voiced by: Natsuki Hanae)
«I Want Power. The Power to Protect the World!»
Driven by a strong sense of justice, he perseveres through what he believes is right. But Dias and Agatha often scold him for his impulsiveness.
Dias Crowley
(Voiced by: Kaito Ishikawa)
«I Desire Power.. The Ultimate Power to Change the World!»
Dias, a squire of the Blue Flame Guard, knight faction of Envylia.
Well composed, and sometimes even cold-hearted, like Logi and Agatha, Dias wishes for a world without class, where everyone can live happily.
He believes this to be unattainable without gaining ultimate power.
His actions, even if harsh, stems from his love for Logi and Agatha, as he feels very protective towards them.
Agatha Crowley
(Voiced by: Yoko Hikasa)
«How Wonderful It Would Be, If This Were a Peaceful World Where We Could Live Along Our Loved Ones»
Agatha, a nun from an Envylian convent.
She cares deeply about her childhood companions, Logi and Dias, and behaves like their older sister. They grew up together, sharing each other’s dreams, hopes, joys and sorrows.
She’s a good cook, and often makes food for the homeless who come to the convent. She’s also good at sewing, and makes clothes for the children.
Ouroboros
(Voiced by: Yui Horie)
«My Name is Ouroboros. I am the Bond between Truth and the World, the Observer of Destiny.»
Ouroboros, a mysterious girl who appears before the Door of Truth.
She calls herself the Observer of Destiny, but her objectives and true identity are unknown.
Edgar L. Leonhart
(Voiced by: Ryota Osaka)
«Don’t Make Women Cry. Nothing in the World is More Important than That.»
Edgar is a sharpshooter traveling the world on his Alchemia bike with his beloved gun “Betty.” As a firm believer of non-killing, he loads his guns with his own powerful Alchemic Energy instead of bullets, basically knocking his opponents unconscious without taking their lives.
He may seem like a sleazy playboy at first glance, but he opposes anyone who makes a lady cry. He’s a hot-blooded type of guy who will furiously make a stand against any womanizer, strong or weak.
Fiona
(Voiced by: Yoshika Akashi)
«I’m Not Sure If I Can Help. But I’ll Do the Best I Can!»
Fiona is the daughter of Redington City’s ex-mayor Edward Elester. “Elester” is also a manufacturer of alkaroids for household and communication purposes. As expected of the daughter of a noble family, she’s a sweet and proper girl, but when push comes to shove, she does have the courage to take matters in her own hands. Her personality is honest and to the point, and she relates to anyone with a sense of equality.
(Voiced by: Ikumi Nakagami)
«My Name Is Al! I’m Not Just an Ordinary Alkemono!»
Al is a pet-type alkaroid. Though he’s an old model without any installed speech functionalities, he gained the ability to speak after a certain event. Edward gave him to Fiona as a birthday present when she was a child, and she’s always taken good care of him. He’s got a mischievous demeanor, and when it comes to Fiona, he’s very easy to excite.
Don Taras
(Voiced by: Daisuke Matsuoka)
«What Are You Babbling About? Just Bring It On. I’ll Take Good Care of You.»
Don Taras is a Mafia boss controlling the “Real Heaven” and “Little Heaven” districts of Redington City. He’s an old-fashioned spirit with a strong sense for duty and humanity, who wouldn’t allow anyone in his organization who’d make a woman cry. In order to deal with the approaching cataclysm, for several years, he’s been saving Alchemic Energy in his right arm.
Lisbeth Finn Lustburg
(Voiced by: Ai Furihata)
«Women fall in love with men too! As long as we don’t hate each other, I’m sure we can find a way to get along!»
Lisbeth is the daughter of the owner of a cheap bar in the outskirts of Lustburg. Having grown up around a bar, she doesn’t have much sense of gender distinction against her own country’s men. Though she’s entered the Academy of Magic, her student career hasn’t looked quite promising. Thanks to her straightforward and kind personality however, she’s been able to make good friends.
(Voiced by: Rika Morinaga)
«Come on. If you think of the bad things, you’ll miss out on the fun.»
Lisbeth’s friend. Quickly spotting rumors or information, her actions are led by her curious nature. She has good athletic skills, is muscular, and has quite a powerful side. She purposely makes herself look average in order to use her networking skills to obtain information constantly. It is said that she possesses information pertaining to government secrets.
Rebecca
(Voiced by: Hyosei)
«From here, I, Rebecca Helkovara Lustburg alone will destroy the monsters!»
A daughter born into the Lustburg family. She is blessed with having an education in and knowledge of magic, while also having excellent athletic skills, though not to the level of Alma’s. She has strong views on family and the roles of men and women so she looks down on others, though she has persuasive skills that support her charismatic nature. She has a large family entourage and no interest in mingling with friends.
(Voiced by: 生天目仁美)
«It must be something that I. and I alone can do!»
Tina is the 45th chief of the Toxotes tribe, a Voda people from the Saga Region. She lives away from the rest of the tribe, deep in the midst of nature, and is unfamiliar with the present situation in Saga. She’s a wary person, but isn’t cold to everyone, and can be very gentle towards animals and children. Her hawk companion’s name is Badalf.
Mocca
«You are indeed the person I have been searching for. no, maybe you’re more than that.»
Mocca is a Wind Shaman of the Fuu faction from Saga. Her summoning was based on memories of a time once passed, achieved by using a catalyst that channeled Ouroboros’ power. Though she may come across as cool, calm, and collected, a strong sense of justice burns brightly in her heart. She simply cannot look away from those in need.
Kamui
«If it is strength that you lack, it must be fate that we’ve met. I will lend you my strength.»
Kamui is a young man of the Sephira tribe, which survives by staying hidden in the desert. He was given the role of Protector for his skill with alchemy. Though his speech implies indifference, he is very caring in nature and his friends consider him extremely dependable. Unfortunately, he is not sensitive enough to sense the subtle moods of others.
Malta
«Will you break me free from this cage that I’m locked up in?»
Malta is a shrine maiden excelling in spiritbonding, and is the daughter of Iakov, the village chief of Sephira. She was summoned through the power of Ouroboros. She takes pride in the responsibilities of a shrine maiden, even to the point of sacrificing herself for the greater good.
Isidore
«If it’s to rescue someone of importance, then I, Isidore will anything necessary.»
The Alchemist Code Items (Global)
Special Voucher
Item that can only be used at the Special Voucher Exchange Shop.
召喚割引券(重複・併用不可)
PotK Collab Coin
A limited-time coin obtained in special Summon, etc. (Can only be used at the PotK Collab Coin Exchange Shop)
Featured 5★ 25-Soul Shard Selector
Use this Ticket to select 25 5★ Soul Shards of your choice.
Featured 5★ 25-Soul Shard Selector
Use this Ticket to select 25 5★ Soul Shards of your choice.
[Summon Coin] Featured Memento Selector
Use this ticket to summon one featured Memento of your choice.
Skip Ticket x200
[Welcome & Come Back Campaign] This set contains lots of tickets that can be used to skip Story Quest battles. Available at a special, commemorative price!
Gear 10-Summon Ticket
[Welcome & Come Back Campaign] Use this ticket to summon ten 2-4★ gear items, available at a special price.
Job Token Set
[Welcome & Come Back Campaign] This set contains plenty of Bronze, Silver, and Gold Job Tokens, available at a special price.
Job Token Box [Rogue]
[Welcome & Come Back Campaign] Box containing six Job Tokens for the target job, available at a special price. Icons of applicable items are displayed on the right.
Job Token Box [Mage]
[Welcome & Come Back Campaign] Box containing six Job Tokens for the target job, available at a special price. Icons of applicable items are displayed on the right.
Job Token Box [Knight]
[Welcome & Come Back Campaign] Box containing six Job Tokens for the target job, available at a special price. Icons of applicable items are displayed on the right.
1★ Equipment Box
[Welcome & Come Back Campaign] This box contains plenty of 1★ equipment items required for training units. Available at a special price. (Icons of applicable items are displayed on the right.)
2★ Equipment Box
[Welcome & Come Back Campaign] This box contains plenty of 2★ equipment items required for training units. Available at a special price. (Icons of applicable items are displayed on the right.)
3★ Equipment Box
[Welcome & Come Back Campaign] This box contains plenty of 3★ equipment items required for training units. Available at a special price. (Icons of applicable items are displayed on the right.)
Exclusive Equipment Box [Knight]
[Welcome & Come Back Campaign] Box containing three pieces of exclusive equipment for the target job, available at a special price. Icons of applicable items are displayed on the right.
Skip Ticket Set
[Welcome & Come Back Campaign] This set contains «Skip Tickets», «Event Skip Tickets», and «Sacred Stone Skip Tickets». Available at a special commemorative price!
Omnicrystal & Enchantment Set
[Welcome & Come Back Campaign] This set contains plenty of Omnicrystal Equipment Diagram Pieces, Omnicrystal Equipment Shards, and Enchantment Materia, available at a special price.
Gear Enhancement Box
[Welcome & Come Back Campaign] Special, commemorative price for a set of «Orichalcum Ore», «Gold Gear Shards», etc. that can enhance your gear. *Icons of applicable items are displayed on the right.
Memento Enhancement Box
[Welcome & Come Back Campaign] This box contains plenty of «Reminiscences of a Robot,» «Ratty’s New Hope,» and more, which can be used to increase the Alchemic Boundary of Mementos. Available at a special price.
Rainbow Soul Shard x150
[Welcome & Come Back Campaign] A set of 150 Rainbow Soul Shards to limit break Fire, Wind, Thunder, Wind, Light, or Dark units, available at a special price.
Super Training Box
[Welcome & Come Back Campaign] A special box which includes all enhancement materials and other items needed to enhance the seven Gates of Enlightenment and Spirit Gear. Can be purchased using Paid Gems. (Tap the icon on the right to view Item Details.)
Unit 150-Soul Shard Selector
[Welcome & Come Back Campaign] Use this ticket to summon 150 Soul Shards for one 3★, 4★, or 5★ rare unit of your choice, available at a special price. Includes Babel Chronicles Festival limited-time units, but does not include other limited-time or collab units. (Once purchased, the ticket will be shown in your Gifts. Tap the icon on the right to view details.)
Elemental Goddess Jar x100 Selector
Use this ticket to summon 100 Goddess Jars for any one element of your choice.
Elemental Mana Golem x100 Selector
Use this ticket to summon 100 Mana Golems for any one element of your choice.
The Alchemist Code Wiki
Events
Event quests are a mixture of quests which are available on a regular schedule and special limited time quests. Any event quests intended to be temporary will display the length of time they are guaranteed to be available. For information about which events may currently be available or are announced to be coming soon, see Current/Upcoming Events and Summons. You must be level 10 to access most events, some have a higher level limit.
Contents
Limited Time Events [ ]
Limited time quests are typically available for 2 weeks at a time and usually begin on a Thursday.
Some limited time events return periodically (such as The Way to True Skill and Gold Rush Pro), while others may never return, or only on rare occasions. Some are tied to holidays. Many limited time events will give access to free characters, special gear for characters or job upgrades for specific characters. Typically limited event quests have milestone rewards you can obtain in addition to the mission bonuses and drops for completing them.
Because most of these events are not available regularly, it’s a good idea to complete as much as you’re capable of before the event expires.
Some of these events will be listed under the main event section, but a few will appear under Day/Training.
Hard/EX Events [ ]
Any event labeled hard or EX is usually meant to be very challenging and will be difficult to complete without characters at level 60 or higher who have their jobs mastered. Even at that level they may still be difficult to complete without some practice, strategy and an optimized group with specific character abilities.
These quests also often have high value rewards from missions or milestones such as character upgrade shards or high level gear. Most of these event quests will also have a multiplayer version available at half the normal AP cost to host.
Archive of Historical Events [ ]
You can see a list of all the limited time events here, including the last date that they were available.
Mystic World Mobius [ ]
The Mystic World Mobius is a special event that is typically available in some occasion. This is displayed under the Trials section under Babel Tower.
Collaborations [ ]
Collaborations are special events done in partnership with content from another game or other source. These generally include units that can only be summoned during the event as well as special event quests which are often required to access equipment or gear for those units. You can view a list of collaborations that have been available previously.
Event Archives [ ]
The Event Archives allow you to unlock and replay one event for 24 hours. You can access it once for free daily, and you can also use an Archive Access to unlock an additional event. The event archives will appear as an option in the event menu. You must be level 60 to access the Event Archives.
Periodically events in the event archive will rerun outside of the archive. When this happens they are temporarily moved to the regular current events section (usually under Rerun Events) and then returned to the event archive when the rerun concludes. During this period if there are challenge boards associated with the event they may rerun- these challenge boards are not accessible when the event is in the archive.
Regular Events [ ]
Regularly available quests will usually be listed as only available for the current day, but will return again the next day they are regularly available (some are only available certain days of the week, others are available every day).
Road to the Top [ ]
This quest gives 1.5 million unit experience to all units that clear it. You can clear this once a day. Only units level 95+ can do this quest. This quest is in the Events: Daily Quests section.
Unit Evolution Quests [ ]
These quests are available every day and there are no limits on the amount of times you can run them. They give you materials to evolve your characters to a higher star level which allows you to increase their maximum level. You can see which quests provide the evolution materials you need when you click on the material in the evolve window for your unit. Note that the rainbow evolution materials are rare and have a low drop rate. These quests are available in the Events: Daily Quests section.
There are 3 types of evolution material quests, and each one has 3 levels of difficulty:
These quests are also available in multiplayer mode for half the normal AP cost to host (and increased drop rates for the rare materials).
Note that some special event characters (such as Kagura) require unit evolution materials which are only available from a specific event and you will not be able to access them via the regular quests.
Job Token Quests [ ]
These quests are available every day and there are no limits on the amount of times you can run them. They give you job tokens which can be used to unlock the 2nd and 3rd jobs on most characters once you have limit broken them enough to gain access to the job. You can see which quests provide the job token materials you need when you click on the token in the job window for your unit. These quests are available in the Events: Daily Quests section.
There are 4 types of job token quests:
These quests are also available in multiplayer mode for half the normal AP cost to host.
Note that some special event character jobs (such as Kagura’s flame orb princess) and job+ require special job tokens which are only available during the event and you will not be able to access them via these quests.
Job Enhancement Quests [ ]
These quests are available every day and there are no limits on the amount of times you can run them. They give you access to the materials needed to apply enchanted jobs to your units. These quests are available in the Events: Daily Quests section.
Apple Garden [ ]
This set of quests gives you apples to use to level your characters and also is a decent source of experience (4500 per unit at advanced level, 3000 per unit at int level). You can also get items from these quests to upgrade memento level. There is a limit of 3 times a day to run each of these. This event is available daily. These quests are available in the Events: Daily Quests: Daily Quests.
If you have a garden key you can unlock a special version of this quest for a single run that costs no AP. It will not cost any AP and drops a larger amount of items than the Pro version.
Note that the metal ratty units in these quests are highly resistant to everything, so if you want to kill them faster you will want to use abilities that ignore defense.
Gold Rush [ ]
This set of quests is the best source of money and you should run all levels each day as they cost 0 AP. There is a limit of 1 time a day to run each of these. This event is available daily. These quests are available in the Events: Daily Quests: Daily Quests section.
If you have a gold key you can unlock the highest level version of the quest to run a single time. It will not cost any AP and drops a larger amount of items than the Pro version.
Mineral Garden [ ]
This set of quests provides minerals you can use to upgrade gear. You should run these to get items to upgrade any gear you are using (alternatively you can buy these items in the shops if you are short on AP). There is a limit of 3 times a day to run each of these. This event is available daily. These quests are available in the Events: Daily Quests: Daily Quests section.
If you have a mine key you can unlock the highest level version of the quest to run a single time. It will not cost any AP and drops a larger amount of items than the Pro version.
Alchemia Pot (Reclaiming The) [ ]
This set of quests provides materials you can use to enhance equipment. You should only ever enhance job 11 equipment. You can alternatively buy these items in shops. There is a limit of 3 times a day to run each of these. This event is available daily. These quests are available in the Events: Daily Quests: Daily Quests section.
Note that only characters with magic damage or penetrating abilities can be effective in these quests.
Gear Projection [ ]
There are 2 versions of this event. The hard version drops a small number of shards for 4 star gacha gear. The normal version drops a summon ticket for a small number of gear upgrade shards (primarily 2 star gear)- the ticket comes from the chest so be sure to get it. There is a limit of 3 times a day to run each of these. This event is available daily. These quests are available in the Events: Daily Quests: Daily Quests section.
Redemption Quests [ ]
These quests provide the idols needed to enlighten units. They are permanently available for multiplayer and are available certain days of the week in single player mode under the Events: Daily Quests section.
Seal Quests [ ]
These quests are permanently available if you are above player level 150. They are for farming Truth Seals and ore for awakening them. Each quest corresponds to the truth seal type and set type you wish to acquire. Normal difficulty drops 3★ seals and ore, Hard drops 3-4★ seals and ore, and EX drops 3-5★ seals and 4-5★ ore.
Vision Clear Quest [ ]
Vision Clear Quest is designed to give bonus Alchemic Boundary for specific mementos (typically 1%) and can be run 3/day. In addition it drops memento enhancement items and has a small chance of dropping Reminiscences of a Robot, which gives 5% Alchemic Boundary to a selected memento. This quest is usually available every week but the featured mementos change weekly. There is also a special version called Vision Clear Quest Pro which is occasionally available (usually on weekends) and gives 10% alchemic boundary to all mementos 1/day.
Permanent Events [ ]
Permanent events are always available and have no timer indicating an expiration date.
Training Hall [ ]
This series of quests is meant to be used to learn the basics of the game. You will want to do all these quests to obtain the rewards and to farm the Moon Star Armor (you can make 3 copies of this item), which is one of the best armor in the game. This event has been moved to the home screen as a separate button labeled «Training Hall».
Sacred Stone Memories [ ]
This is a series of story quests that periodically has new chapters added to the story. Each chapter is progressively more difficult and introduces new limited units which are only available occasionally for summoning. Some free units are also available from these quests such as Kanon and Kagura. There are also several farmable gear items available in these quests. There are a large number of milestones for these quests which give useful rewards, including gems. These quests are available under Story: Sacred Stone.
Babel Chronicles [ ]
This is a series of story quests that periodically has new chapters added to the story. Most of these quests provide specific units for you to play, although the EX versions you will use your own units for. These quests provide materials for enlightenment as well as other rewards. These quests are available under Story: Babel Chronicles.
Mystic Tower Veda [ ]
The Mystic Tower Veda is a special event that is available permanently under Trials > Babel Tower. The one-time rewards are quite nice, and you can clear the tower again every time it resets for coins which you can use to buy items in the Veda Coin Exchange. You get one free reset a month, additional resets cost gems.
Protagonist Job Change Quests [ ]
These series of quests provide the job tokens necessary to unlock protagonist job+ upgrades and the specialized equipment pieces required for the job and for protagonists with 3rd jobs there are associated quests here as well. These quests are available in the Events: Current Events section under Protagonists’ Job Change Quests.
Call of the Scarlet Flame [ ]
This series of quests provides gear shards for the Dazzling Blade, which is usable by many units and has a special ability only for Chloe. These quests are available in the Events: Current Events section.
Reclaiming the Scarlet [ ]
This series of quests provides the job tokens necessary to unlock Chloe’s job Scarlet Flame Battle Princess, specialized equipment pieces required the job and Fluffy Plushie Shard in order to craft Fluffy Plushie. These quests are available in the Events: Current Events section.
Chamber of Tribulations Archives [ ]
This is a series of quests that can only be completed by units of specific elements. Completing them rewards elemental shards. These quests are available in the Events: Current Events section.
Key Quests [ ]
Key quests require special keys to access. These quests are available in the Events: Key Quests section. For a description of the available key quests, see Key Quests.
The Alchemist Code Wiki
Character Quests
Contents
Unit Character Quests [ ]
Some units have character quests available. For units with a character quest series, the first quest becomes available at level 30, the second and level 60, and the third at level 80. These quests are not repeatable after they are completed. The level 80 character quest for each unit rewards the unit with a master ability. You can view a list of units with a character quest and master ability available on the Master Ability page.
Combo Character Quests [ ]
Combo character quests reward a special skill that can be triggered by either unit if both units are near each other and have the jewels to use the ability.
Logi and Edgar [ ]
Unlock Requirement: Complete chapter 2
Slash ATK (ignores DEF) that removes all buffs/debuffs cast on enemy unit [Range: 4, Height Range: 2]
Dias and Lisbeth [ ]
Unlock Requirement: Complete chapter 3
Raises own PATK/MATK for three turns and Dark Mag ATK on enemy unit after casting Jewel Auto Charge & target takes 25% of their Max Jewels as Jewel Dmg & Strong vs Light [Range: 4, Height Range: 4]
Tina and Mocca [ ]
Unlock Requirement: Complete chapter 4 and own Mocca
Wind Missile ATK on enemy unit (Strong vs Thunder) & greatly raises own Strong vs Thunder for three turns [Range: 5, Height Range: 3]
Kamui and Malta [ ]
Unlock Requirement: Complete chapter 5 episode 4
Fire Strike ATK on enemy unit (Strong vs Wind) & casts Jewel Auto Charge on self & bestows powerfully Strong vs Amorphous for three turns before activation [Range: 6, Height Range: 2]
THE ALCHEMIST CODE
Используйте приложение APKPure
Получите последнее обновление THE ALCHEMIST CODE на Android
Описание для THE ALCHEMIST CODE
FULL-FLEDGED STRATEGY RPG
* Classic turn-based battle system with grid-based movement
* Command strategic units on 3D terrains, consider the difference in elevation and orientation to turn the tides of battles
DEEP CHARACTER CUSTOMIZATION
* Summon, collect and evolve more than 50 beautifully designed characters
* Master a wide selection of Jobs Classes, unlock new abilities and outfits
RICH EXPANSIVE CONTENT
* Go on invigorating adventures and traverse through unique landscapes
* Take up exciting Missions and Challenges daily and get fantastic rewards
* Discover intriguing character personalities, gripping backstories and quests
The Forbidden Art of Alchemy brought about destruction and a world divided by differing ideals.
It was sealed away into the darkness by the Seven Kingdoms of Babel.
However, its seal has shown signs of weakening, signalling an eminent foreshadowing of what’s to come..
Bestowed with the power of Alchemy, who will prevail, and bring about a change in the world? Where will your will take you and how will the world judge you?
NOTICE: THE ALCHEMIST CODE is completely free to play. However, some in-game items can also be bought with real money.
SOCIAL NETWORK
Facebook: facebook.com/thealchemistcode
Instagram: instagram.com/alchemist_code
Twitter: twitter/alchemist_code
TERMS OF SERVICE & PRIVACY POLICY
http://gumi.sg/terms/
** THE ALCHEMIST CODE recommended a device with Android 6 and above.
** A device with a minimum of 4GB RAM is recommended. Performance is not guaranteed on devices with less than 4GB RAM.
** 1.8 GB free space in phone internal memory is recommended to install the game with all of the downloadable contents.
** The game will require you to grant permission to access photos, media, and other files on your device. Enabling this permission will allow game data to be written to your SD card.
The Alchemist Code Wiki
Using the Tier List
The Alchemist Code Tier List and Build Guide can be a useful tool for assessing which units are a worthwhile investment of your time, money and resources. However it can be a little overwhelming to understand, especially when you’re a new player.
Contents
Ratings [ ]
The Image Tier List and Tier Breakdown tabs are your rough guide to how useful a unit generally is at maximum performance within the context of other units of their element. It’s important to pay attention to this note as in some cases to achieve maximum performance for a unit you will not only need quite a large amount of shards to limit break and enlighten the unit, you may require job upgrades from time sensitive events, or limited memento or gear. In a few cases, the performance of the unit is also dependent on having the right units to include in a team to be as relevant (this is mainly for support units such as Letitia).
Understanding a Unit’s Rating [ ]
Ratings of a unit are reflective of their PvE performance and tend to factor in the type of content that is primarily available in the game at current. This means that in some cases, a unit may be rated poorly not because they don’t have useful skills, but because there is very little content where those skills will be currently relevant. Ratings do not take into account PvP performance.
A unit is rated based on their primary role and how effective they are in it relative to other units of the same element perform at that role. If you are curious about how a unit is generally played and the unit review in the build guide does not give you enough information, you can ask in Discord in #ac_questions how best to play that unit. If you are curious why they were rated at their current level and what about them earns them that spot, you can ask in Discord in #tier-list-questions for more specifics, or to give feedback if you think the rating might need adjustment.
Because unit ratings are ranked in relation to each other and it is time consuming to re-evaluate units, sometimes older units may have inflated rankings because they have not yet been fully re-evaluated in the context of newer units. Keep this in mind when investing in older limited units (especially ones from collaborations that do not re-run regularly) since your resources for upgrading them may be limited. You can check the unit page on this site to see when units were released and whether they are limited.
Future Considerations [ ]
These ratings also do not take into account any buffs or changes that we expect for units in the future, so in some cases although a unit may be rated low currently, that could change significantly down the road when an expected job upgrade or enlightenment or memento is released. In the case of units that are available in Japan, you may be able to get some idea about what they have to look forward to in the future from the unit guides section, which lists future job upgrades, master abilities and enlightenments. You can also check the Japan News Summary for any information about future unit buffs. Keep in mind that global does get upgrades in a somewhat different order than Japan, and we don’t always get the same upgrades, so the unit may not perform the same in the future in global as they do in Japan.
Accessibility/Cost [ ]
The ratings also don’t take into account the cost of getting all the resources required to max out the unit. Since most players do not have limitless resources, you should take that into account. Some units are limited and of those, some have more cost effective banners than others. Ease of getting shards to enlighten a unit is also worth considering, some are farmable 3/day, some can only be farmed 1/day and require you own the unit. Collaboration units (except ones which are «cosplay» versions of normal game units) also have the option of using Otherworlder Enlightenment Shard which other limited units do not. The Source column will list if the unit has a farm stage, or if it is a free unit, where they are obtained.
Guidance for Newer Players [ ]
If you are new, make sure you are not just paying attention to the top rating of a unit, but also to how accessible they are and how easily you can get the limit breaks or other resources (such as important job+) you need to make the unit viable. Some units will perform well at lower limit breaks or are easy to get unit shards for. Others may require a large amount of investment or time farming to get to a good performance level. Pay particular attention to the accessibility of unit shards for any unit before investing elemental shards- it is generally recommended to ask the advice of veteran players in Discord before using any elemental shards on your units.
In some cases the unit might also have Important notations. This indicates that there is something the unit needs that is a big factor in how strong their performance will be, and without it, their rating might be significantly lower. Usually the notations will refer to either a specific limit break, J+ (the job+ upgrade for that unit, see Job Upgrades for more information), Memento (usually refers to a memento specifically designed for that unit), Master Ability (MA, which can usually be obtained at level 80) or VCR (vision clear reward) which is a gear obtained from a memento, usually the one designed for that unit.
Image Tier List [ ]
This tab lists all the units by their top rating in image format, organized by element. Keep in mind that since these ratings are based on their rating at top level, they may not be reflective of their performance at lower levels. For more detail about a unit, you should also check the Tier Breakdown tab. The order of units within a tier is not significant, only the tier ranking itself.
There is a dividing line in each section of the image tier list- units to the right of the line are ones that excel in support roles. They may also be viable in other roles, but the support role is the use that earned them their rank in the tier.
Tier Breakdown (Gates, Overviews) [ ]
The tier data tab is helpful for learning more about a unit, such as optimal builds, accessibility and future upgrades.
For each unit the following information is available:
Job Setup Guide [ ]
For each unit there may be one or multiple builds listed for the unit in the Job Setup Guide tab.
Enlightened Bond Groups [ ]
This tab lists the Enlightened Bond groups which are currently available in the Japanese version of the game. Any groups which are released in global will be bolded. To get the benefit associated with a group, you must have unlocked all 7 enlightenment gates on at least one unit in the group, then it requires additional unit shards of each unit to reach each level benefit.
Updates To Do [ ]
This section lists units that have had recent upgrades but have not yet been fully updated on the tier list and build guide to reflect those upgrades. You can check here to see if a unit is pending a review due to recent changes. If a unit looks out of date but is not listed here, or the listing is incorrect, you can notify the tier list management on Discord in the #tier-list-questions channel.
The Alchemist Code Wiki
Equipment
Equipment are a vital part of any unit’s growth. In fact, they tend to account for about half of a unit’s attributes, as well as covering various resistances.
Every job defines what equipment it uses, consisting of 6 pieces per job level. In order for a job to level up, it must equip all 6 pieces, at which point the equipment is absorbed and a new job level is available.
Note: Equipment is not the same thing as gear. Equipment is permanently applied (and is permanently used up), whereas gear can be moved between units to add additional stats (and is not permanently bound to a unit).
Contents
Equipment Types [ ]
There are 2 primary types of equipment, standard equipment items and equipment that requires diagrams. Standard equipment items are either dropped as single items or as fragments of a single item, that when merged together form the entire equipment. Equipment that requires diagrams are assembled from the diagram (which can also be dropped as single items or as fragments which must be merged together) and also a set of other equipment items to complete the recipe. The number of fragments required to assemble an item is proportional to the rarity level of the equipment (i.e. no border, bronze, silver or gold border).
Job Specific Equipment [ ]
Most equipment items used by units are generic and are used by many different jobs. However is some equipment which is specific only to a single job. Every standard job has a special job-specific item (which is a diagram based equipment) which is only used by that job for the first slot for job levels 9-11. Enchanted jobs use that same job-specific diagram in addition to a special one for the enchanted job. Some special units with unique jobs (usually free collaboration units) may also have other special job-specific items which are used for lower job levels (these are typically not diagram based).
Time Sensitive Equipment [ ]
Job+ upgrades use specialized equipment only acquired via the job+ event for all 6 slots of job level 11 of the job. These items (as well as the corresponding job tokens) can only be acquired when the event is available so it is important to get these when they are available, even if you aren’t ready to use them yet. These items can’t be replaced with omnicrystal equipment.
Limited collaboration units (and free collaboration units) often use special job-specific equipment which is only available during their events for their unique jobs. It’s important to get this before the event ends, otherwise you will be reliant on omnicrystal equipment to replace it.
Acquiring Equipment [ ]
Story Quests [ ]
Most equipment can be obtained via farming story quests. When you need a specific piece of equipment for a unit, it should give you a list of quests to obtain that equipment item. Some quests are better for specific equipment drops than others. Generally quests that drop less other items are preferred for farming a specific piece of a equipment. You can check the Best Places to Farm for a list of story quests that may be the best options for common non-job specific equipment pieces. You can also search the Alchemist Code Database: Items section to find where specific equipment pieces drop.
Limited Time Events [ ]
In addition to story quests, there are often good spots to farm specific equipment in limited time quests. Often higher level quests drop a useful selection of the higher level equipment items and may be an efficient place to farm them. If you have units which are specific to a collaboration, their job specific items are typically only available to farm within their limited time events. There is often quite a lot of job equipment given as rewards for Box Event summons as well.
Shops [ ]
The main shops are often a good place to buy diagrams of job specific equipment or also shards of general equipment for zeni. They refresh 5 times a day and it’s a good idea to pre-buy diagrams for units you may one day wish to raise. They also sell some equipment for gems but this is less cost efficient to purchase and rarely a good idea. Sometimes the secret shop also has temporary good deals on equipment for zeni, and the Adventurer’s Shop has a regular stock of lower level equipment items for zeni, such as great lances and star staves. Typically it is not cost efficient to buy equipment for gems in the secret shops, but occasionally there are cost efficient bundles, and for newer players who obtain limited units, it may sometimes be easier to purchase their job specific equipment for gems rather than trying to farm quests beyond their skill level. In addition you can buy equipment from some coin exchanges, such as the Multi Coin Exchange, Arena Coin Exchange and Veda Coin Exchange.
Omnicrystal Equipment [ ]
In addition to standard equipment, there are 2 special kinds of wildcard equipment available:
The Alchemist Code Wiki
Units are the characters you can collect and utilize when playing the game.
Contents
Obtaining Units [ ]
Units can be obtained via a variety of sources:
Rarity [ ]
An empty rarity star.
Each unit has a rarity, represent by the gold stars under its icon, or next to its name when viewing the unit’s details. Gold stars are the unit’s current rarity, while empty grey stars represent the unit’s ability to increase its rarity via evolving. Rarity has an effect on things like the units stats, max level, max job level, and maximum limit break. Different units have different starting rarity as well as different maximum rarity.
| Rarity | Max Job Level | Max Limit Break |
|---|---|---|
 | 1 |  |
  | 3 |   |
   | 6 |    |
    | 9 |     |
     | 11 |      |
Evolving [ ]
Evolving is a process by which a unit’s rarity can be increased. In order to evolve a unit must have an empty rarity star and must be max level for their current rarity (excluding levels added by limit breaks). Evolving also requires Zeni and special materials depending on the unit and its current rarity. See the individual unit’s page for the materials required for each stage of its evolution, or you can click on the evolve button for the unit to see what is required.
Each unit starts with a single job and can unlock one or more additional jobs by Limit Breaking a certain number of times. Switching a unit’s active job changes the its stats and available abilities. Certain job abilities stay available to the unit once learned regardless of job, however, making it beneficial to level up all of the units jobs in order to increase the units usefulness and help distinguish it from other units with the same job. Jobs have levels which determine which abilities the job can learn and which gear the job can equip. A job’s level is increased by equipping all 6 pieces of equipment, however the unit’s rarity limits the maximum job level. Upon reaching job level 11 and equipping the last set of equipment a job will become mastered.
Job Master [ ]
When you raise your units to job level 11, then fill all the equipment slots at that level, the job is considered mastered. When you master a job you get a % bonus to a few specific stats (the stats that it benefits vary by job). Typically there is also a significant % boost to HP (hit points). The job mastery bonus not only applies to the currently active job, but to all jobs on the unit, regardless of which one is currently active. So to fully maximize a unit you may want to master all of their jobs.
Because the amount of equipment required to fully master a job is significant, you may want to consider how heavily you are using the unit before investing in the secondary job masteries. The HP gain is usually enough reason to do it for any actively used unit in the long term, but in the short term the primary job is a higher priority.
If you wish to know the mastery bonus you receive for a specific job you should look the unit up in Alchemist Code Database: Units. The job mastery bonus is listed under the job information section, under Job Master Bonus.
Ability Setup [ ]
When you have unlocked more than one job on a unit, you can use the job setup menu to configure the the job to use a mixture of abilities from that job and the other unlocked jobs. The main ability associated with a job is always locked to the active job, but you can utilize the basic ability from another unlocked job. You also get slots to select one counter ability and 2 passive abilities from any of those provided by the unlocked jobs on the unit. For most jobs raising them to job level 6 is sufficient to unlock all abilities, but there are some that require a higher job level for some abilities.
Ability Leveling [ ]
You can level each skill on a unit up to 20- the cost increases the higher the skill level. In most cases you will want to max the skill at 20 for any skill you are using on the unit. However there are some cases where it may be advantageous to leave a skill unleveled or unmaxed. Once trained a skill can’t be untrained (although if you do a job upgrade you will need to re-level your skills for that job). For more specific details about how to judge which abilities to level, see Ability Leveling.
Limit break [ ]
An empty limit break star.
A filled limit break star.
Limit break increases the maximum level of a unit and unlocks the unit’s additional jobs. In order to limit break a unit the player must have a certain number of Soul Shards specific to that unit. Different units can limit break a different number of times. How many times a Unit is able to limit break is indicated by the star shaped icons on the unit’s limit break button, with each star representing 5 limit breaks and the points of the star being individual limit breaks. For more information on how to acquire shards for limit breaks, see the Unit Shards page.
| Limit break star | Limit breaks | Soul Shards required per limit break | Job unlocked after completing the star | Gear slot unlocked |
|---|---|---|---|---|
     | 1-5 | 5 | Second Job | |
     | 6-10 | 10 | Second slot | |
     | 11-15 | 15 | Third Job 1 | |
     | 16-20 | 20 | ||
     | 21-25 | 25 | Third slot |
1 Not all units have 3rd jobs, even if they are able to limit break to these levels.
Job+/Enchanted Job [ ]
Note that some units also have a job+ or enchanted job upgrade available. Typically the job upgrade requires that you have 15 limit breaks and have reached job 11 on the job that the job upgrade replaces (i.e. sniper for Caris, bard for Polin). For more details, and to see a list of available upgrades, see Job Upgrades.
Leader Skill [ ]
A leader skill increases the stats of the entire team, typically based on certain restrictions (for Dark Units, for units from Envylia, etc. ) though some are more generalized. A full listing of leader skills can be found on the Unit Leader Skills page.
Master Ability [ ]
A master ability is an ultimate skill or stat improvement that some units can learn. Protagonists usually earn their master ability through a story quest. Other units typically learn their master ability through a level 80 character quest. More recent, limited units can obtain them through a trial (Babel War Arts) upon reaching level 85. (It is highly recommended that you level these units jobs and skills fully before attempting these limited unit trials).
Enlightenment [ ]
This unit upgrade feature allows for increasing the level cap on a unit from 85 to 97 (depending on the level of enlightenment you have invested in the unit) and can upgrade the stats, a passive the unit possesses, their leader bonus, strength vs. certain sins (Greed, Envy, Lust, Gluttony, Wrath, Sloth and Pride), abilities for their jobs and add a sub-memento slot. Individual units will get access to various levels of enlightenment gradually. For more details, see Enlightenment.
Truth Seals [ ]
Units have access to 6 truth seal slots they can use to enhance their stats further. For more details, see Truth Seals.
Many units have alternative skins available through a variety of means. Some are permanently available, some temporary. Some are acquired via milestones or mission rewards, and some only through summons, gems or bundles. Some memento also provide skins. For more details on available skins, see the Alchemist Code Unit Skin Guide (GoogleDoc).
You can select a skin on the unit page if you have one available.
The Alchemist Code Wiki
Reroll Guide
While The Alchemist Code is actually incredibly F2P friendly and thus it is not necessary to reroll, starting with a strong limited unit early on can be a huge help. If you don’t start with a good set of units, it is suggested to reroll, but if you would prefer to just play instead of spending a few hours or even a day or two trying to get the perfect units, then you are not doomed unlike in many other gacha games, in large part because many S-SS tier units are free or can be farmed.
Contents
Banner Summon Advice [ ]
A new account typically has access to a total of 3500 gems after initial gems and the rewards for summoning (you get 750 gems back after your first 500 gem summon, plus another 500 gems from the daily new player summon milestone and 750 gems for leveling a unit to 50). You should not start over your account until after you have done all the high priority discount summons you can afford. Which banners you should summon on will be contextual to the events of the week.
Most good limited units are now on banners that cost 2500 gems to summon, so new players will only be able to afford to do those without farming additional gems if a summon discount ticket is available to reduce the price to 500 gems (there should be one in your expiring gifts mailbox, they are sent weekly). If you have enough gems to do a 2nd step at the 2500 price on the banner after doing the first one and not getting a target unit (which should be possible if you collect the rewards listed above) it is a good idea to do that 2nd step before starting over.
Note: Due to how variable the banner recommendations are from week to week, it is highly recommended to ask for help on Discord in #ac_questions to determine what the reroll priority is for the week.
How to Reroll [ ]
Android or Android emulator (such as Nox or Bluestacks): Close the app and go to Android > data > SG.gumi.alchemistww > files and delete «gu3c.dat«. (If you have root enabled in Nox, you may first need to navigate to sdcard to find the Android directory). You may need a file manager that will show you hidden files. One that has been reported to work is CX File Explorer.
iOS: Reinstall the app (note that if you have jailbroken your device you may also be able to find the gu3c.dat file and remove it)
Reroll Unit Targets [ ]
During Collaboration [ ]
Generally speaking, if you are starting the game during a collaboration, you should try to get the best unit from it, as they are not available outside of the event and are usually (but not always) an SS tier unit. This was especially true for units like Levi or Merlinus, who were dominant in their elements; there are typically 1 or 2 of these units for every collab, and if you are a particular perfectionist, you may want to roll for both if there’s more than one.
Disclaimer: if you are rerolling on a collab, you NEED to obtain 3 copies of a unit’s equipment and it would be greatly preferred to transmute (craft) the gear needed to use their Weapon Ability (essentially an ultimate attack). Even if you have to gem for continues on these quests, it is worth it. If you don’t at least obtain the equipment, your unit will be useless as you will not be able to max their unique job and their maximum potential could also take a hit without their special weapon/gear (if available for the unit). It is possible to get wildcard (Omnicrystal) equipment to replace it, but it is not plentiful so it could take a long time to put the unit into service.
Outside a Collaboration [ ]
If a collab is not happening, but there are other good quality limited units available on a banner, you should typically reroll on that. Some examples are:
When no strong limited units are featured on a banner (this is extremely unlikely), you’d want to reroll for the best units you can get in the normal pool. Note that most normal pool units are farmable, but will take a while to farm to a good level. Ideally you want to look for units which are relatively useful with their first job (or are farmable and useful with their second job) and have a good long term rating. You will get many free units in your first week as well as a unit selector with shards to bring one unit to 15 limit breaks, so you don’t need to worry too much if you don’t get anything you can use right away and don’t want to spend a lot of time rerolling.
You can consult the tier list to get an idea of the current rankings of units (see Using the Tier List for more advice on how to understand it). But keep in mind the rankings are based on units at max power, and many units require a lot of investment or time to reach max power. The recommended reroll targets are usually ones that don’t require a ton of investment to play well on a new account. Also keep an eye on the Viable and Important information for units, as this will let you know if a unit requires something (such as a limited time job upgrade) you may not have to maximize their power.
If you want more help figuring out which units to target based on the current game events, ask for help on Discord in #ac_questions. Typically the recommended reroll target will be pinned in the #gacha-sak_salts_rerolls channel.
The Alchemist Code Wiki
About the Game
The Alchemist Code is a free-to-play mobile strategy role-playing game developed by Fuji&gumi Games and gg2 and published by gumi Inc., for iOS and Android devices. It was released in Japan under the name For Whom the Alchemist Exists (誰ガ為のアルケミスト, ta ga tame no arukemisuto) in January 2016. The global version officially launched on November 14, 2017.
It is designed as a turn-based tactical role-playing game, using features similar to titles such as Final Fantasy Tactics and Tactics Ogre. The Alchemist Code features a job/class system where each character has three set jobs. These jobs can be built up independently from one another, and some of the abilities from one job can be used on the character even when running a separate job as their main job. This presents the player with several build options for each of their characters. Each character also has an element associated with them, creating a sort of paper-rock-scissors mechanic between the different units.
As part of the game’s gacha system, players can summon characters from the game’s story or other fan titles, such as Fate/stay Night, Disgaea, Final Fantasy XV, and Full Metal Alchemist, to name a few. Players can then build a team of four main members around these units, with the ability to bring in one of your friend’s units as a mercenary, and two sub-in units for when one of your other five units die.
The game features multiple game modes. Story mode takes you through various chapters, each with a different main character along the same timeline. Story mode also has a hard mode that allows you to obtain «character shards» that are used to increase the strength of your units. Event mode allows you to meet additional characters along various timelines and regions. These event missions tend to have three different difficulties: normal, hard (EX), and very hard (EX+). There is also a co-op multiplayer option for these event missions. Character mode allows you to play three levels that immerses you in characters within your roster. Veda Tower is a timed but reoccurring event that allows you to climb various levels of increasing difficulty. Finally, there are two PvP modes: an automated mode controlled by the AI, and a live PvP mode.
The Alchemist Code uses an anime style of art. The character portraits and models, as well as the level design and cinematics adhere to this art style. Gameplay is presented in a 3D isometric view. Although the text in the global version is in English/French/German/Spanish (depending on your settings), all of the voices are in Japanese.
The development team includes senior producer Taku Aizawa, who also worked on Brave Exvius. Yoko Shimomura, Shinya Tanaka, and Shigeki Hayashi composed the soundtrack, while Shoji Kawamori worked on the opening animation video. That video can be viewed on the right.
The Alchemist Code Wiki
Events
Event quests are a mixture of quests which are available on a regular schedule and special limited time quests. Any event quests intended to be temporary will display the length of time they are guaranteed to be available. For information about which events may currently be available or are announced to be coming soon, see Current/Upcoming Events and Summons. You must be level 10 to access most events, some have a higher level limit.
Contents
Limited Time Events [ ]
Limited time quests are typically available for 2 weeks at a time and usually begin on a Thursday.
Some limited time events return periodically (such as The Way to True Skill and Gold Rush Pro), while others may never return, or only on rare occasions. Some are tied to holidays. Many limited time events will give access to free characters, special gear for characters or job upgrades for specific characters. Typically limited event quests have milestone rewards you can obtain in addition to the mission bonuses and drops for completing them.
Because most of these events are not available regularly, it’s a good idea to complete as much as you’re capable of before the event expires.
Some of these events will be listed under the main event section, but a few will appear under Day/Training.
Hard/EX Events [ ]
Any event labeled hard or EX is usually meant to be very challenging and will be difficult to complete without characters at level 60 or higher who have their jobs mastered. Even at that level they may still be difficult to complete without some practice, strategy and an optimized group with specific character abilities.
These quests also often have high value rewards from missions or milestones such as character upgrade shards or high level gear. Most of these event quests will also have a multiplayer version available at half the normal AP cost to host.
Archive of Historical Events [ ]
You can see a list of all the limited time events here, including the last date that they were available.
Mystic World Mobius [ ]
The Mystic World Mobius is a special event that is typically available in some occasion. This is displayed under the Trials section under Babel Tower.
Collaborations [ ]
Collaborations are special events done in partnership with content from another game or other source. These generally include units that can only be summoned during the event as well as special event quests which are often required to access equipment or gear for those units. You can view a list of collaborations that have been available previously.
Event Archives [ ]
The Event Archives allow you to unlock and replay one event for 24 hours. You can access it once for free daily, and you can also use an Archive Access to unlock an additional event. The event archives will appear as an option in the event menu. You must be level 60 to access the Event Archives.
Periodically events in the event archive will rerun outside of the archive. When this happens they are temporarily moved to the regular current events section (usually under Rerun Events) and then returned to the event archive when the rerun concludes. During this period if there are challenge boards associated with the event they may rerun- these challenge boards are not accessible when the event is in the archive.
Regular Events [ ]
Regularly available quests will usually be listed as only available for the current day, but will return again the next day they are regularly available (some are only available certain days of the week, others are available every day).
Road to the Top [ ]
This quest gives 1.5 million unit experience to all units that clear it. You can clear this once a day. Only units level 95+ can do this quest. This quest is in the Events: Daily Quests section.
Unit Evolution Quests [ ]
These quests are available every day and there are no limits on the amount of times you can run them. They give you materials to evolve your characters to a higher star level which allows you to increase their maximum level. You can see which quests provide the evolution materials you need when you click on the material in the evolve window for your unit. Note that the rainbow evolution materials are rare and have a low drop rate. These quests are available in the Events: Daily Quests section.
There are 3 types of evolution material quests, and each one has 3 levels of difficulty:
These quests are also available in multiplayer mode for half the normal AP cost to host (and increased drop rates for the rare materials).
Note that some special event characters (such as Kagura) require unit evolution materials which are only available from a specific event and you will not be able to access them via the regular quests.
Job Token Quests [ ]
These quests are available every day and there are no limits on the amount of times you can run them. They give you job tokens which can be used to unlock the 2nd and 3rd jobs on most characters once you have limit broken them enough to gain access to the job. You can see which quests provide the job token materials you need when you click on the token in the job window for your unit. These quests are available in the Events: Daily Quests section.
There are 4 types of job token quests:
These quests are also available in multiplayer mode for half the normal AP cost to host.
Note that some special event character jobs (such as Kagura’s flame orb princess) and job+ require special job tokens which are only available during the event and you will not be able to access them via these quests.
Job Enhancement Quests [ ]
These quests are available every day and there are no limits on the amount of times you can run them. They give you access to the materials needed to apply enchanted jobs to your units. These quests are available in the Events: Daily Quests section.
Apple Garden [ ]
This set of quests gives you apples to use to level your characters and also is a decent source of experience (4500 per unit at advanced level, 3000 per unit at int level). You can also get items from these quests to upgrade memento level. There is a limit of 3 times a day to run each of these. This event is available daily. These quests are available in the Events: Daily Quests: Daily Quests.
If you have a garden key you can unlock a special version of this quest for a single run that costs no AP. It will not cost any AP and drops a larger amount of items than the Pro version.
Note that the metal ratty units in these quests are highly resistant to everything, so if you want to kill them faster you will want to use abilities that ignore defense.
Gold Rush [ ]
This set of quests is the best source of money and you should run all levels each day as they cost 0 AP. There is a limit of 1 time a day to run each of these. This event is available daily. These quests are available in the Events: Daily Quests: Daily Quests section.
If you have a gold key you can unlock the highest level version of the quest to run a single time. It will not cost any AP and drops a larger amount of items than the Pro version.
Mineral Garden [ ]
This set of quests provides minerals you can use to upgrade gear. You should run these to get items to upgrade any gear you are using (alternatively you can buy these items in the shops if you are short on AP). There is a limit of 3 times a day to run each of these. This event is available daily. These quests are available in the Events: Daily Quests: Daily Quests section.
If you have a mine key you can unlock the highest level version of the quest to run a single time. It will not cost any AP and drops a larger amount of items than the Pro version.
Alchemia Pot (Reclaiming The) [ ]
This set of quests provides materials you can use to enhance equipment. You should only ever enhance job 11 equipment. You can alternatively buy these items in shops. There is a limit of 3 times a day to run each of these. This event is available daily. These quests are available in the Events: Daily Quests: Daily Quests section.
Note that only characters with magic damage or penetrating abilities can be effective in these quests.
Gear Projection [ ]
There are 2 versions of this event. The hard version drops a small number of shards for 4 star gacha gear. The normal version drops a summon ticket for a small number of gear upgrade shards (primarily 2 star gear)- the ticket comes from the chest so be sure to get it. There is a limit of 3 times a day to run each of these. This event is available daily. These quests are available in the Events: Daily Quests: Daily Quests section.
Redemption Quests [ ]
These quests provide the idols needed to enlighten units. They are permanently available for multiplayer and are available certain days of the week in single player mode under the Events: Daily Quests section.
Seal Quests [ ]
These quests are permanently available if you are above player level 150. They are for farming Truth Seals and ore for awakening them. Each quest corresponds to the truth seal type and set type you wish to acquire. Normal difficulty drops 3★ seals and ore, Hard drops 3-4★ seals and ore, and EX drops 3-5★ seals and 4-5★ ore.
Vision Clear Quest [ ]
Vision Clear Quest is designed to give bonus Alchemic Boundary for specific mementos (typically 1%) and can be run 3/day. In addition it drops memento enhancement items and has a small chance of dropping Reminiscences of a Robot, which gives 5% Alchemic Boundary to a selected memento. This quest is usually available every week but the featured mementos change weekly. There is also a special version called Vision Clear Quest Pro which is occasionally available (usually on weekends) and gives 10% alchemic boundary to all mementos 1/day.
Permanent Events [ ]
Permanent events are always available and have no timer indicating an expiration date.
Training Hall [ ]
This series of quests is meant to be used to learn the basics of the game. You will want to do all these quests to obtain the rewards and to farm the Moon Star Armor (you can make 3 copies of this item), which is one of the best armor in the game. This event has been moved to the home screen as a separate button labeled «Training Hall».
Sacred Stone Memories [ ]
This is a series of story quests that periodically has new chapters added to the story. Each chapter is progressively more difficult and introduces new limited units which are only available occasionally for summoning. Some free units are also available from these quests such as Kanon and Kagura. There are also several farmable gear items available in these quests. There are a large number of milestones for these quests which give useful rewards, including gems. These quests are available under Story: Sacred Stone.
Babel Chronicles [ ]
This is a series of story quests that periodically has new chapters added to the story. Most of these quests provide specific units for you to play, although the EX versions you will use your own units for. These quests provide materials for enlightenment as well as other rewards. These quests are available under Story: Babel Chronicles.
Mystic Tower Veda [ ]
The Mystic Tower Veda is a special event that is available permanently under Trials > Babel Tower. The one-time rewards are quite nice, and you can clear the tower again every time it resets for coins which you can use to buy items in the Veda Coin Exchange. You get one free reset a month, additional resets cost gems.
Protagonist Job Change Quests [ ]
These series of quests provide the job tokens necessary to unlock protagonist job+ upgrades and the specialized equipment pieces required for the job and for protagonists with 3rd jobs there are associated quests here as well. These quests are available in the Events: Current Events section under Protagonists’ Job Change Quests.
Call of the Scarlet Flame [ ]
This series of quests provides gear shards for the Dazzling Blade, which is usable by many units and has a special ability only for Chloe. These quests are available in the Events: Current Events section.
Reclaiming the Scarlet [ ]
This series of quests provides the job tokens necessary to unlock Chloe’s job Scarlet Flame Battle Princess, specialized equipment pieces required the job and Fluffy Plushie Shard in order to craft Fluffy Plushie. These quests are available in the Events: Current Events section.
Chamber of Tribulations Archives [ ]
This is a series of quests that can only be completed by units of specific elements. Completing them rewards elemental shards. These quests are available in the Events: Current Events section.
Key Quests [ ]
Key quests require special keys to access. These quests are available in the Events: Key Quests section. For a description of the available key quests, see Key Quests.
The Alchemist Code Wiki
Babel Expedition
Babel Expedition is a feature where you send teams of 4 units from the area you are exploring for a period of time to acquire items. The items you bring back are registered in the codex for the area. When you complete the codex for an area, you get a small permanent buff to all units (not just those from that origin).
Contents
Accessing the Expedition [ ]
To access Babel Expedition, click the Expedition button in the bottom left of the home screen. You must be player level 150 to access this feature.
Starting an Expedition [ ]
To create a team to explore, you can select 4 units from the area you are exploring and send them to explore for a period of time to collect items. The exploration time is 6 hours for level 1 and 8 hours for level 2. The total combat power of the units sent must be 18,000 or higher for level 1, 20,000 or higher for level 2 (currently due to a bug, Saga and Wadatsumi level 1 also take 8 hours). You must also have available the resources required for the expedition, which varies by each expedition. Sending units on an expedition does not prevent you from using the units for other content.
Optimizing Combat Power [ ]
To get your combat power high enough to complete expeditions, you may need to optimize your stats to get high enough. The formula for combat power is:
HP / 10 + AGI * 5 + All Other Stats (PATK, PDEF, MATK, MDEF, DEX, CRIT, LUCK)
Only stats that display on the unit screen will count towards this, bonuses that are only available in combat will not. Swapping in gear, memento and runes that will raise those particular stats as high as possible (even if they are not useful stats for the unit) will make it easier to get the number up. In some cases you may wish to use a different job on the unit that has a higher combat power potential. You can use the ACDB Unit Planner to experiment with different configurations to see what combat power you can get up to.
Additional Teams [ ]
Players start with 1 expedition team slot. Every completed expedition gives 1 point. When you reach 250 points, you will gain an additional team slot. You can’t get more than 2 teams. You can’t send both teams to the same area at once, but you can send them to different areas.
Codex [ ]
There is an item codex for each area which has slots for the items you collect on expedition. When you complete the codex for an area you will receive the associated buff. It applies to all units and is permanent. It will also unlock the next level of expedition if available.
Codex Rare Drops [ ]
In each area, there are 2 slots in the bottom right of the codex which are rare drops (in most cases, a few areas only have 1). These items can only be obtained when exploring with a specific pair of units. The pairs associated with the rare drops are listed below. Each rare drop slot is associated with a single pair of units. You do not need to run both pairs at the same time, and in most cases you will find it easier to meet the combat power requirements if you do each pair separately until you get their shard.
Area Summary [ ]
Below is a list of all areas, the costs to expedition, the buff acquired when completing the codex for the area, and the pairs of units which can acquire the codex rare drops. Level 2 Gluttony Foss and Northern Pride, and all levels of Lost Blue are not yet implemented in game.
| Area | Level | Compass | Globe | Pass | Buff | Codex Rare Item Pairs | Released? |
|---|---|---|---|---|---|---|---|
| Envylia | 1 | 6 | 6 | 8 | PDEF +1% MDEF +1% | 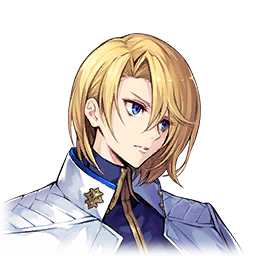 Gino and Gino and  Fraise Fraise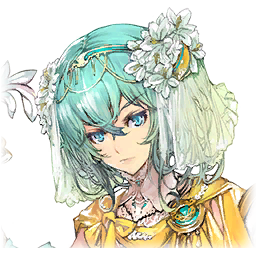 Lucretia and Lucretia and  Leoniaz Leoniaz | Yes |
| Envylia | 2 | 7 | 7 | 9 | PDEF +3% MDEF +3% |  Margaret and Margaret and  Elizabeth Elizabeth Gerald and Gerald and  Natalie Natalie | Yes |
| Slothstein | 1 | 2 | 6 | 12 | DEX +1% |  Aisha and Aisha and  Chat Noir Chat Noir Hazel and Hazel and  Carol Carol | Yes |
| Slothstein | 2 | 3 | 7 | 13 | DEX +3% |  Cheryl and Cheryl and  Courage Courage Daisy and Daisy and  Reagan Reagan | Yes |
| Lustburg | 1 | 16 | 2 | 2 | MATK +1% LUCK +1% |  Mielikki and Mielikki and  Celliers Celliers Fung Liu and Fung Liu and  Polin Polin | Yes |
| Lustburg | 2 | 17 | 3 | 3 | MATK +3% LUCK +3% |  Eve and Eve and  Moa Moa Cordelia and Cordelia and  Alyu Alyu | Yes |
| Wratharis | 1 | 6 | 8 | 6 | PATK +1% CRIT +1% |  Kevin and Kevin and  Mirianne Mirianne Anastasia and Anastasia and 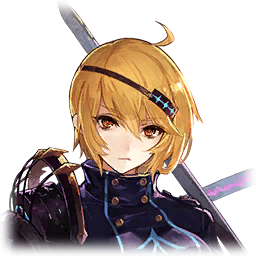 Glanz Glanz | Yes |
| Wratharis | 2 | 7 | 9 | 7 | PATK +3% CRIT +3% |  Klima and Klima and  Annerose Annerose Ila and Ila and  Mia Mia | Yes |
| Northern Pride | 1 | 6 | 4 | 10 | Slash ATK Power +5 | 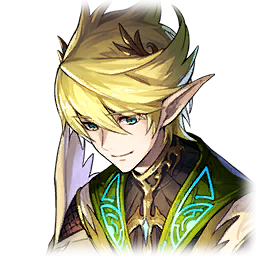 Nasario and Nasario and  Ines Ines | Yes |
| Northern Pride | 2 | 7 | 5 | 11 | Slash ATK Power +7 | No pair required. | No |
| Desert Zone | 1 | 6 | 12 | 2 | Max Jewels +5% |  Ryle and Ryle and  Ankh Ankh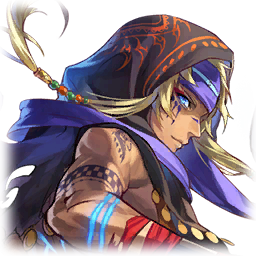 Lucian and Lucian and  Retzius Retzius | Yes |
| Desert Zone | 2 | 7 | 13 | 3 | Max Jewels +7% |  Carla and Carla and 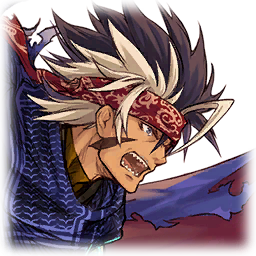 Balt Balt Ramses and Ramses and  Scheherazade Scheherazade | Yes |
| Saga Region | 1 | 4 | 8 | 8 | HP +5% |  Aruba and Aruba and  Chiruru Chiruru Tomas and Tomas and 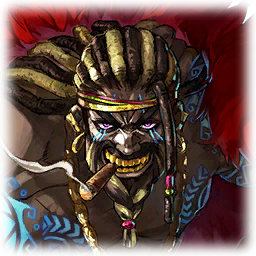 Gormalas Gormalas | Yes |
| Saga Region | 2 | 5 | 9 | 9 | HP +7% |  Aruba and Aruba and  Olga Olga Seida and Seida and  Almira Almira | Yes |
| Gluttony Foss | 1 | 2 | 10 | 8 | Missile ATK Power +5 Strike ATK Power +5 |  Teona and Teona and  Lotiyah Lotiyah | Yes |
| Gluttony Foss | 2 | 3 | 11 | 9 | Missile ATK Power +7 Strike ATK Power +7 |  Teona and Teona and  Neica Neica | No |
| Greed Dike | 1 | 4 | 4 | 12 | Pierce ATK Power +5 JUMP ATK Power +5 |  Shenmei and Shenmei and  Liu Shen Liu Shen Chao and Chao and  Won Won | Yes |
| Greed Dike | 2 | 5 | 5 | 13 | Pierce ATK Power +7 JUMP ATK Power +7 |  Lucia and Lucia and  Mei Fang Mei Fang | Yes |
| Wadatsumi | 1 | 6 | 10 | 4 | AGI +1% |  Yunagi and Yunagi and  Kazahaya Kazahaya Suzuka and Suzuka and  Zangetsu Zangetsu | Yes |
| Wadatsumi | 2 | 7 | 11 | 5 | AGI +2% |  Mikoto and Mikoto and  Tamamo Tamamo Fujika and Fujika and  Hazuki Hazuki | Yes |
| Lost Blue | 1 | 14 | 4 | 2 | Magic ATK Power +5 |  Neun and Neun and  Sieba Sieba Vier and Vier and  Füry Füry | No |
| Lost Blue | 2 | 15 | 5 | 3 | Magic ATK Power +7 |  Zehn and Zehn and  Neun Neun Vier and Vier and  Acht Acht | No |
Completed Expeditions [ ]
Desert Zone Level 1
Desert Zone Level 2
Envylia Level 1
Envylia Level 2
Gluttony Foss Level 1
Greed Dike Level 1
Greed Dike Level 2
Lustburg Level 1
Lustburg Level 2
Northern Pride Level 1
Saga Region Level 1
Saga Region Level 2
Slothstein Level 1
Slothstein Level 2
Wadatsumi Level 1
Wadatsumi Level 2
Wratharis Level 1
Wratharis Level 2
Babel Expedition Materials [ ]
The following materials are required for expeditions:
These items are primarily obtained from completing Daily Milestone Quests which rewards 30 of each item daily.
Expedition Time Reduction [ ]
There are items that can be used for reducing the time for expeditions (it is unclear where these will be obtained). Multiple of these items can be used per expedition.
Cancelling an Expedition [ ]
If you cancel an expedition, you can start a new one, but you will not be refunded the materials cost of the expedition you cancelled.
The Alchemist Code Wiki
Mechanics
The gameplay of The Alchemist Code follows certain conventions and mechanics.
Contents
Units [ ]
These are the characters that make up a battle. Player units and enemy units all operate under the same mechanics, the only difference being that enemy units are automatically AI controlled (though running a battle on auto will make your own units AI controlled as well). However, AI scripts can differ from unit to unit.
A unit will have the following that defines it: (Keep in mind these definitions apply to enemies found on the field, as well)
These also define a unit but can be improved on a player unit:
In battle a unit will also have any of the following:
Attributes [ ]
Every attribute will fall under one of these categories: stats, elemental assistance/resistance, status assistance/resistance and bonus parameters. Every attribute on a unit has a base score, plus additional factors that may increase or decrease them.
Stats [ ]
These are the scores that can be viewed in the unit information screen. Note that different jobs use different stats to calculate their ability damage formulas, although in general Physical Attack is used by most physical damage units and Magic Attack by most magic damage units.
| Health Points: The unit will die when this reaches 0. All units start with their HP full. Some buffs can increase Max HP without increasing current HP. | |
| Jewels: The mana pool that a unit draws from when using a skill. Also referred to as MP/MPmax. For calculations, MP refers to the portion of MPmax that a unit starts a battle with (also referred to as initial jewels). | |
| Physical Attack: Used in most damage formulas. Note: some damage formulas do not use PATK, making the stat useless. | |
| Physical Defense: Determines damage reduction when receiving physical attacks. | |
| Magic Attack: Used in some damage formulas. Also used to determine healing from skills. Note: some damage formulas do not use MATK, making the stat useless. | |
| Magic Defense: Determines damage reduction when receiving magical attacks. | |
| Dexterity: Influences attack accuracy (hit rate). | |
| Agility: Determines how quickly and how often a unit can take an action (more specifically, affects how quickly a unit’s charge time fills up). | |
| Critical: Determines how often a unit will land a critical hit when attacking. Note that only basic attacks and attack which explicitly say they can crit can land a critical hit. | |
| Luck: Reduces the chance of receiving a critical hit when taking damage. | |
| Combo: Determines the chance of activating a combo attack (blue aura). | |
| Move: The number of tiles a unit can move. | |
| Jump: How high a unit can jump when moving between tiles. |
Elemental Assistance & Resistance [ ]
Every unit has a single element (which can not change). Additionally, the unit will have an elemental assistance score for each element (such as Fire Assist) and an elemental resistance score for each as well (such as Light Resist).
Elemental resistance will reduce the damage received from attacks by units with that element by 25%, and if the skill is elemental, it can also add/subtract 25% (the two effects will add together, for a total of 50% if both the unit and skill are a resisted element). Elemental assistance in effect reduces the elemental resistance of a defender. Since assist only applies to the unit’s element and a unit’s element does not change, assist attributes for any other element are in effect, useless. The elemental resistance reduction from a skill is determined instead by its own assist score (not the units).
By this, each unit has each one of these scores:
Status Assistance & Resistance [ ]
A unit may have any of the below status effects applied to it. Each effect may have a value (such as the damage of poison), as well as a turn count (which may be infinite, such as from a Bishop’s Regeneration passive).
Like the elements, a unit can have assistance and resistance scores for each status effect. Assistance determines chance of inflicting that status effect on an attack while resistance reduces the chance when receiving an attack.
For More Information [ ]
Alchemic Effects [ ]
Some units apply Alchemic Effects. These are not considered status effects and are not prevented by status protection. Each effect has a specific way to be removed. Bishop jobs also have a skill to remove these effects.
Unit Type Advantage and Tags [ ]
Units in the game have types. Some unit abilities, gear, and leader skills specify increased damage against a specific enemy type, such as «Strong vs Machines» or «Strong vs Demons.» Other common enemy types include Humans, Monsters, Airborne, Beasts.
On top of these common types, units can have other additional tags that can modify damage when attacked. Those include gender for Humans (Male, Female), material (Metal, Plant), raid-specific types (Gigantic, Eldritch, Holy Beast), miscellany (Undead, Insect, Hybrid, Demi-Human, Templar) and a special Sin type (Envy, Sloth, Lust, Gluttony, Wrath, Pride, Greed).
«Strong vs Sin» modifiers are currently gained by maxing Gate 4 (Gluttony) of a unit’s Enlightenment, often +20 against one type and +40 against another. There are also strong vs sin bonuses on Memento Leader Skills.
It’s worth noting that units commonly have multiple tags, and attacks against them with corresponding strength modifiers can deal significantly more damage.
Unit attack abilities that specify enemy type modifiers can have varying degrees of strength modifiers:
These values are labeled as «killerBonus» in the damage formula. On occasion, abilities labeled as «Strong vs Enemy Type» actually have a higher modifier tier, possibly due to a mistranslation.
Bonus Parameters [ ]
Miscellaneous attributes fall into this category.
Formula [ ]
For every attribute, the score is determined by the following formula:
BaseScore [ ]
For stats (except MOV and JUMP), every unit has a base score, which is scaled according to the unit’s level. That number is then multiplied by a value determined by the current job of that unit to give the BaseScore of that unit.
The base value for MOV and JUMP usually are solely determined by the job. Some units may also increase/decrease these values by a flat amount, regardless of job.
Nearly every other attribute has a base value of 0, though some units and jobs can specify other values.
BaseAdds [ ]
These include flat increases or decreases that add to the BaseScore, including equipment, gear and skins. Nearly every value from equipment, gear and skins will take be a BaseAdd.
Specific to gear: For any given attribute, the add value will be equal to the highest value for that attribute among all equipped gear. This means having two gear that supply PATK will only give the benefit of the highest value (they do not stack).
BaseScales [ ]
After adding the BaseScore with all BaseAdds, this value is then multiplied by the sum of all the BaseScales. There is no known BaseScales so this is in effect adding 0%.
In theory, the maximum value restriction on gear does not apply to gear with attribute scales.
BuffAdds [ ]
These include flat increases or decreases that add to the FinalBase from skills and effects. Both passive (including leader skills) and active effects are included. Some attributes act as a percentage so most increases to these will take the form of an add (such as elemental resistance).
BuffScales [ ]
After adding the FinalBase with all BuffAdds, this value is then multiplied by the sum of all the BuffScales.
Example: The leader skill Pure Water’s Trance increases PATK of water units by 30%. A water unit that has this effect as well as a Bard’s Song of the Warrior Lv. 1 (Increases PATK by 10%) will have a total BuffScale to PATK of 40%.
Timing [ ]
Charge Time (CT) [ ]
In battle, every unit maintained a Charge Time (CT) value which is used to determine when the unit will get their turn. At 100 CT, a unit will get their turn and will be able to move. CT can go over 100, and the unit with the highest CT will get to move first.
Actions [ ]
On a units turn, 60 CT is automatically deducted. If the unit moves, 20 more CT is deducted. If that unit takes an action (attacking, casting, etc), an additional 20 CT is also deducted.
By not moving and/or not taking an action, a unit can make its next turn come quicker.
Effect Timing [ ]
Every buff, debuff and status effect has a timing which determines how long it lasts. With the exception of Eternal, every effect will have a turn count, which will cause the effect to expire once it reached 0. The timings determine how the counter is decremented:
Game Clock [ ]
When the battle first begins, as well as after any unit ends their turn, the game checks the highest CT of every unit in the battle. If that value is at least 100, that unit will then take its turn. If no unit can take its turn, the game clock is advanced by 1.
Advancing the game clock has these effects:
Casting [ ]
Amount of Starting Jewels [ ]
Starting jewels are based on these factors:
Attack Attributes [ ]
Attribute Legend: [ ]
Any damage skill, will usually have a combination of three main attributes which are categorized as Damage, Power Type, and Element:
You can see which of these attributes a skill has, at the top left corner of the skill.


Other skills may have a different combination of attributes, but they all show «damage / power type / element» attribute symbols, unless it’s a «non-typed» skill (which won’t have symbols)
*** In-game wording can be confusing; the «Attack Type» will determine which «Power Modifiers» an attack will benefit from. Meanwhile the «Attack Damage» will determine if it’s reduced by MDEF, or PDEF«
*Even if an attack does 

Reaction/Counter skills, can also have a combination of those attributes.
Attack Modifiers [ ]
With the exception of «Other» attacks (such as a Bard’s attack), a unit has 3 bonus modifiers for each ATK Type:
Other-type attacks do not use these parameters.
For a list of some skills which modify attack type resistances, see Resist Skills.
For a list of some skills which buff/debuff attack types, see Buff Skills.
Damage Formula [ ]
Here is some psuedo-code detailing how damage is calculated. Credits to Xores for decoding this:
Special Attack References [ ]
Combat Power [ ]
The in-game calculation for total power for a unit uses the following formula:
HP / 10 + AGI * 5 + All Other Stats (PATK, PDEF, MATK, MDEF, DEX, CRIT, LUCK)
This calculation includes any equipped gear, mementos, passives, truth seals, etc, as long as they affect the stats on the character screen (so on map abilities will not be included).
Total combat power for an element just adds the power of each unit you have of that element. For the requirements of accessing the Elite Door quests, you must only reach that total combat power once to qualify, you do not need to be at that power when you do the quest.
The Alchemist Code Wiki
Enlightened Gear Skills
Gear enlightenment can be performed for certain weapons upon reaching level 30 and provides the weapon with a special skill.
Contents
Acquiring Skills [ ]
There are several factors and conditions to be met when determining the added special skill. You may need to hit an enemy with a unit holding the gear, you may need to use a specific unit and/or job, a specific enemy or type of enemy that needs to be attacked, or the unit’s level and/or enemy’s level and/or the stage where these conditions need to be met. All these conditions can be checked on the relevant gear page in Alchemist Code DB. Note that the % chance to get the skill listed there does not seem to be accurate but the other data should be.
There are 3 levels of the enlightenment skills:
| Tier 1 A | Tier 2 D | Tier 3 D |
| Tier 2 E | Tier 3 E | |
| Tier 1 B | ||
| Tier 2 F | Tier 3 F | |
| Tier 2 G | Tier 3 G | |
| Tier 1 C | ||
| Tier 2 H | Tier 3 H |
• Tier 1: There are always three tier 1 skills for each weapon type. Each can be evolved into multiple tier 2 skills and some tier 2 skills can evolved from multiple tier 1 skills;
• Tier 2: These are more specialized versions of the tier 1 skill with improvements to that skill. A tier 2 skill can generally only be evolved into a single tier 3 skill;
• Tier 3: A more powerful version of the tier 2 skill. There are some weapons with unique tier 3 skills restricted to that specific weapon.
Typically you will look to see which Tier 3 skill you wish to get, then determine which skills lead to that skill. You can’t have more than one enlightened skill on the weapon at a time.
Resetting Skills [ ]
Because the skill is acquired randomly you may get a skill other than your intended- if so make sure to reset the skill in the Gear > Enlightened Skill interface so that you can continue working to get the skill you desire. You can reset the skill 1 level at a time (i.e. if it’s a level 2 skill you wish to reset, you don’t have to reset to the beginning, you can go back to the level 1 skill).
Example of how to reset weapon skill.
Setting Skills [ ]
When you acquire a skill, you must first go to Gear > Enlightened Skill to select the gear and go under the enlightened skill tab on the gear details screen to set the skill. Until you set the skill it will not show up as an option to use in combat. Setting the skill will not prevent you from learning new skills or resetting the skill if you need to.
Leveling Skills [ ]
Once you have acquired the tier 3 skill you desire, you will want to level the skill to maximize the power of it. There are 3 levels of the skill, so you must level up twice to get to the maximum power. There are 3 ways to level the skill:
Note: If you fuse a level 30 copy of the same weapon that also has the same skill it will fully level the skill since it counts as 2 level ups.
Weapon Type Skill Trees [ ]
Note: This is a mechanic is released gradually for different weapon types.
Sword [ ]
| Tier 1 | Tier 2 | Tier 3 |
|---|---|---|
| Solo Blade: Slash ATK on enemy unit that lowers PATK for three turns [Range: 2, Height Range: 2] | Dancing Blade: After moving, Slash ATK on enemy unit & Jewel Dmg [Range: 4, Height Range: 2] | Blade Waltz: After moving, Slash ATK on enemy unit & absorbs Jewels [Range: 4, Height Range: 2] |
| Flame Sword: Fire Mag Slash ATK on units within area & lowers PATK for three turns [Range: 2, Area: Lateral (3), Height Range: 2] | Melting Blade: Fire Mag Slash ATK on enemy units within area & lowers PATK for three turns & lowers all attacks for targeted Wind units for three turns (Only usable and unlocked by the jobs Magic Swordsman [Efreet]/Free-Spirited Rogue) [Range: 3, Area: Lateral (3), Height Range: 2] | |
| Wind Sword: Wind Mag Slash ATK on enemy unit & lowers PATK for three turns [Range: 3, Height Range: 2] | Storm Blade: Wind Mag Slash ATK on enemy unit & lowers PATK for three turns & lowers all attacks for targeted Thunder unit for three turns (Only usable and unlocked by Magic Swordsman [Sylphide]) [Range: 5, Height Range: 2] | |
| Dark Cross Slash: Dark Slash ATK on units within area & lowers PATK for three turns [Range: 2, Area: Cross (3), Height Range: 2] | Blade of Perpetual Night: Dark Slash ATK on units within area & lowers PATK for three turns & raises Power if Dark unit (Only unlocked by using a Dark unit) [Range: 3, Area: Cross (3), Height Range: 2] | |
| Crystal Drain: Dark Slash ATK on units within area that increases in power according to own PDEF & absorbs part of Dmg inflicted back as HP [Range: 3, Area: Cross (3), Height Range: 2] |
Unlocked by: Blade of Silence, Caliburn-Sword of Truth, Charming Blade, Dark Corpse-Slasher, Dazzling Blade, Electrospike Blade, Joyful Blade [Hagoita], Lexida, Light Metal Rapier, Mirage Sword Mystic Blade Tyrfing, Poison Fang Blade, Protector Shield and Sunblade Prometheus when used by a Dark unit
Excalibur Exclusive: Unlocked by using Excalibur on a Dark unit (in place of Crystal Drain)
Sparkling Crystal Sword Lumiere Exclusive: Unlocked by using Sparkling Crystal Sword Lumiere on a Light unit (in place of Wall of Blades)
Excalibur Exclusive: Unlocked by using Excalibur on Kanon/Zain (in place of Vengeful Blade of Greed)
Broadsword Exclusive: Only usable and unlocked by using Broadsword on Lambert (in place of Flame Rend of Envy)
Crowley Sword Exclusive: Unlocked by Crowley Sword (only weapon to have Blue Flame Shining Slash)
Crowley Sword Exclusive: Unlocked by using Crowley Sword on Logi/Zeke against a Wrathris General unit.
Staff/Rod [ ]
| Tier 1 | Tier 2 | Tier 3 |
|---|---|---|
| Dia: Light Mag ATK on enemy unit [Range: 2, Height Range: 2] | Luminous Dia: Light Mag ATK on units within area [Range: 3, Area: Cross (3), Height Range: 2] | Consecration of Pride: Light Mag ATK on units within area (Strong vs Pride) (Only unlocked by using a Light unit against a Demon type enemy) [Range: 3, Area: Diamond (5), Height Range: 2] |
| Judgment Dia: Light Mag ATK on units within area (Strong vs Dark) [Range: 3, Area: Lateral (3), Height Range: 2] |
Nina’s Pointing Stick Exclusive: Unlocked by attacking a Dark unit with Judgement, Crusade Judge or Call of the Crusade while equipped with Nina’s Pointing Stick
Illusion Rod Exclusive: Only usable by the unit Othima, but unlocked by the jobs Sage [Carnac], Luminous Immortal and Blue Ice General while geared with Illusion Rod
Helkovara Family Staff Exclusive: Only usable by units from Lustburg and unlocked by Lisbeth/Rebecca attacking Queen or Venus with Helkovara Family Staff
Illusion Rod Exclusive: Only usable by the unit Dark Phantom Othima, but unlocked by attacking a Water unit with the jobs Sage[Monolith], Night Agent or Greedy Phantom Master
Harmony Rod/Silencing Rod Exclusive: Only usable by Templar units. Unlocked by using either rod on Vier or Fury
Takemikazuchi Exclusive: Unlocked by attacking Acht or Sol with Takemikazuchi
Easter Star Rod Exclusive: Only usable by Battle Mage, Magical Honor Student & Powerful Witch, but additionally unlocked by Battle Mage Job Enchantments as well
Good-Luck Staff [Kumadesu]/Staff of Rich Harvest/Staff of Thriving Business Exclusive: Only usable by the jobs Merchant & Battle Maid, but unlocked by Merchant, Battle Maid and all Merchant Job Enchantments while using any of the three gear
Yune Spirit Staff Exclusive: Only usable by Macherie and unlocked by level 85 Macherie
Spear [ ]
| Tier 1 | Tier 2 | Tier 3 |
|---|---|---|
| Acute Thrust: Pierce ATK on units within area [Range: 3, Area: Line (3), Height Range: 2] | Acute Drill: Pierce attack on units within area [Range: 3, Area: Line (3), Height Range: 2] | Conflagrant Flash: Fire Pierce ATK on units within area & raises Power if user is a Fire unit [Range: 5, Area: Line (5), Height Range: 2] |
| Ice Drill Longinus: Water Pierce ATK on units within area (Strong vs Eldritch) [Range: 5, Area: Line (5), Height Range: 2] |
Holy Lance Longinus/Deadly Lance Exclusive: Unlocked by attacking Eldritch with Longinus or Dark Longinus
Helix Wind Wolf Spear Exclusive: Unlocked by attacking demons or jams with Mocca
Spirit Spear Chastiefol Exclusive: Unlocked by attacking a specific enemy only available during Seven Deadly Sins (see ACDB for details) with level 85 unit
Piercing Dawn Spear Exclusive: Unlocked by attacking Kanon or Zain with Kudanstein
Katana [ ]
| Tier 1 | Tier 2 | Tier 3 |
|---|---|---|
| Diagonal Sever: Slash ATK to enemy unit [Range: 1, Height Range: 2] | Diagonal Cross: Slash ATK to units within area around self [Area: Cross (3), Height Range: 2] | Four Corners Slash: Slash ATK on units within area around self [Area: Diamond (5), Height Range: 2] |
| Illuminated Slash: Slash ATK on enemy unit [Range: 3, Height Range: 2] | Crescent Moon Slash: 3-hit Slash ATK on enemy unit & disables all Reactions to this attack & chance of critical [Range: 3, Height Range: 2] | |
| Bamboo Split: Slash ATK (ignores DEF) to enemy unit [Range: 5, Height Range: 2] | ||
| Merciless Greed: Dark Slash ATK an enemy unit that ignores DEF (Strong vs Greed) [Range: 5, Height Range: 2] |
Kaiko Samonji Exclusive: Usable only by Kuza, unlocked by attacking Orion with Kuza (in place of Crescent Moon Slash and Bamboo Split)
Dark Memory Blade Exclusive: Usable only by Zehn and Cadanova, unlocked by attacking level 85 unit with Zehn or Cadanova (in place of Ceaseless Flurry Blade)
Sealed Blade Kagomurasaki Exclusive: Unlocked by attacking a Discarnate Power with Yomi (in place of Twofold Exorcizing Blade)
Greatsword [ ]
| Tier 1 | Tier 2 | Tier 3 |
|---|---|---|
| Slash: Slash ATK to enemy unit [Range: 1, Height Range: 2] | High Slash: Slash ATK to enemy unit [Range: 1, Height Range: 2] | Crushing Slash: Slash ATK to enemy unit [Range: 1, Height Range: 2] |
| Leo Eclipse: Thunder Slash ATK on enemy unit (Strong vs Pride) & inflicts Stun [Range: 1, Height Range: 2] |
Leo Falchion Exclusive: Usable only by Orion, unlocked by attacking level 85 unit with Orion (in place of Crushing Slash)
Masamune Blade and Dark Corpse-Slicer Exclusive: Usable only by Masamune and Dark Masamune, unlocked by attacking Eldritch with Masamune or Dark Masamune (in place of Crushing Slash)
Scythe Weapon Exclusive: Usable and unlockable only by Necromancer based jobs (in place of Flare Sonic)
Blossom Claymore Exclusive: Unlockable only by Dark units (in place of Biting Wheel and Spark Spin)
Bloody Death Scythe Exclusive: Unlocked by attacking demon or diablo using Dark unit (in place of Earth-Sweeping Rend)
Dark Blade Grausam Exclusive: Unlockable and usable only by Zahar (in place of Dark Force)
Mystic Blade Laevateinn and Dark Corpse-Shredder Exclusive: Usable only by Laevateinn and Dark Laevateinn, unlocked by attacking Eldritch with Laevateinn or Dark Laevateinn (in place of Flying Blade Shock Wave and Ruinous Flying Cut)
Cestus [ ]
| Tier 1 | Tier 2 | Tier 3 |
|---|---|---|
| Crumble Fist: After moving, Strike ATK that ignores DEF on enemy unit [Range: 3, Height Range: 2] | Crushing Crumble Fist: After moving, Strike ATK that ignores DEF on enemy unit & removes all statuses inflicted on self [Range: 3, Height Range: 2] | Godly Crumble Fist: After moving, Strike ATK that ignores DEF on enemy unit & greatly raises Power if self is inflicted with a status & removes all statuses inflicted on self [Range: 4, Height Range: 2] |
| Destructive Crumble Fist: After moving, Strike ATK on enemy unit [Range: 4, Height Range: 2] | Destructive Screaming Palm: After moving, Strike ATK & inflicts Silence [Range: 5, Height Range: 2] | |
| Rolling Impact: After moving, Strike ATK on units within area around self [Move Area: Diamond (7), Area: Square (3) Height Range: 2] | Rolling Trance Impact: After moving, Strike ATK on units within area around self [Move Area: Diamond (7), Area: Diamond (5) Height Range: 2] | |
| Shockwave: Strike ATK on units within area [Range: 2, Area: Lateral (3), Height Range: 2] | Flame Wheel Destruction Fist: After moving, Fire Strike ATK on units within area around self & greatly increase Jewels Spent for 1 turn [Move Area: Diamond (7), Area: Special (Square-Cross), Height Range: 2] (Fire units only) |
Machina Cestus Exclusive: Unlockable only by Fire units on Wind enemies (in place of Rolling Trance Impact)
Haas Family Gauntlets Exclusive: Unlockable only by Alma (in place of Mind’s Eye Blow)
Mittens of Binding Ties Exclusive: Unlockable only by attacking Lust enemies (in place of Envious Dark Palm and Crashing Gust of Greed)
These skills are currently unreleased in Global! (Released June 2021 in Japan)
| Tier 1 | Tier 2 | Tier 3 | |||||||||||||||||||||||||||||||||||||||||||||||||||||||||||||||||||||||||||||||||||||||||||||||||||||||||||||||||||||||||||||||||||||||||||||||||||||||||||||||||||||||||
|---|---|---|---|---|---|---|---|---|---|---|---|---|---|---|---|---|---|---|---|---|---|---|---|---|---|---|---|---|---|---|---|---|---|---|---|---|---|---|---|---|---|---|---|---|---|---|---|---|---|---|---|---|---|---|---|---|---|---|---|---|---|---|---|---|---|---|---|---|---|---|---|---|---|---|---|---|---|---|---|---|---|---|---|---|---|---|---|---|---|---|---|---|---|---|---|---|---|---|---|---|---|---|---|---|---|---|---|---|---|---|---|---|---|---|---|---|---|---|---|---|---|---|---|---|---|---|---|---|---|---|---|---|---|---|---|---|---|---|---|---|---|---|---|---|---|---|---|---|---|---|---|---|---|---|---|---|---|---|---|---|---|---|---|---|---|---|---|---|---|---|---|
| Needle Shot: Missile ATK on enemy unit [Range: 4, Height Range: Unlimited] | Spike Shot: Missile ATK on enemy unit [Range: 5, Height Range: Unlimited] | Piercing Shot: Missile ATK on enemy unit & lowers Missile Res for three turns & 100% Hit & Strong vs Jumping Opponents & interrupts JUMP [Range: 5, Height Range: Unlimited] | |||||||||||||||||||||||||||||||||||||||||||||||||||||||||||||||||||||||||||||||||||||||||||||||||||||||||||||||||||||||||||||||||||||||||||||||||||||||||||||||||||||||||
| Charted Shot: Missile ATK on enemy unit [Range: 4, Height Range: Unlimited] | Charging Bolt: Missile ATK on enemy unit & inflicts Stun for three turns [Range: 4, Height Range: Unlimited] | ||||||||||||||||||||||||||||||||||||||||||||||||||||||||||||||||||||||||||||||||||||||||||||||||||||||||||||||||||||||||||||||||||||||||||||||||||||||||||||||||||||||||||
| Burning Charge: Fire Missile ATK on enemy unit & raises own Missile ATK Power for three turns [Range: 4, Height Range: Unlimited] (restricted to fire units) | |||||||||||||||||||||||||||||||||||||||||||||||||||||||||||||||||||||||||||||||||||||||||||||||||||||||||||||||||||||||||||||||||||||||||||||||||||||||||||||||||||||||||||
| Godwolf Storm Fang: Wind Missile ATK on enemy unit & doubles own Missile ATK Power for one turn before activation & removes all statuses inflicted on self [Range: 4, Height Range: Unlimited] (Seida only) Tranquil Bow Alizehan Exclusive: Unlockable only by Seida (in place of other skills) | |||||||||||||||||||||||||||||||||||||||||||||||||||||||||||||||||||||||||||||||||||||||||||||||||||||||||||||||||||||||||||||||||||||||||||||||||||||||||||||||||||||||||||
| Needle Arrow: Missile ATK on target units within area around self & moves target 2 sq back [Area: Square (3), Height Range: 3] | Spiral Arrow: Missile ATK on target units within area around self & moves targets 3 sq back [Area: Diamond (5), Height Range: 3] | ||||||||||||||||||||||||||||||||||||||||||||||||||||||||||||||||||||||||||||||||||||||||||||||||||||||||||||||||||||||||||||||||||||||||||||||||||||||||||||||||||||||||||
| Shadow Swift Funeral Manifest: Dark Missile ATK on enemy units within area around self & raises Power if target is inflicted with a status [Area: Diamond (7), Height Range: 5] (Failnaught only) Arcane Bow [Failnaught] Exclusive: Unlockable only by Failnaught (in place of other skills) | |||||||||||||||||||||||||||||||||||||||||||||||||||||||||||||||||||||||||||||||||||||||||||||||||||||||||||||||||||||||||||||||||||||||||||||||||||||||||||||||||||||||||||
| High Arrow: Missile ATK on target units within area [Range: 4, Area: Cross (3), Height Range: Unlimited] | Quarreling Rain: Missile ATK on target units within area around self [Area: Special (Square-Cross 2), Height Range:3] | ||||||||||||||||||||||||||||||||||||||||||||||||||||||||||||||||||||||||||||||||||||||||||||||||||||||||||||||||||||||||||||||||||||||||||||||||||||||||||||||||||||||||||
| Quickbow Cactus: After moving, Missile ATK on target units within area around self & greatly lowers probability of activating Reactions for three turns [Move Area: Diamond (9), Area: Square (3), Height Range: 3] | |||||||||||||||||||||||||||||||||||||||||||||||||||||||||||||||||||||||||||||||||||||||||||||||||||||||||||||||||||||||||||||||||||||||||||||||||||||||||||||||||||||||||||
| Fallen Arrow: Missile ATK on target units within area [Range: 4, Area: Square (3), Height Range: Unlimited] | Low Latio Arrow: Missile ATK on target units within area [Range: 5, Area: Diamond (5), Height Range: Unlimited] | ||||||||||||||||||||||||||||||||||||||||||||||||||||||||||||||||||||||||||||||||||||||||||||||||||||||||||||||||||||||||||||||||||||||||||||||||||||||||||||||||||||||||||
| New Moon Storm: Penetrating 4-hit Wind Missile ATK on target units within area & chance of CRIT [Range: 4, Area: Diamond (5), Height Range: Unlimited] (Artemis and Dark Artemis only) Deadly Bow and Divine Purity Bow Artemis Exclusive: Unlockable only by Artemis or Dark Artemis (in place of other skills) | |||||||||||||||||||||||||||||||||||||||||||||||||||||||||||||||||||||||||||||||||||||||||||||||||||||||||||||||||||||||||||||||||||||||||||||||||||||||||||||||||||||||||||
| Pure Flowers of Love: Light Missile ATK on target units within area & powerfully Strong vs Dark & Strong vs Eldritch [Range: 6, Area: Diamond (5), Height Range: Unlimited] (Eros only) Cupid Bow Eros Exclusive: Unlockable only by Eros (in place of other skills) | |||||||||||||||||||||||||||||||||||||||||||||||||||||||||||||||||||||||||||||||||||||||||||||||||||||||||||||||||||||||||||||||||||||||||||||||||||||||||||||||||||||||||||
| Kill the Purgatory: Fire Missile ATK on target units within area & Strong vs Eldritch & greatly raises target’s Jewels Spent [Range: 4, Area: Square (3), Height Range: Unlimited] (Shekinah only) Dazzling Shekinah Bow Exclusive: Unlockable only by Shekinah (in place of other skills) | |||||||||||||||||||||||||||||||||||||||||||||||||||||||||||||||||||||||||||||||||||||||||||||||||||||||||||||||||||||||||||||||||||||||||||||||||||||||||||||||||||||||||||
| Deep Abyss Ray: Dark Missile ATK on target units within area & inflicts powerful Blind & raises own PATK/DEX for three turns [Range: 5, Area: Square (3), Height Range: Unlimited] (Dark Princess Yomi only) Bow of Darkness Exclusive: Unlockable only by Dark Princess Yomi (in place of other skills) | |||||||||||||||||||||||||||||||||||||||||||||||||||||||||||||||||||||||||||||||||||||||||||||||||||||||||||||||||||||||||||||||||||||||||||||||||||||||||||||||||||||||||||
| Quarreling Arrow: Missile ATK on target units within area that ignores DEF [Range: 2, Area: Lateral (3), Height Range: 2] | Arrowsphere: Missile ATK on target units within area that ignores DEF [Range: 3, Area: Lateral (3), Height Range: 2] | ||||||||||||||||||||||||||||||||||||||||||||||||||||||||||||||||||||||||||||||||||||||||||||||||||||||||||||||||||||||||||||||||||||||||||||||||||||||||||||||||||||||||||
| Warning Drop Arrow: Missile ATK on targets units within area & lowers PATK/MATK for three turns [Range: 4, Area: Cross (3), Height Range: Unlimited] | Offense Chain Rigid Arrow: Missile ATK on enemy units within area & greatly lowers PATK/MATK for three turns [Range: 4, Area: Square (3), Height Range: Unlimited] | ||||||||||||||||||||||||||||||||||||||||||||||||||||||||||||||||||||||||||||||||||||||||||||||||||||||||||||||||||||||||||||||||||||||||||||||||||||||||||||||||||||||||||
| Warning Arrow: Missile ATK on enemy unit & lowers PATK/MATK for three turns [Range: 4, Height Range: Unlimited] | Sharp Arrow Shadow Shot: Missile ATK on enemy units within area & lowers AGI for three turns & lowers MOVE by 1 & greatly raises Power if target has had their AGI lowered [Range: 4, Area: Square (3), Height Range: Unlimited] | ||||||||||||||||||||||||||||||||||||||||||||||||||||||||||||||||||||||||||||||||||||||||||||||||||||||||||||||||||||||||||||||||||||||||||||||||||||||||||||||||||||||||||
| Wings of the Blue Sky: Missile ATK on enemy units within area & greatly raises Power if target has had their hit rate lowered & grants Quicken on self [Range: 4, Area: Square (3), Height Range: Unlimited] (restricted to male units) | |||||||||||||||||||||||||||||||||||||||||||||||||||||||||||||||||||||||||||||||||||||||||||||||||||||||||||||||||||||||||||||||||||||||||||||||||||||||||||||||||||||||||||
| Offense Chain Arrow: Missile ATK on enemy unit & greatly lowers PATK/MATK for three turns [Range: 4, Height Range: Unlimited] | Cursed Arrow Assault: Missile ATK on enemy unit & sets PATK/MATK to zero for one turn [Range: 4, Height Range: Unlimited] | ||||||||||||||||||||||||||||||||||||||||||||||||||||||||||||||||||||||||||||||||||||||||||||||||||||||||||||||||||||||||||||||||||||||||||||||||||||||||||||||||||||||||||
| Unknown Dark Thumb: Dark Missile Mag ATK on enemy unit & sets PATK/MATK to zero for one turn [Range: 4, Height Range: Unlimited] (restricted to female units) Inact Jaeger Exclusive (in place of other skills) The alchemist code
«Let the brilliance of your soul В статье не хватает гайдов, артов, мемов, прочего фансервиса, причём всего сразу, и непонятно даже, за что браться. Спрашивайте, что интересует, в комментариях, и, вероятно, статья будет дополнена. Чем игра примечательна… Как и у любой другой игры, у этой целый ворох своих собственных особенностей, достоинств и недостатков. Стоит, пожалуй, последовать примеру лурка и разобрать всё это вкратце прежде, чем приступать к многобукаф: Почему в это стоит играть: Почему в это не стоит играть: Теперь подробнее. Как уже было сказано, это аниме-игра. А потому она страдает заскоками, свойственными аниме. Общий ход сюжета банален, но индивидуальный отыгрыш очень неплох и в отдельных случаях даже в состоянии доставить, что и характерно для японских произведений. Да что там опенинг… Сейчас уже есть полноценный полнометражный аниме-фильм. Причём занимались им серьёзные люди и студия Satelight, потому оформление вышло на хорошем уровне. Другое дело, что сюжет получился… в духе игры, но ужат в формат, потому не раскрывающий сути. Подробнее можно узнать в рецензии на это аниме. Геймплей у игры интересный, если опустить сам жанр, который предполагает, что юниты ходят по очереди, перемещаясь по карте и совершая какое-либо действие. В целом здесь легко разобраться, но в то же время есть множество нюансов вроде ограничения движения по высоте, линии стрельбы у стрелков, скорости каста умений и тому подобного. Собственные фишули прилагаются. И в случае отдельных квестов действительно приходится думать, составлять план и стратегию, отталкиваясь от имеющихся ресурсов и игровой механики, что и делает игру интересной, заставляя даже давно играющих пропадать в ней сутками. Теперь о контенте. Было сказано, что его много. Так вот. Есть основной сюжет. Он состоит из глав. Каждая глава состоит из нескольких эпизодов. Каждый эпизод состоит из трёх актов. Каждый акт состоит из десяти одиночных сражений. И ПРАКТИЧЕСКИ ПЕРЕД КАЖДЫМ СРАЖЕНИЕМ ПО ДИАЛОГУ! И это только основной сюжет. Есть ещё разного рода спин-оффы, не менее насыщенные по событиям, истории героев и даже небольшие временные ивенты, повествующие об отрезке жизни кого-либо из персонажей. И это всё только сюжет… Квестов в принципе тут видимо-невидимо. Запутаться во всём этом – легче лёгкого. Можно зайти не в ту сюжетку и случайно что-либо себе проспойлерить. Чтобы этого не допустить, ниже приведены эти самые спойлеры: Main Story и Sacred Stone Memories практически не содержат спойлеров между собой, разве что в четвёртой главе упоминается события в регионе Сага, описанные в SSM. Желательно бы SSM осилить до четвёртой главы. Но необязательно. Перед ивентом Steel-lined Wedding Aisle стоит прочитать вторую главу Main Story. Перед ивентом The Girls Who Tread on the Remaining Snow стоит прочитать третью главу Main Story. Пятая глава Main Story содержит спойлер Babel Chronicles: Green Prayers in Drought. In Our Fated Future спойлерит события Sacred Stone Memories. Ивенты темпларов стоит читать только после Sacred Stone Memories. Babel Chronicles: Red Sparks of Iron идёт параллельно с Sacred Stone Memories, а потому минимум девять глав SSM стоит прочитать прежде, чем браться за Вавилонские Хроники Энвирии. Reclaiming the Scarlet мощно спойлерит Sacred Stone Memories и Babel Chronicles: Red Sparks of Iron. Притом, что сюжет этого квеста – полная херня. Да и класс Хлои, который там фармится – тоже. Чтобы получить полноту картины событий перед Babel Chronicles: Crossroads in the Devastation of War, следует сначала прочитать историю Йоми и ивент Return to the Underworld. Перед тем, как приступать к Babel Chronicles: When Bells Toll Over White Snow – Clockwork Campanella, стоит сначала прочитать историю Албеи. Перед тем, как приступать к Babel Chronicles: When Bells Toll Over White Snow – Snowfields of Nostalgia, стоит сначала прочитать ивент Sweet Aspirations и историю Равины. Genesis Story не содержит особых спойлеров какой-либо из сюжеток, но всё-таки прежде, чем приступать к ней, стоит получить хотя бы примерное понятие о том, как устроен местный мир, и о том, кто такие Нимул и Эммель. Проще говоря, чтобы избежать наибольших спойлеров, стоит читать в следующем порядке: сначала первые три главы Main Story и Sacred Stone Memories (особенно Sacred Stone Memories), после чего можно читать ивенты Steel-lined Wedding Aisle, The Girls Who Tread on the Remaining Snow, In Our Fated Future, а также первые три сюжетки Babel Chronicles, а после Хроник можно дочитать Main Story и взяться за Reclaiming the Scarlet. В остальных случаях спойлеры не столь существенные. Сюжет довольно сложен для его описания в нескольких словах. Если предельно коротко, то в этом мире существует запретное искусство – алхимия. С её помощью можно трансмутировать души умерших людей и призывать фантомов, что служат своему призывателю. Изначально это искусство использовалось для альтруистичных дел, но люди всё чаще стали применять алхимию в корыстных целях. Потому на неё и был наложён запрет. Единственные, кто вправе владеть алхимией, это Паладины. Они же следят за порядком на континенте, хотя и вмешиваются лишь в крайнем случае. В центре сюжета оказывается множество людей, вовлечённых в интриги, связанные с алхимией, а также та, что называет себя связью между Правдой и Миром – Наблюдательница Судеб Уроборос, предоставляющая силу тем, кто яро её желает. Согласно легендам, основоположниками алхимии являются Нимул и Эммель – брат и сестра, что смогли достичь могущества, сравнимого со силой богов. Именно они стали возводить башню, что должна была достичь самих Небес. Видя это, боги разозлись на человечество и сокрушили строение, которое, однако, осталось достаточно высоким, чтобы его было видно практически из любой точки континента Вавилона, дабы напоминать о людской глупости и грехе, что они совершили. Согласно внутриигровой истории, Нимул и Эммель существовали на самом деле. И они действительно основали алхимию, так как по крайней мере были осведомлены о Вратах Истины и о мире тьмы, находящемся за ними. Нимул был заинтересован в этом мире и всё больше и больше погружался в него, познавая тёмную сторону алхимии. Вместе с тем, он всё больше и больше терял рассудок, и дошло до того, что он собрался уничтожить весь мир. Эммель, видя всё это, предала брата и стала в итоге той, что основала Святой Орден Вавилона, регулирующий деятельность алхимиков. Нимул и Эммель часто упоминаются по ходу сюжета. Многие заинтересованы в силе, что они познавали и изучали. Говорят, что каждые несколько сотен лет они перерождаются. Говорят, что Нимула можно принудительно вернуть в мир Вавилона при помощи семи Святых Камней, каждый из которых олицетворяет какой-либо смертный грех и которыми владеют семь основных государств континента. Потому вокруг алхимии и этих камней и возникает так много конфликтов, что ведут к кровопролитию и жертвам. Но, разумеется, это не единственная сюжетная линия. У каждого государства целый ворох собственных проблем. Так, например, Энвирия и Врасарис не могут выяснить отношения уже много десятилетий, что нередко приводит боевым столкновениям на границе государств. В Слотстейне свои проблемы, вызванные скачком уровня технологии. «Лень – двигатель прогресса» – фраза, соответствующая Слотстейну целиком и полностью. Королевство ведьм Люстбург с некоторых пор проклято собственным Святым Камнем. Любой мужчина после связи с женщиной превращался в насекомое, которое, до кучи, из-за местного дерева, впитавшего в себя энергию философских камней, ещё и вырасти могло до неимоверных размеров, усугубляя проблему. Регион Сага постоянно подвергается нападениям со стороны Глютони Фосс, своей культурой во многом напоминающей Древний Рим, возжелавших наложить руку на запасы плодородных земель обитающих там племён (кстати, что только усиливает аналогию с Древним Римом). А жадность империи Грид Дик не знает границ, ибо они однажды устроили войну, сотрясшую весь мир. Причём до этого они успели уничтожить островное государство Вадацуми, пользуясь лазейкой в Магма Коде о запрете на алхимию. Оба государства эксплуатируют культуру Востока и неуклонно напоминают Китай и Японию. Особенно по своему расположению. Ко всему прочему и в самом Святом Ордене Вавилона в Нортен Прайд, что располагается прямо в центре континента, имея на своей территории легендарную башню, не всё гладко. Говорят, что среди Ордена существует нечистая на руку группировка, которая использует своё влияние не для наведения порядка, а для укрепления собственной власти, даже если это будет вести к многочисленным жертвам и геноциду. Таким образом, ведётся несколько сюжетных линий. Основная, то есть линия «настоящего» времени, и несколько прошедших, среди которых выделяются Sacred Stone Memories, повествующая о Святом Ордене Вавилона, и Babel Chronicles, рассказывающая историю значимых героев того же времени, но других государств. Примечательно, что каждому государству соответствует свой собственный смертный грех, во многом отражающий его суть: Нортен Прайд – гордыня, Энвирия – зависть, Врасарис – гнев, Слотстейн – лень, Грид Дик – жадность, Глютони Фосс – обжорство и Люстбург – похоть. Сам по себе сюжет довольно неплох, если оценивать в общем, довольно-таки интригующий, персонажи проявляют завидную сознательность, потому наблюдать за ними приятно. Находится место всему: и юмору, и интригам, и превозмоганиям, и даже отчасти психологии. Проблема тут разве что в том, что общий ход сюжетных линий довольно-таки банальный, в конце часто бывает сложно удержать себя от того, чтобы не шлёпнуть себя по лбу от второсортности концовки. К счастью, это происходит не всегда: многие, в частности – последние, сюжетные линии довольно-таки осмысленны, хотя и простоваты. Сюжет там – полное противоречивое пафосное фуфло, как и связанные с ним юниты. Всё тут непродуманно, неосмысленно и прибито ненужным приторным пафосом. Примечательно, что именно сюжет SSM в этой игре связан с «Атакой титанов», являющейся эквивалентной хернёй по своей сути. Впоследствии были введены новые сюжетные линии, связанные с SSM, но они мало того, что не выправляют сюжетную линию, так ещё и вносят ещё больше противоречий и тупости. А усиленные личные классы Паладинов даже не получили свои сюжетные линии. Правда, и здесь есть положительный момент. Темплары. В сюжетке SSM они появляются с одной лишь целью: устроить резню, после чего быть выпиленными, оставив читателя недоумевать, что это были за психи. Однако у каждого из Темпларов есть собственная история, что даёт им усиленный личный класс, превращающий каждого из них в действительно сильного юнита, так ещё и сами истории вполне себе дают очень даже выразительный ответ на вопрос, откуда эта их долбанутость взялась. Кстати, с довольно-таки осмысленными психологическими моментами. В общем-то получается, что члены отряда (по меньшей мере большинство) уже умерли и представляют собой тени умерших людей. С другой стороны, ряды спин-оффов как бы намекают, что фантомы не только сражаются и всё-таки имеют какую-то жизнь вне моментов, когда их призывают. Впрочем, имея некоторое воображение и желание собрать разрозненные факты мира игры воедино, додуматься до существа фантомов всё-таки можно. По сути дела, обычные фантомы – лишь тени умерших людей, имеющие часть их навыков, но не имеющие большую часть их сил. Своей личности они также лишены, что только усиливает их сходство не более чем с тенями некогда живших людей. Такие фантомы призываются повсеместно и составляют бóльшую часть от всех фигурирующих в игре фантомов, что особенно характерно, если призыватели не являются алхимиками, а просто используют философские камни для призыва (так, например, Спика, чтобы задержать преследователей, на короткое время призвала фантом Захара). Чтобы фантом был сильнее и вместе с тем больше напоминал жившего в своё время человека, нужно не только его трансмутировать, но и продолжить восстанавливать целостность его души (отсюда название предмета для снятия предела ограничений каждого из героев – осколки души). Кроме того, чтобы юнит был по-настоящему сильным им нужны знания или воспоминания тех, кто им близок, а в идеале их самих. Таким фрагментом знаний или воспоминаний является так называемое «мементо», что экипируется подобно артефакту и также способно серьёзно усилить героя (каждое мементо предоставляет ряд бонусов, некоторые из которых влияют только на представителей конкретных фракций или даже конкретных героев, и представляет собой арт и небольшой текст, повествующий о невероятно значительном фрагменте из чьей-либо жизни). Вместе с душой и воспоминаниями (а также боевым опытом, экипировкой и прочим и прочим) восстанавливается и сила фантома, а вместе с тем и его личность. Многочисленные спин-оффы показывают, что фантомы склонны чудить так же, как если бы они это делали при жизни. Так, например, Магнус перед своей миссией первым делом свалил в казино, Элизабет продолжает проводить эксперименты, которые на многих наводят ужас, а Алексис настолько крипотный, что в своём костюме на Хэллоуин умудрился перепугать половину пришедших на фестиваль. Был также момент, когда призванные Лизбет фантомы – Доротея, Рейдо и Айша – отказались ей подчиняться под предлогом собственных дел. Самих героев, что могут быть призваны, очень много и все отличаются классом, характером, историей, элементом. Каждый себе в состоянии найти что-то по душе, хотя достать что-то конкретное, пожалуй, непросто… Вообще говоря, герои имеют даже не по одному, а по три класса, который можно менять вне боя. При всём при этом отдельные сочетания героев будут работать лучше, чем другие, благодаря их связи элементов или фракции, к которой они принадлежат. Да и вообще разные сочетания юнитов в команде могут реализовать себя по-разному. Тут всё зависит от цели, которую преследует игрок. Помимо своих героев в игре ещё есть кроссоверные – персонажи из других проектов Gumi, например, Phantom of the Kill, или даже из сторонних вселенных, например, Fullmetal Alchemist. Хотя достать таких героев, мягко говоря, проблематично… Это другой масштабный проект от Fuji Games и Gumi, который в Японии даже популярнее этой игры, и вообще считается чуть ли не одной из лучших jRPG для мобильных устройств. И заметно, насколько они любят этот свой проект и сколько ресурсов на него выделяют, ибо опенинг – да, хорош – но и сюжетные ролики выглядят прям ну очень симпатично, и уж точно получились интереснее ходячих моделек в роликах TAC. Однако игра не нашла признание в мире, потому глобальный сервер был закрыт, оставив нам лишь The Alchemist Code. О причинах можно только гадать, но скорее всего дело банально в том, что PotK получилась слишком японской и слишком мобильной, в то время как TAC, во-первых, свободно играется на ПК, хотя и на эмуляторе, во-вторых, геймплей тут ближе к западным пошаговым играм, нежели к японским, а в-третьих, сюжет здесь заключается не в стиле классического противостояния добра со злом, популярного в Японии до сих пор, но от которого всякие там ханжи, считающие себя ценителями «годных» сюжетов, лицемерно воротят нос, а в интригах внутри группировок и даже различных государств, которые периодически из-за этих самых интриг начинают вести полномасштабные войны между собой. Возможно, ещё повлиял тот факт, что Phantom of the Kill является полностью вайфу-игрой, в то время как TAC является ей всего лишь наполовину. Впрочем, те, кому понравятся героини из PotK, имеют шанс их достать и в The Alchemist Code во время повторения кроссоверного ивента, так что всё не так уж и плохо. Музыка в игре – запара отдельная. Ибо музыка неплоха. Не шедевр, но определённо не раздражает, не напрягает, даже те треки, что звучат постоянно (исключением из этого является разве что песня из открывающей заставки на экране главного меню). Отдельные композиции и вовсе хороши, действительно приятны для прослушивания. Собственно, непосредственно запара всего этого в том, что не все треки можно найти и достать. А некоторые и вовсе непонятно откуда, хотя источник утверждает, что они имеют какое-то отношение к игре… Потому разобраться с музыкой к этой игре – целая проблема. Заведомо стоит сказать, что список будет дополняться по мере нахождения новых треков и их источников. Но пока так. 1) Walk with Love and Glory – главная тема первой главы. Трек №7 на первом официальном диске. 2) Where Justice Lies – основная тема сражений первой главы. Трек №1 на втором официальном диске. 4) Cornerstones of Revolution – тема сражений, прозвучавшая в последнем бое первой главы. В остальном встречается редко. Трек №2 на втором официальном диске. 5) Mercy from Wrathful Soul – один из наиболее часто звучащих треков, но при этом идеально вписывающийся в контекст каждой своей сцены. Тяжёлые рассуждения об алхимии, поступках людей или даже о собственном выборе постоянно сопровождаются этой композицией, каждый раз идеально передавая гнетущую атмосферу происходящего. Является главной темой Уроборос. Англоязычное название трека переводится как «Милосердие от гневной души», но композиция встречается и под другим вариантом перевода названия с японского – Tolerance, Though Your Heart is Still Ablaze – «Терпимость, хотя твоё сердце всё ещё пылает». Трек №8 на первом официальном диске. 6) Melody of Unrelenting Gears – главная тема второй главы. Трек №9 на первом официальном диске. 7) Smoking Metropolis – основная тема сражений второй главы. И одна из шикарнейших композиций игры. Трек №3 на втором официальном диске. Большинство треков распространяется официально на двух дисках с саундтреком к игре. И было бы глупо, если бы эти диски не попали в сеть. Заинтересованные наверняка желают получить нечто вроде гайда. И неудивительно. В меню (да и в настройках персонажей тоже) действительно слишком много различных опций, что так и манят, потому, впервые зайдя в игру, можно почувствовать себя словно внезапно закинутым в ночной Лас-Вегас. Конечно, здесь имеются всяческие подсказки, тренировочные курсы и иже с ним, но проходя их, рядовой, ещё не втянувшийся игрок всё равно будет чувствовать себя так, словно его просто ведут как обезьянку. Чтобы получить нового героя (или его шарды, если этот герой уже есть, но об этом ниже), нужно его призвать. В главном меню Summon, а там найти в боковых опциях Rare Summon (призывы Ticket Summon и Normal Summon тоже можно инициировать безо всяких опасений). Свободный призыв героя доступен только раз в сутки, в то время как все остальные за гемы – местную полудонатную валюту, которая в принципе при регулярной игре вполне себе неплохо копится, если не растрачивать на ерунду. Чтобы играть новичку достаточно лишь найти в главном меню Quests – Story – Main Story, где можно проходить основную историю мало-помалу. Квесты в большинстве своём требуют AP – местный аналог энергии. Но проблему с AP новички не испытывают, так что заморачиваться этим не стоит. Гораздо большая проблема заключается в том, что юниты – герои – в скором времени начнут слабеть относительно квестов в истории, потому их нужно всячески улучшать. Улучшаются в боковом меню – верхний пункт – Units. Там ткнуть на иконку интересующего героя. Основное улучшение – уровень. Набирается за прохождение квестов, также его можно поднимать при помощи яблок. Другое улучшение – уровень профессии – Job Lv. Он увеличивается тогда, когда все шесть слотов в Equipment заполнены. А фрагменты экипировки фармятся на тех же квестах или крафтятся из других. Дальше. Если персонаж упёрся в максимальный уровень, то его можно увеличить при помощи limit break, но чтобы это сделать, нужно иметь soul shard’ы этого персонажа. Фармятся на hard-квестах, также можно получить за призыв. И кроме этого всего, максимальный уровень героя, его профы и даже лимит бриков можно увеличить при помощи Evolve. Лут для еволва фармится в специальных квестах. Следующий момент заключается в халяве. За выполнение различных заданий (а их можно выполнить даже не осознавая этого) в игре выдают различные награды. Конечно, для новичка они наверняка будут тёмным лесом, но лишнего тут точно нет ничего, потому их всегда нужно регулярно собирать. А собираются они в Milestones – миссии, как ежедневные, так и одноразовые (только осторожно: верхние два пункта в Daily – [Video Ads] – просмотр рекламы… не то чтобы её не имело смысла смотреть), Challenges – испытания, бывают постоянными, бывают временными, и Gifts – где может внезапно заваляться нечто подаренное. Или полученное. Разного рода магазины стоит проверять лишь тем, кто более-менее разобрался в игре, но есть ещё одно место, куда стоит на досуге заглянуть новичку – это Training Hall. Находится… если можно так выразиться, в городе, справа ото всех магазинов… нужно проскролить. Там разъясняют основные моменты игры вроде системы элементов (шпаргалка к которой всегда на видном месте в боях), нюансов вроде того, что лучники с высоких мест стреляют дальше и тому подобное. На английском это всё, правда… Игра довольно молодая и малоизвестная, но всё же успела породить свои мемы, некоторые из которых довольно забавны.
Перевод: Отдельной хохмой является Веттель – один из ключевых героев сайд-историй. Честный, добросовестный энвириец, талантливый мечник, неспособный пренебречь совестью даже ради всеобщего блага. Его доброжелательность, привлекательность и мастерство сделали его уважаемым у друзей и популярным у девушек. Виктор, и ты туда же?! В качестве юнита Веттель в большинстве случаев выполняет роль танка. К минусам игры. Пожалуй, ключевыми из них является тот факт, что она для мобильных устройств и что она на английском. И хотя по количеству контента может даже дать фору некоторым полноценным ММО, факт есть факт. Играть в неё на компьютере можно только через эмулятор (подойдёт, например, NOX). А английский… разве что учить. Каждому игроку присуждается уникальный код, который по сути является логином. Его без труда можно найти в профиле (в главном меню шестерня в левом верхнем углу, там же можно ник поменять). К этому профилю можно зарегистрировать пароль. Таким образом, используя код юзера и пароль можно входить в игру на других устройствах так, как обычно это делается в играх. Правда, стоит помнить, что все последующие заходы в профиль уже будут автоматическими, а данные для входа в предыдущий профиль, если он был, перезапишутся (короче говоря, регистрируйте пароль и записывайте вместе с кодом где-нибудь, чтобы случайно свою учётную запись не потерять, особенно, если кто-то захочет на вашем устройстве поиграть с собственной учёткой). А вообще возможно кому-то проще будет этим всем не заморачиваться и просто привязать свою учётку в игре к аккаунту Facebook. Донат и баланс. Тут ситуация неоднозначная. Игра завязана на коллекционировании. Персонажей, предметов экипировки, материалов для эволюции и т.д., и это можно и нужно долго и кропотливо выфармливать. Кроме того, присутствует внушительная доля случайности во всём этом. Короче говоря, с помощью доната можно серьёзно облегчить процесс коллекционирования и улучшения персонажей, но просто купить юнита-нагибалку и всех пабиждать – нельзя. Впрочем, если достаточно много вложить, то рано или поздно, но необходимый юнит и всё сопутствующее к нему всё-таки появится… Проблему усугубляет тот факт, что редкие юниты, в частности – кроссоверные: всякие там Леви из «Атаки титанов» и тому подобное фуфло, на которые люди и вкладывают деньги, зачастую очень сильные в плане своего урона. При особых обстоятельствах выдают абсолютно аномальные числа, что безусловно не сказывается на мнении о балансе в лучшую сторону. Это породило локальные мемы вроде «Free to pay game» (каламбур от Free to play game, всегда ваш, Капитан Очевидность). Однако, как ни странно, но в том, что касается ПВЕ, в игре достаточно бесплатных аналогов, которые можно достать своими силами. Кроме того, сильный в плане своего урона юнит не заменит ни мозгов, ни рук, и всякие умники, на это полагающиеся, идущие в мультиплеер на сложные квесты, сливаются уже через пару ходов. В том же, что касается ПВП, и вовсе ситуация обнадёживающая: практически на каждый плей есть контр-плей, на каждый пик есть контр-пик. И всё это реально собрать из свободных юнитов при некотором желании и усердии. По большому счёту получается, что те, кто используют мейнстримовые юниты, становятся предсказуемыми для тех, кто подбирает контр-плеи и втягиваются в механику игры. Всё это приводит к тому, что толковые игроки не ущемляются донатом, но сам факт, что мета смещена в сторону урона не может не досадовать, так как оставляет многих танков и саппортов не у дел. Да и, даже притом, что достойных юнитов более чем хватает, многие другие, в частности – ранние, начальные и малозвёздочные, просто не имеют своей нищи. Проще говоря, баланс есть, но подхрамывает он сильно. Другие недостатки игры связаны с её узкой ориентированностью. То есть игра хороша, но, пожалуй, лишь в своём жанре. Сюжет интересен, насыщен и хорошо отыгран, но в то же время банален. И в конце концов, очень многое в этой игре, как и во многих других ММО, связано с бесконечным гриндом. Можно, конечно, не зацикливаться на нём и просто проходить сюжетные истории себе в удовольствие, благо, что многим из них свойственно меняться, но, к сожалению или к счастью, очень многое действительно редкое или хотя бы просто интересующее конкретного игрока (не говоря уже о чём-то таком, что просто внезапно оказалось в дефиците) определённо нужно выфармливать. Что особенно печально, если квесты, на которых оно выфармливается высокого уровня. С другой стороны, постоянные ивенты, халява, расширение контента, а также эпичные фразы с другом в мультиплеере («Ты зачем бафнул стену?!» «Я СЛУЧАЙНО!») весомо это всё уравновешивают. Цепляться же к графике и вовсе уже тянет на придирку. Да и неплоха она как для игры для мобильных устройств. The Alchemist Code WikiDraft:The Alchemist Code WikiThe Alchemist Code is a free-to-play mobile strategy role-playing game developed by Gumi for iOS and Android devices. It is designed as a turn-based tactical role-playing game, using elements similar to titles such as Final Fantasy Tactics and Tactics Ogre. As part of the game’s gacha system, players can summon characters from the game’s story or other fan titles, which players can use to build a party of four units. Game play is presented in a 3D isometric view. Read more. Welcome to The Alchemist Code Wiki, an unofficial resource site created and maintained by the community. 31,178,893 users have helped the wiki maintain 208,250 pages (20,276 articles). Contribute Community Register The Alchemist Code WikiUnits are the characters you can collect and utilize when playing the game. ContentsObtaining Units [ ]Units can be obtained via a variety of sources: Rarity [ ]An empty rarity star. Each unit has a rarity, represent by the gold stars under its icon, or next to its name when viewing the unit’s details. Gold stars are the unit’s current rarity, while empty grey stars represent the unit’s ability to increase its rarity via evolving. Rarity has an effect on things like the units stats, max level, max job level, and maximum limit break. Different units have different starting rarity as well as different maximum rarity.
Evolving [ ]Evolving is a process by which a unit’s rarity can be increased. In order to evolve a unit must have an empty rarity star and must be max level for their current rarity (excluding levels added by limit breaks). Evolving also requires Zeni and special materials depending on the unit and its current rarity. See the individual unit’s page for the materials required for each stage of its evolution, or you can click on the evolve button for the unit to see what is required. Each unit starts with a single job and can unlock one or more additional jobs by Limit Breaking a certain number of times. Switching a unit’s active job changes the its stats and available abilities. Certain job abilities stay available to the unit once learned regardless of job, however, making it beneficial to level up all of the units jobs in order to increase the units usefulness and help distinguish it from other units with the same job. Jobs have levels which determine which abilities the job can learn and which gear the job can equip. A job’s level is increased by equipping all 6 pieces of equipment, however the unit’s rarity limits the maximum job level. Upon reaching job level 11 and equipping the last set of equipment a job will become mastered. Job Master [ ]When you raise your units to job level 11, then fill all the equipment slots at that level, the job is considered mastered. When you master a job you get a % bonus to a few specific stats (the stats that it benefits vary by job). Typically there is also a significant % boost to HP (hit points). The job mastery bonus not only applies to the currently active job, but to all jobs on the unit, regardless of which one is currently active. So to fully maximize a unit you may want to master all of their jobs. Because the amount of equipment required to fully master a job is significant, you may want to consider how heavily you are using the unit before investing in the secondary job masteries. The HP gain is usually enough reason to do it for any actively used unit in the long term, but in the short term the primary job is a higher priority. If you wish to know the mastery bonus you receive for a specific job you should look the unit up in Alchemist Code Database: Units. The job mastery bonus is listed under the job information section, under Job Master Bonus. Ability Setup [ ]When you have unlocked more than one job on a unit, you can use the job setup menu to configure the the job to use a mixture of abilities from that job and the other unlocked jobs. The main ability associated with a job is always locked to the active job, but you can utilize the basic ability from another unlocked job. You also get slots to select one counter ability and 2 passive abilities from any of those provided by the unlocked jobs on the unit. For most jobs raising them to job level 6 is sufficient to unlock all abilities, but there are some that require a higher job level for some abilities. Ability Leveling [ ]You can level each skill on a unit up to 20- the cost increases the higher the skill level. In most cases you will want to max the skill at 20 for any skill you are using on the unit. However there are some cases where it may be advantageous to leave a skill unleveled or unmaxed. Once trained a skill can’t be untrained (although if you do a job upgrade you will need to re-level your skills for that job). For more specific details about how to judge which abilities to level, see Ability Leveling. Limit break [ ]An empty limit break star. A filled limit break star. Limit break increases the maximum level of a unit and unlocks the unit’s additional jobs. In order to limit break a unit the player must have a certain number of Soul Shards specific to that unit. Different units can limit break a different number of times. How many times a Unit is able to limit break is indicated by the star shaped icons on the unit’s limit break button, with each star representing 5 limit breaks and the points of the star being individual limit breaks. For more information on how to acquire shards for limit breaks, see the Unit Shards page.
1 Not all units have 3rd jobs, even if they are able to limit break to these levels. Job+/Enchanted Job [ ]Note that some units also have a job+ or enchanted job upgrade available. Typically the job upgrade requires that you have 15 limit breaks and have reached job 11 on the job that the job upgrade replaces (i.e. sniper for Caris, bard for Polin). For more details, and to see a list of available upgrades, see Job Upgrades. Leader Skill [ ]A leader skill increases the stats of the entire team, typically based on certain restrictions (for Dark Units, for units from Envylia, etc. ) though some are more generalized. A full listing of leader skills can be found on the Unit Leader Skills page. Master Ability [ ]A master ability is an ultimate skill or stat improvement that some units can learn. Protagonists usually earn their master ability through a story quest. Other units typically learn their master ability through a level 80 character quest. More recent, limited units can obtain them through a trial (Babel War Arts) upon reaching level 85. (It is highly recommended that you level these units jobs and skills fully before attempting these limited unit trials). Enlightenment [ ]This unit upgrade feature allows for increasing the level cap on a unit from 85 to 97 (depending on the level of enlightenment you have invested in the unit) and can upgrade the stats, a passive the unit possesses, their leader bonus, strength vs. certain sins (Greed, Envy, Lust, Gluttony, Wrath, Sloth and Pride), abilities for their jobs and add a sub-memento slot. Individual units will get access to various levels of enlightenment gradually. For more details, see Enlightenment. Truth Seals [ ]Units have access to 6 truth seal slots they can use to enhance their stats further. For more details, see Truth Seals. Many units have alternative skins available through a variety of means. Some are permanently available, some temporary. Some are acquired via milestones or mission rewards, and some only through summons, gems or bundles. Some memento also provide skins. For more details on available skins, see the Alchemist Code Unit Skin Guide (GoogleDoc). You can select a skin on the unit page if you have one available. Video Game / Alchemist CodeEdit LockedA long time ago in the continent of Babel in which the Tower of Babel stands, two siblings; a brother named Nimul and the sister named Emmel invented the Art of Alchemy in order to reach their ambition to become gods. However as a result, humanity itself was in danger due to the exploitation of Alchemy as a tool of war, nearly pushing themselves to the brink of annihilation. Seeing the threat to mankind and it’s devastating powers, the Kingdoms of Babel formed the alliance of the Seven Kingdoms in which it was headed by a state called Northern Pride. As a result, Alchemy was branded as a forbidden art. A delicate balance and peace followed, being maintained by the Seven Kingdoms for several centuries. However in the year of 911, the tenuous peace crumbled when the Western Kingdom, Wratharis revived alchemy again as an instrument of warfare. And as a result of their actions, the remaining Kingdoms formed a United Suppression Army, with Envylia as their vanguard. the Kingdom of Wrath was dissolved and Alchemy as a weapon of war was once more, sealed away. Twenty years later, things began to change. As the forbidden seal of Alchemist begins showing signs of weakening, signalling an eminent foreshadowing of what’s to come. And as a result, 7 heroes from different nations are called for this epic journey; Logi Crowley and his half-brother Dias Crowley from Envylia, Edgar L. Leonhart from Slothstein, Lizbeth Finn from Lustberg, Tina from Saga Region, Kamui from Desert Region and Akame from Wadatsumi. The game was created and published by Fuji Games (Phantom of the Kill), with a global version via Gumi Inc. (Brave Frontier, Chain Chronicle). The Alchemist Code offers turn-based tactical RPG combat with a 3D isometric view and animations, plus Visual Novel style cutscenes featuring voice acting from Natsuki Hanae, Kaito Ishikawa, Yōko Hikasa, and others. New playable units are obtained via a gacha system, which in addition to original units from the game’s story also periodically offers crossover events featuring titles such as Fate/stay night, Disgaea, and so on. It also offers multiplayer elements such as co-op missions as well as an Arena mode to pit your best team against another player’s defending squad. An anime film adaptation produced by Satelight with Shoji Kawamori as the general director has been announced for a June 14, 2019 release. It takes place a few years into the events of the game, when a high school student named Kasumi Nagasaka is suddenly transported to the continent of Babel, where she encounters the game’s protagonists. This game transmutes the following tropes:The Alchemist Code WikiTeam BuildingContentsPreview [ ]When you start playing The Alchemist Code, you’ll be encountering easier quests and don’t need to worry too much about team synergy. You also won’t have a large collection of units to build focused teams. As a new player you’ll want to prioritize your best units regardless of team dynamics. Once you’ve built up a good collection of units in late game, team building becomes very important. By building a team with good synergy, well matched to the content you’re doing, you can make your team perform much better. You’ll want to have the ability to field teams of each element and tweak your teams for specialized needs. Advantages you’ll want to consider in Team Building [ ]Leader Skill [ ]Your first member of the team is the leader. Generally speaking some of the best leader skills are those focused on increasing the team’s damage. Select your units wisely to take advantage of the leader skill you choose, it will significantly improve their stats if you build your team appropriately. Check out the Leader Skills page if you need some directed advice. The 3 types of unit leader skills: Note: Some enlightenment leader skills can be a mixture of element and full team focused. Memento Leader Skill [ ]If you have access to max limit break mementos which provide leader skills, you can also use a memento leader skill in place of the unit leader skill. This gives more flexibility as to how to construct your teams, but this requires that all units in the party wear a memento in the same group as the memento leader skill (note the memento the unit is wearing does not have to belong to them). For more information, see Memento Leader Skills. Memento Groups [ ]Choosing mementos is a bit more complex. You’ll want to be mindful of not only who triggers a group buff, but the units that actually receive it. Choosing the right mementos can benefit others in your group and, if done right, each units memento can benefit multiple team members. Most memento group buffs are based around region, but some are more specific. For example, Desert Zone units have a lot of strong mementos that benefit each other, and there are several strong wind units in Desert Zone, so with the right mementos and a good wind leader, you can build a strong Desert Wind team. How to build a balanced team [ ]If you are aiming to deal with hard content like EX+/EX Hell, you might want to run through it a few times to decide which units best suit the challenges provided so you can clear them with a bit more ease. You can also check the quest details on Alchemist Code Database to see what enemies you’ll need to deal with before you go in. Choose a unit with a good leader skill for your whole team to take advantage of. If you have problems with stat debuffs (such as PATK or slash damage debuffs) on the map or stat buffs on enemy units (such as defense or resist buffs), you may want to bring someone who can remove them, like an Enchanter. If enemies on the map are vulnerable to status effects, you may want to bring units that can inflict those. For example, a Chronomancer can inflict stop, a Wild Beast Tamer can inflict rage, a Professor can inflict charm. This is also important, some Gear gives very good stat increases and/or abilities for you to handle the challenges of your quest. For example Wadatsumi Brush can give your unit very high Missile Resistance and Magic Resistance during the opening turns of battle. Wanderer Hat can give your unit added initial jewels so they can use a certain skill immediately or earlier (this thing is broken). Equipping mementos lets your team members have extra stats (either specific to them, for other members of the team, or both), and some have great vision abilities. For example Burning Desert Vow has a very good vision ability buff for whole team to do extra damage. The starting position can be very important on some maps, units may need to start in specific positions to do their jobs more effectively. You can check Alchemist Code Database or the Discord Bot to get a map of the quest and determine the starting position of each unit, or you can enter the quest to see where each unit will start. Note: You don’t need to follow these steps. Sometimes you may need to make exceptions. For example, you can take units that don’t take advantage of your leader skill if you think that unit will be the best option for the map. Team types commonly used in late game [ ]Mono Element Team [ ]The most prevalent and commonly used structure. Often preferred because many maps and quest missions are oriented towards a specific element. Example: If the map is primarily comprised of enemy units from Wind, you’ll likely want to bring a Fire team. These mono element teams can also be effective on maps with mixed element enemies simply due to the synergy provided by a good elemental leader skill. Regional Team [ ]The second most common teams are constructed using units from the same region/origin. These can be as powerful as a mono team, with the right unit selection, leader skill synergy and mementos. Example: This example team is very strong for farming enlightenment statues with the right gear and mementos equipped. Damage Modifier Team [ ]The third most common team is centered around a specific damage type. These are used less due to lower damage output, but they are sometimes required by the quest due to enemy resistances. Example: These teams are less viable in high end content like EX/EX+/EX-Hell/EX-Nightmare maps, but are perfectly suited for clearing normal quests quickly. The Alchemist Code WikiEnlightenmentKanon’s Enlightenment, with max levels in Envy and Sloth, three levels in Lust, two levels in Gluttony and no levels in Wrath Enlightenment (called Kaigan in Japan) is a mechanic where a unit is able to progress beyond level 85 and gain a variety of benefits. To unlock the ability to obtain Enlightenment, you need to do spend a «Circle of Truth». These come in three colors: blue (for 1-3 star units), yellow (for 4 star units), and red (for 5 star units). For a five star unit, unlocking also requires 10 rainbow golems, 10 rainbow pots, 30 golems of the unit’s elemental color, 30 Soul Alchemia, and 500,000 Zeni. This gives you access to the first gate (Envy). Each of the gates is named after one of the seven deadly sins. There are seven unlockable gates. ContentsGates [ ]Each gate you unlock will also increase the unit’s max level by +2, for a total of level 99 with seven gates. You must unlock 2 levels in a gate to unlock the next gate. Leveling up the gates requires a variety of materials (you can review the full costs through the Alchemist Code Database), but in terms of soul shards, the first level in each gate takes 5 soul shards, then each level takes 5 more soul shards than the last (so 50 shards total for the first 4 levels). Level 5 is an exception, with a differing cost for each gate (30 for Envy, 50 for Sloth, 40 for Lust, 40 for Gluttony, 50 for Wrath and 60 for Greed). For Pride the gate costs are higher than for the other gates (10 + 20 + 30 + 40 + 100). Note: It is rare that you will fully max all gates on a unit- in most cases you will focus on maxing out specific high value gates (which ones are high value varies by unit), then may fill out parts of other gates for bonus stats if you have shards to spare. Resource Costs [ ]Unlocking Enlightenment [ ]Note: Logi and Dias do not follow the standard unlock costs. Collaboration units also have special unlock costs. Gate Upgrade Costs [ ]Note that you must unlock the first 2 steps of a gate before you can progress to the next gate. The Sloth gate also typically requires that you have a specific job upgrade raised to job level 11 before unlocking it. Resource Types [ ]Resource Costs [ ]
Mana Golem x 10 | 0 | 0 | 750K | ||||||||||||||||||||||||||||||||||||||||||||||||||||||||||||||||||||||||||||||||||||||||||||||||||||||||||||||||||||||||||||||||||||||||||||||||||||||||||||||||||||||||
| 4 | 20 | 5 | 20 | Arcane Alchemia x 10 Rainbow Soul Golem x 5 | 0 | 0 | 1.5M | ||||||||||||||||||||||||||||||||||||||||||||||||||||||||||||||||||||||||||||||||||||||||||||||||||||||||||||||||||||||||||||||||||||||||||||||||||||||||||||||||||||
| 5 | 30 | 20 | 30 | Soul Golem x 20 Rainbow Soul Golem x 5 | 0 | Sinful Indulgence x 1 | 5M | ||||||||||||||||||||||||||||||||||||||||||||||||||||||||||||||||||||||||||||||||||||||||||||||||||||||||||||||||||||||||||||||||||||||||||||||||||||||||||||||||||||
| Total | 80 | 35 | 80 | Arcane Alchemia x 10 Goddess Jar x 10 | 0 | Sinful Indulgence x 1 | 7.9M | ||||||||||||||||||||||||||||||||||||||||||||||||||||||||||||||||||||||||||||||||||||||||||||||||||||||||||||||||||||||||||||||||||||||||||||||||||||||||||||||||||||
| Sloth | 1 | 5 | 0 | 5 | Soul Alchemia x 10 | 0 | 0 | 250K | |||||||||||||||||||||||||||||||||||||||||||||||||||||||||||||||||||||||||||||||||||||||||||||||||||||||||||||||||||||||||||||||||||||||||||||||||||||||||||||||||||
| 2 | 10 | 5 | 10 | Goddess Pot x 10 | 0 | 0 | 400K | ||||||||||||||||||||||||||||||||||||||||||||||||||||||||||||||||||||||||||||||||||||||||||||||||||||||||||||||||||||||||||||||||||||||||||||||||||||||||||||||||||||
| 3 | 15 | 10 | 15 | Rainbow Goddess Jar x 5 Mana Golem x 10 | 0 | 0 | 750K | ||||||||||||||||||||||||||||||||||||||||||||||||||||||||||||||||||||||||||||||||||||||||||||||||||||||||||||||||||||||||||||||||||||||||||||||||||||||||||||||||||||
| 4 | 20 | 15 | 20 | Soul Alchemia x 20 Rainbow Goddess Pot x 5 | 0 | 0 | 1.5M | ||||||||||||||||||||||||||||||||||||||||||||||||||||||||||||||||||||||||||||||||||||||||||||||||||||||||||||||||||||||||||||||||||||||||||||||||||||||||||||||||||||
| 5 | 50 | 50 | 30 | Arcane Alchemia x 5 Soul Golem x 30 | 0 | Sinful Indulgence x 2 | 10M | ||||||||||||||||||||||||||||||||||||||||||||||||||||||||||||||||||||||||||||||||||||||||||||||||||||||||||||||||||||||||||||||||||||||||||||||||||||||||||||||||||||
| Total | 100 | 80 | 80 | Soul Alchemia x 30 Arcane Alchemia x 5 | 0 | Sinful Indulgence x 2 | 12.9M | ||||||||||||||||||||||||||||||||||||||||||||||||||||||||||||||||||||||||||||||||||||||||||||||||||||||||||||||||||||||||||||||||||||||||||||||||||||||||||||||||||||
| Lust | 1 | 5 | 0 | 5 | Soul Alchemia x 10 | 0 | 0 | 250K | |||||||||||||||||||||||||||||||||||||||||||||||||||||||||||||||||||||||||||||||||||||||||||||||||||||||||||||||||||||||||||||||||||||||||||||||||||||||||||||||||||
| 2 | 10 | 5 | 10 | Goddess Jar x 10 | 0 | 0 | 400K | ||||||||||||||||||||||||||||||||||||||||||||||||||||||||||||||||||||||||||||||||||||||||||||||||||||||||||||||||||||||||||||||||||||||||||||||||||||||||||||||||||||
| 3 | 15 | 10 | 15 | Soul Alchemia x 20 Arcane Alchemia x 5 | 0 | 0 | 750K | ||||||||||||||||||||||||||||||||||||||||||||||||||||||||||||||||||||||||||||||||||||||||||||||||||||||||||||||||||||||||||||||||||||||||||||||||||||||||||||||||||||
| 4 | 20 | 15 | 20 | Soul Alchemia x 20 Rainbow Soul Golem x 5 | 0 | 0 | 1.5M | ||||||||||||||||||||||||||||||||||||||||||||||||||||||||||||||||||||||||||||||||||||||||||||||||||||||||||||||||||||||||||||||||||||||||||||||||||||||||||||||||||||
| 5 | 40 | 30 | 30 | Goddess Pot x 30 Rainbow Goddess Pot x 5 | 0 | Sinful Indulgence x 2 | 8M | ||||||||||||||||||||||||||||||||||||||||||||||||||||||||||||||||||||||||||||||||||||||||||||||||||||||||||||||||||||||||||||||||||||||||||||||||||||||||||||||||||||
| Total | 90 | 60 | 80 | Soul Alchemia x 50 Arcane Alchemia x 5 | 0 | Sinful Indulgence x 2 | 10.9M | ||||||||||||||||||||||||||||||||||||||||||||||||||||||||||||||||||||||||||||||||||||||||||||||||||||||||||||||||||||||||||||||||||||||||||||||||||||||||||||||||||||
| Gluttony | 1 | 5 | 0 | 5 | Goddess Jar x 10 | 0 | 0 | 250K | |||||||||||||||||||||||||||||||||||||||||||||||||||||||||||||||||||||||||||||||||||||||||||||||||||||||||||||||||||||||||||||||||||||||||||||||||||||||||||||||||||
| 2 | 10 | 5 | 10 | Mana Golem x 10 | 0 | 0 | 400K | ||||||||||||||||||||||||||||||||||||||||||||||||||||||||||||||||||||||||||||||||||||||||||||||||||||||||||||||||||||||||||||||||||||||||||||||||||||||||||||||||||||
| 3 | 15 | 5 | 15 | Arcane Alchemia x 5 Goddess Jar x 10 | 5 | 0 | 750K | ||||||||||||||||||||||||||||||||||||||||||||||||||||||||||||||||||||||||||||||||||||||||||||||||||||||||||||||||||||||||||||||||||||||||||||||||||||||||||||||||||||
| 4 | 20 | 5 | 20 | Goddess Pot x 10 Rainbow Goddess Jar x 5 | 5 | 0 | 1.5M | ||||||||||||||||||||||||||||||||||||||||||||||||||||||||||||||||||||||||||||||||||||||||||||||||||||||||||||||||||||||||||||||||||||||||||||||||||||||||||||||||||||
| 5 | 40 | 20 | 30 | 10 | Sinful Indulgence x 2 | 8M | |||||||||||||||||||||||||||||||||||||||||||||||||||||||||||||||||||||||||||||||||||||||||||||||||||||||||||||||||||||||||||||||||||||||||||||||||||||||||||||||||||||
| Total | 90 | 35 | 80 | Arcane Alchemia x 5 Goddess Jar x 20 | 10.9M | ||||||||||||||||||||||||||||||||||||||||||||||||||||||||||||||||||||||||||||||||||||||||||||||||||||||||||||||||||||||||||||||||||||||||||||||||||||||||||||||||||||||
| Wrath | 1 | 5 | 0 | 5 | Goddess Jar x 10 | 0 | 0 | 250K | |||||||||||||||||||||||||||||||||||||||||||||||||||||||||||||||||||||||||||||||||||||||||||||||||||||||||||||||||||||||||||||||||||||||||||||||||||||||||||||||||||
| 2 | 10 | 5 | 10 | Soul Alchemia x 10 | 0 | 0 | 400K | ||||||||||||||||||||||||||||||||||||||||||||||||||||||||||||||||||||||||||||||||||||||||||||||||||||||||||||||||||||||||||||||||||||||||||||||||||||||||||||||||||||
| 3 | 15 | 5 | 15 | Goddess Jar x 10 Rainbow Soul Golem x 5 | 5 | 0 | 750K | ||||||||||||||||||||||||||||||||||||||||||||||||||||||||||||||||||||||||||||||||||||||||||||||||||||||||||||||||||||||||||||||||||||||||||||||||||||||||||||||||||||
| 4 | 20 | 5 | 20 | Arcane Alchemia x 5 Soul Golem x 10 | 5 | 0 | 1.5M | ||||||||||||||||||||||||||||||||||||||||||||||||||||||||||||||||||||||||||||||||||||||||||||||||||||||||||||||||||||||||||||||||||||||||||||||||||||||||||||||||||||
| 5 | 50 | 20 | 30 | 10 | Sinful Indulgence x 2 | 10M | |||||||||||||||||||||||||||||||||||||||||||||||||||||||||||||||||||||||||||||||||||||||||||||||||||||||||||||||||||||||||||||||||||||||||||||||||||||||||||||||||||||
| Total | 100 | 35 | 80 | Soul Alchemia x 10 Arcane Alchemia x 5 | 12.9M | ||||||||||||||||||||||||||||||||||||||||||||||||||||||||||||||||||||||||||||||||||||||||||||||||||||||||||||||||||||||||||||||||||||||||||||||||||||||||||||||||||||||
| Greed | 1 | 5 | 0 | 0 | 5 | 0 | 500K | ||||||||||||||||||||||||||||||||||||||||||||||||||||||||||||||||||||||||||||||||||||||||||||||||||||||||||||||||||||||||||||||||||||||||||||||||||||||||||||||||||||
| 2 | 10 | 5 | 10 | 10 | 0 | 800K | |||||||||||||||||||||||||||||||||||||||||||||||||||||||||||||||||||||||||||||||||||||||||||||||||||||||||||||||||||||||||||||||||||||||||||||||||||||||||||||||||||||
| 3 | 15 | 10 | 15 | Goddess Jar x 5 (Jar) Rainbow Goddess Jar x 5 | 15 | 0 | 1.5M | ||||||||||||||||||||||||||||||||||||||||||||||||||||||||||||||||||||||||||||||||||||||||||||||||||||||||||||||||||||||||||||||||||||||||||||||||||||||||||||||||||||
| 4 | 20 | 15 | 20 | Goddess Pot x 20 Rainbow Goddess Pot x 10 | 20 | 0 | 3M | ||||||||||||||||||||||||||||||||||||||||||||||||||||||||||||||||||||||||||||||||||||||||||||||||||||||||||||||||||||||||||||||||||||||||||||||||||||||||||||||||||||
| 5 | 60 | 50 | 30 | 30 | Retribution for Sin x 2 | 15M | |||||||||||||||||||||||||||||||||||||||||||||||||||||||||||||||||||||||||||||||||||||||||||||||||||||||||||||||||||||||||||||||||||||||||||||||||||||||||||||||||||||
| Total | 110 | 80 | 80 | Goddess Jar x 5 Rainbow Goddess Jar x 5 | 20.8M | ||||||||||||||||||||||||||||||||||||||||||||||||||||||||||||||||||||||||||||||||||||||||||||||||||||||||||||||||||||||||||||||||||||||||||||||||||||||||||||||||||||||
| Pride | 1 | 10 | 0 | 5 | 10 | 0 | 1M | ||||||||||||||||||||||||||||||||||||||||||||||||||||||||||||||||||||||||||||||||||||||||||||||||||||||||||||||||||||||||||||||||||||||||||||||||||||||||||||||||||||
| 2 | 20 | 20 | 10 | 15 | 0 | 1.5M | |||||||||||||||||||||||||||||||||||||||||||||||||||||||||||||||||||||||||||||||||||||||||||||||||||||||||||||||||||||||||||||||||||||||||||||||||||||||||||||||||||||
| 3 | 30 | 30 | 15 | Goddess Pot x 5 Mana Golem x 20 | 20 | 0 | 3M | ||||||||||||||||||||||||||||||||||||||||||||||||||||||||||||||||||||||||||||||||||||||||||||||||||||||||||||||||||||||||||||||||||||||||||||||||||||||||||||||||||||
| 4 | 40 | 40 | 20 | Soul Alchemia x 30 (Soul) Arcane Alchemia x 10 | 25 | 6M | |||||||||||||||||||||||||||||||||||||||||||||||||||||||||||||||||||||||||||||||||||||||||||||||||||||||||||||||||||||||||||||||||||||||||||||||||||||||||||||||||||||
| 5 | 100 | 50 | 30 | 30 | Sinful Bubble x 2 | 30M | |||||||||||||||||||||||||||||||||||||||||||||||||||||||||||||||||||||||||||||||||||||||||||||||||||||||||||||||||||||||||||||||||||||||||||||||||||||||||||||||||||||
| Total | 200 | 140 | 80 | Soul Alchemia x 30 Arcane Alchemia x 10 | 41.5M | ||||||||||||||||||||||||||||||||||||||||||||||||||||||||||||||||||||||||||||||||||||||||||||||||||||||||||||||||||||||||||||||||||||||||||||||||||||||||||||||||||||||
| Total | 770 | 465 | 560 | Soul Alchemia x 120 Arcane Alchemia x 40 Note: Units that are below 5 star rarity use only one Sinful Bubble for maxing gate 6 and one Final Acquittal Stamp for maxing gate 7 instead of two. Common Configurations [ ]Collaboration Unit Enlightenment Items [ ]For collaboration units, there are alternative items you can use in place of standard items for enlightenment. Note that this does not include units like Sacred Stone Memories and time limited units, only ones from external game collaborations. This eye is used for unlocking enlightenment on some (but not all) free units from collaborations. Other collaboration units use standard eyes based on the unit rarity. Otherworlder Enlightenment Shard [ ]These shards can be used in place of standard unit shards when enlightening a collaboration unit. They can only be used once you have consumed all shards of a unit. These shards will work for crossover units such as EO Chloe and EO Shenmei. These do not work for Nero or Bianca. Otherworldly Indulgence [ ]These are used instead of sinful indulgence for units from other (such as collaboration units). Note that these are only usable by full collaboration units and not crossover units such as EO Chloe and EO Shenmei- they use standard sinful indulgence. Otherworldly Retribution [ ]These are used instead of retribution for sin for units from other (such as collaboration units). Note that these are only usable by full collaboration units and not crossover units such as EO Chloe and EO Shenmei- they use standard retribution for sin. Otherworldly Bubble [ ]These are used instead of sinful bubble for units from other (such as collaboration units). Note that these are only usable by full collaboration units and not crossover units such as EO Chloe and EO Shenmei- they use standard sinful bubble. Otherworldly Acquittal Stamp [ ]These are used instead of final acquittal stamp for units from other (such as collaboration units). Note that these are only usable by full collaboration units and not crossover units such as EO Chloe and EO Shenmei- they use the standard final acquittal stamp. Special Unit Enlightenment Items [ ]For some units, they use special items for parts of their enlightenment which are only obtainable in events associated with the units. Many Genesis units can only obtain certain enlightenment items from Godless Revolution. Gilfred can only obtain some of his enlightenment items from Mystic World Mobius. For a full list of where to find these specialized items, see Specialized Enlightenment Materials. The Alchemist Code WikiEvery playable unit has a set selection of up to 3 jobs that they may choose from. A unit may only have a single job active, dictating its basic attack, primary ability and attributes. However, the abilities from a unit’s jobs may be equipped, allowing a level of customization. ContentsWhat is a Job? [ ]A job provides a collection of skills to a unit. Every job comes with a set of main skills, a set of basic/sub skills, a reactive and at least one passive. Each job is standardized across all units that have that job, but there are some unique jobs only available to a specific unit and there are job upgrades available for many jobs. See List of jobs for summaries of most of the available jobs. When the job is selected as the currently active job, the unit also receives the stat benefits from the equipment applied to raise the job levels of that job (all job mastery bonuses will be available regardless of the active job). Accessing Jobs [ ]Once you have the appropriate number of limit breaks to access a job, you must unlock it using 6 of the appropriate job tokens for that job. Clicking on the job token slot will show you where you can obtain that particular job token from event quests (these can be done in single or multiplayer version). Alternatively you can buy job tokens from shops, although the stock of tokens changes regularly. Note that some collaboration unit specific job tokens are only available during the relevant collaboration event (such as the caster tokens for Fate Yomi), but you can use wildcard job tokens to replace them. Wildcard job tokens can’t be used for job upgrades, only base jobs. Upgrading Job Levels [ ]Once you have unlocked a job, you can upgrade the job levels of that job by applying equipment. Each job level requires 6 specific pieces of equipment to upgrade to the next job level. Most of the equipment is generic and is used by multiple jobs, but the first equipment slot for job levels 9 to 11 of a unit is a job-specific item that is only used by that job. Note that for collaboration units, they often have at least one job which is limited to the collaboration, and those job-specific items are typically only available to be acquired during the collaboration. If you do not obtain these before the collaboration is over, you won’t be able to maximize the unit unless you use Omnicrystal Equipment Diagram Pieces to replace the job-specific items. These are only available in limited quantities from occasional sources such as bundles or celebration shops. Job Mastery [ ]When you raise your units to job level 11, then fill all the equipment slots at that level, the job is considered mastered. When you master a job you get a % bonus to a few specific stats (the stats that it benefits vary by job). The job mastery bonus not only applies to the currently active job, but to all jobs on the unit, regardless of which one is currently active. So to fully maximize a unit you may want to master all of their jobs. Enhancing Equipment [ ]Once you have raised a unit’s job level to 11, you may wish to enhance the job level 11 equipment items for additional stats. This will only impact the unit when they are using that job as their main job, so it is not useful to enhance equipment for jobs on the unit that are only used for extra stats or abilities. Job Configuration [ ]Once you have access to more than one job on a unit, you will want to configure their abilities. You can change the active job on a unit in the unit screen by clicking on the job, then clicking the «Job Change» button. The currently active job is flagged as «Set». You can then click on «Ability Setup» to adjust which abilities are enabled for that job. There are 5 slots available to configure: Job Upgrades [ ]Note that some units also have a job+ or enchanted job upgrade available. Both types of upgrade require that you have 15 limit breaks and have reached job 11 on the job that the upgrade replaces (i.e. sniper for Caris, bard for Polin). To upgrade to a job+ on a unit typically requires special tokens and equipment that are only available during a limited time event. For enchanted job upgrades, the tokens and equipment are permanently available. When you upgrade, the new job fully will replace the job it upgrades (including the job mastery, so there is no reason to master the old job before upgrading). You should never do the job upgrade until you are sure you have acquired all the necessary materials to fully master the job, especially in the case of job+, because those materials will not be available again until the event is rerun, which can take a long time. In some cases a unit may have a 2nd level job upgrade, known as a J++ (for a job+ upgrade to a job+) or a JE+ (for a job+ upgrade to an enchanted job). To access the 2nd level upgrade, you must first upgrade to the first level, then job level that to at least job level 11, at which point you can apply the 2nd level upgrade. 2nd level job upgrades start at job level 11, so you won’t need to raise the other job levels a 3rd time, just apply the items specific to that job upgrade to master it. See Job Upgrades for a list of all currently available upgrades. The Alchemist Code WikiAbout the Game
The Alchemist Code is a free-to-play mobile strategy role-playing game developed by Fuji&gumi Games and gg2 and published by gumi Inc., for iOS and Android devices. It was released in Japan under the name For Whom the Alchemist Exists (誰ガ為のアルケミスト, ta ga tame no arukemisuto) in January 2016. The global version officially launched on November 14, 2017. It is designed as a turn-based tactical role-playing game, using features similar to titles such as Final Fantasy Tactics and Tactics Ogre. The Alchemist Code features a job/class system where each character has three set jobs. These jobs can be built up independently from one another, and some of the abilities from one job can be used on the character even when running a separate job as their main job. This presents the player with several build options for each of their characters. Each character also has an element associated with them, creating a sort of paper-rock-scissors mechanic between the different units. As part of the game’s gacha system, players can summon characters from the game’s story or other fan titles, such as Fate/stay Night, Disgaea, Final Fantasy XV, and Full Metal Alchemist, to name a few. Players can then build a team of four main members around these units, with the ability to bring in one of your friend’s units as a mercenary, and two sub-in units for when one of your other five units die. The game features multiple game modes. Story mode takes you through various chapters, each with a different main character along the same timeline. Story mode also has a hard mode that allows you to obtain «character shards» that are used to increase the strength of your units. Event mode allows you to meet additional characters along various timelines and regions. These event missions tend to have three different difficulties: normal, hard (EX), and very hard (EX+). There is also a co-op multiplayer option for these event missions. Character mode allows you to play three levels that immerses you in characters within your roster. Veda Tower is a timed but reoccurring event that allows you to climb various levels of increasing difficulty. Finally, there are two PvP modes: an automated mode controlled by the AI, and a live PvP mode. The Alchemist Code uses an anime style of art. The character portraits and models, as well as the level design and cinematics adhere to this art style. Gameplay is presented in a 3D isometric view. Although the text in the global version is in English/French/German/Spanish (depending on your settings), all of the voices are in Japanese. The development team includes senior producer Taku Aizawa, who also worked on Brave Exvius. Yoko Shimomura, Shinya Tanaka, and Shigeki Hayashi composed the soundtrack, while Shoji Kawamori worked on the opening animation video. That video can be viewed on the right. The Alchemist Code WikiReroll GuideWhile The Alchemist Code is actually incredibly F2P friendly and thus it is not necessary to reroll, starting with a strong limited unit early on can be a huge help. If you don’t start with a good set of units, it is suggested to reroll, but if you would prefer to just play instead of spending a few hours or even a day or two trying to get the perfect units, then you are not doomed unlike in many other gacha games, in large part because many S-SS tier units are free or can be farmed. ContentsBanner Summon Advice [ ]A new account typically has access to a total of 3500 gems after initial gems and the rewards for summoning (you get 750 gems back after your first 500 gem summon, plus another 500 gems from the daily new player summon milestone and 750 gems for leveling a unit to 50). You should not start over your account until after you have done all the high priority discount summons you can afford. Which banners you should summon on will be contextual to the events of the week. Most good limited units are now on banners that cost 2500 gems to summon, so new players will only be able to afford to do those without farming additional gems if a summon discount ticket is available to reduce the price to 500 gems (there should be one in your expiring gifts mailbox, they are sent weekly). If you have enough gems to do a 2nd step at the 2500 price on the banner after doing the first one and not getting a target unit (which should be possible if you collect the rewards listed above) it is a good idea to do that 2nd step before starting over. Note: Due to how variable the banner recommendations are from week to week, it is highly recommended to ask for help on Discord in #ac_questions to determine what the reroll priority is for the week. How to Reroll [ ]Android or Android emulator (such as Nox or Bluestacks): Close the app and go to Android > data > SG.gumi.alchemistww > files and delete «gu3c.dat«. (If you have root enabled in Nox, you may first need to navigate to sdcard to find the Android directory). You may need a file manager that will show you hidden files. One that has been reported to work is CX File Explorer. iOS: Reinstall the app (note that if you have jailbroken your device you may also be able to find the gu3c.dat file and remove it) Reroll Unit Targets [ ]During Collaboration [ ]Generally speaking, if you are starting the game during a collaboration, you should try to get the best unit from it, as they are not available outside of the event and are usually (but not always) an SS tier unit. This was especially true for units like Levi or Merlinus, who were dominant in their elements; there are typically 1 or 2 of these units for every collab, and if you are a particular perfectionist, you may want to roll for both if there’s more than one. Disclaimer: if you are rerolling on a collab, you NEED to obtain 3 copies of a unit’s equipment and it would be greatly preferred to transmute (craft) the gear needed to use their Weapon Ability (essentially an ultimate attack). Even if you have to gem for continues on these quests, it is worth it. If you don’t at least obtain the equipment, your unit will be useless as you will not be able to max their unique job and their maximum potential could also take a hit without their special weapon/gear (if available for the unit). It is possible to get wildcard (Omnicrystal) equipment to replace it, but it is not plentiful so it could take a long time to put the unit into service. Outside a Collaboration [ ]If a collab is not happening, but there are other good quality limited units available on a banner, you should typically reroll on that. Some examples are: When no strong limited units are featured on a banner (this is extremely unlikely), you’d want to reroll for the best units you can get in the normal pool. Note that most normal pool units are farmable, but will take a while to farm to a good level. Ideally you want to look for units which are relatively useful with their first job (or are farmable and useful with their second job) and have a good long term rating. You will get many free units in your first week as well as a unit selector with shards to bring one unit to 15 limit breaks, so you don’t need to worry too much if you don’t get anything you can use right away and don’t want to spend a lot of time rerolling. You can consult the tier list to get an idea of the current rankings of units (see Using the Tier List for more advice on how to understand it). But keep in mind the rankings are based on units at max power, and many units require a lot of investment or time to reach max power. The recommended reroll targets are usually ones that don’t require a ton of investment to play well on a new account. Also keep an eye on the Viable and Important information for units, as this will let you know if a unit requires something (such as a limited time job upgrade) you may not have to maximize their power. If you want more help figuring out which units to target based on the current game events, ask for help on Discord in #ac_questions. Typically the recommended reroll target will be pinned in the #gacha-sak_salts_rerolls channel. The Alchemist Code WikiEnlightenmentKanon’s Enlightenment, with max levels in Envy and Sloth, three levels in Lust, two levels in Gluttony and no levels in Wrath Enlightenment (called Kaigan in Japan) is a mechanic where a unit is able to progress beyond level 85 and gain a variety of benefits. To unlock the ability to obtain Enlightenment, you need to do spend a «Circle of Truth». These come in three colors: blue (for 1-3 star units), yellow (for 4 star units), and red (for 5 star units). For a five star unit, unlocking also requires 10 rainbow golems, 10 rainbow pots, 30 golems of the unit’s elemental color, 30 Soul Alchemia, and 500,000 Zeni. This gives you access to the first gate (Envy). Each of the gates is named after one of the seven deadly sins. There are seven unlockable gates. ContentsGates [ ]Each gate you unlock will also increase the unit’s max level by +2, for a total of level 99 with seven gates. You must unlock 2 levels in a gate to unlock the next gate. Leveling up the gates requires a variety of materials (you can review the full costs through the Alchemist Code Database), but in terms of soul shards, the first level in each gate takes 5 soul shards, then each level takes 5 more soul shards than the last (so 50 shards total for the first 4 levels). Level 5 is an exception, with a differing cost for each gate (30 for Envy, 50 for Sloth, 40 for Lust, 40 for Gluttony, 50 for Wrath and 60 for Greed). For Pride the gate costs are higher than for the other gates (10 + 20 + 30 + 40 + 100). Note: It is rare that you will fully max all gates on a unit- in most cases you will focus on maxing out specific high value gates (which ones are high value varies by unit), then may fill out parts of other gates for bonus stats if you have shards to spare. Resource Costs [ ]Unlocking Enlightenment [ ]Note: Logi and Dias do not follow the standard unlock costs. Collaboration units also have special unlock costs. Gate Upgrade Costs [ ]Note that you must unlock the first 2 steps of a gate before you can progress to the next gate. The Sloth gate also typically requires that you have a specific job upgrade raised to job level 11 before unlocking it. Resource Types [ ]Resource Costs [ ]
Mana Golem x 10 | 0 | 0 | 750K | ||||||||||||||||||||||||||||||||||||||||||||||||||||||||||||||||||||||||||||||||||||||||||||||||||||||||||||||||||||||||||||||||||||||||||||||||||||||||||||||||||||
| 4 | 20 | 5 | 20 | Arcane Alchemia x 10 Rainbow Soul Golem x 5 | 0 | 0 | 1.5M | ||||||||||||||||||||||||||||||||||||||||||||||||||||||||||||||||||||||||||||||||||||||||||||||||||||||||||||||||||||||||||||||||||||||||||||||||||||||||||||||||||||
| 5 | 30 | 20 | 30 | Soul Golem x 20 Rainbow Soul Golem x 5 | 0 | Sinful Indulgence x 1 | 5M | ||||||||||||||||||||||||||||||||||||||||||||||||||||||||||||||||||||||||||||||||||||||||||||||||||||||||||||||||||||||||||||||||||||||||||||||||||||||||||||||||||||
| Total | 80 | 35 | 80 | Arcane Alchemia x 10 Goddess Jar x 10 | 0 | Sinful Indulgence x 1 | 7.9M | ||||||||||||||||||||||||||||||||||||||||||||||||||||||||||||||||||||||||||||||||||||||||||||||||||||||||||||||||||||||||||||||||||||||||||||||||||||||||||||||||||||
| Sloth | 1 | 5 | 0 | 5 | Soul Alchemia x 10 | 0 | 0 | 250K | |||||||||||||||||||||||||||||||||||||||||||||||||||||||||||||||||||||||||||||||||||||||||||||||||||||||||||||||||||||||||||||||||||||||||||||||||||||||||||||||||||
| 2 | 10 | 5 | 10 | Goddess Pot x 10 | 0 | 0 | 400K | ||||||||||||||||||||||||||||||||||||||||||||||||||||||||||||||||||||||||||||||||||||||||||||||||||||||||||||||||||||||||||||||||||||||||||||||||||||||||||||||||||||
| 3 | 15 | 10 | 15 | Rainbow Goddess Jar x 5 Mana Golem x 10 | 0 | 0 | 750K | ||||||||||||||||||||||||||||||||||||||||||||||||||||||||||||||||||||||||||||||||||||||||||||||||||||||||||||||||||||||||||||||||||||||||||||||||||||||||||||||||||||
| 4 | 20 | 15 | 20 | Soul Alchemia x 20 Rainbow Goddess Pot x 5 | 0 | 0 | 1.5M | ||||||||||||||||||||||||||||||||||||||||||||||||||||||||||||||||||||||||||||||||||||||||||||||||||||||||||||||||||||||||||||||||||||||||||||||||||||||||||||||||||||
| 5 | 50 | 50 | 30 | Arcane Alchemia x 5 Soul Golem x 30 | 0 | Sinful Indulgence x 2 | 10M | ||||||||||||||||||||||||||||||||||||||||||||||||||||||||||||||||||||||||||||||||||||||||||||||||||||||||||||||||||||||||||||||||||||||||||||||||||||||||||||||||||||
| Total | 100 | 80 | 80 | Soul Alchemia x 30 Arcane Alchemia x 5 | 0 | Sinful Indulgence x 2 | 12.9M | ||||||||||||||||||||||||||||||||||||||||||||||||||||||||||||||||||||||||||||||||||||||||||||||||||||||||||||||||||||||||||||||||||||||||||||||||||||||||||||||||||||
| Lust | 1 | 5 | 0 | 5 | Soul Alchemia x 10 | 0 | 0 | 250K | |||||||||||||||||||||||||||||||||||||||||||||||||||||||||||||||||||||||||||||||||||||||||||||||||||||||||||||||||||||||||||||||||||||||||||||||||||||||||||||||||||
| 2 | 10 | 5 | 10 | Goddess Jar x 10 | 0 | 0 | 400K | ||||||||||||||||||||||||||||||||||||||||||||||||||||||||||||||||||||||||||||||||||||||||||||||||||||||||||||||||||||||||||||||||||||||||||||||||||||||||||||||||||||
| 3 | 15 | 10 | 15 | Soul Alchemia x 20 Arcane Alchemia x 5 | 0 | 0 | 750K | ||||||||||||||||||||||||||||||||||||||||||||||||||||||||||||||||||||||||||||||||||||||||||||||||||||||||||||||||||||||||||||||||||||||||||||||||||||||||||||||||||||
| 4 | 20 | 15 | 20 | Soul Alchemia x 20 Rainbow Soul Golem x 5 | 0 | 0 | 1.5M | ||||||||||||||||||||||||||||||||||||||||||||||||||||||||||||||||||||||||||||||||||||||||||||||||||||||||||||||||||||||||||||||||||||||||||||||||||||||||||||||||||||
| 5 | 40 | 30 | 30 | Goddess Pot x 30 Rainbow Goddess Pot x 5 | 0 | Sinful Indulgence x 2 | 8M | ||||||||||||||||||||||||||||||||||||||||||||||||||||||||||||||||||||||||||||||||||||||||||||||||||||||||||||||||||||||||||||||||||||||||||||||||||||||||||||||||||||
| Total | 90 | 60 | 80 | Soul Alchemia x 50 Arcane Alchemia x 5 | 0 | Sinful Indulgence x 2 | 10.9M | ||||||||||||||||||||||||||||||||||||||||||||||||||||||||||||||||||||||||||||||||||||||||||||||||||||||||||||||||||||||||||||||||||||||||||||||||||||||||||||||||||||
| Gluttony | 1 | 5 | 0 | 5 | Goddess Jar x 10 | 0 | 0 | 250K | |||||||||||||||||||||||||||||||||||||||||||||||||||||||||||||||||||||||||||||||||||||||||||||||||||||||||||||||||||||||||||||||||||||||||||||||||||||||||||||||||||
| 2 | 10 | 5 | 10 | Mana Golem x 10 | 0 | 0 | 400K | ||||||||||||||||||||||||||||||||||||||||||||||||||||||||||||||||||||||||||||||||||||||||||||||||||||||||||||||||||||||||||||||||||||||||||||||||||||||||||||||||||||
| 3 | 15 | 5 | 15 | Arcane Alchemia x 5 Goddess Jar x 10 | 5 | 0 | 750K | ||||||||||||||||||||||||||||||||||||||||||||||||||||||||||||||||||||||||||||||||||||||||||||||||||||||||||||||||||||||||||||||||||||||||||||||||||||||||||||||||||||
| 4 | 20 | 5 | 20 | Goddess Pot x 10 Rainbow Goddess Jar x 5 | 5 | 0 | 1.5M | ||||||||||||||||||||||||||||||||||||||||||||||||||||||||||||||||||||||||||||||||||||||||||||||||||||||||||||||||||||||||||||||||||||||||||||||||||||||||||||||||||||
| 5 | 40 | 20 | 30 | 10 | Sinful Indulgence x 2 | 8M | |||||||||||||||||||||||||||||||||||||||||||||||||||||||||||||||||||||||||||||||||||||||||||||||||||||||||||||||||||||||||||||||||||||||||||||||||||||||||||||||||||||
| Total | 90 | 35 | 80 | Arcane Alchemia x 5 Goddess Jar x 20 | 10.9M | ||||||||||||||||||||||||||||||||||||||||||||||||||||||||||||||||||||||||||||||||||||||||||||||||||||||||||||||||||||||||||||||||||||||||||||||||||||||||||||||||||||||
| Wrath | 1 | 5 | 0 | 5 | Goddess Jar x 10 | 0 | 0 | 250K | |||||||||||||||||||||||||||||||||||||||||||||||||||||||||||||||||||||||||||||||||||||||||||||||||||||||||||||||||||||||||||||||||||||||||||||||||||||||||||||||||||
| 2 | 10 | 5 | 10 | Soul Alchemia x 10 | 0 | 0 | 400K | ||||||||||||||||||||||||||||||||||||||||||||||||||||||||||||||||||||||||||||||||||||||||||||||||||||||||||||||||||||||||||||||||||||||||||||||||||||||||||||||||||||
| 3 | 15 | 5 | 15 | Goddess Jar x 10 Rainbow Soul Golem x 5 | 5 | 0 | 750K | ||||||||||||||||||||||||||||||||||||||||||||||||||||||||||||||||||||||||||||||||||||||||||||||||||||||||||||||||||||||||||||||||||||||||||||||||||||||||||||||||||||
| 4 | 20 | 5 | 20 | Arcane Alchemia x 5 Soul Golem x 10 | 5 | 0 | 1.5M | ||||||||||||||||||||||||||||||||||||||||||||||||||||||||||||||||||||||||||||||||||||||||||||||||||||||||||||||||||||||||||||||||||||||||||||||||||||||||||||||||||||
| 5 | 50 | 20 | 30 | 10 | Sinful Indulgence x 2 | 10M | |||||||||||||||||||||||||||||||||||||||||||||||||||||||||||||||||||||||||||||||||||||||||||||||||||||||||||||||||||||||||||||||||||||||||||||||||||||||||||||||||||||
| Total | 100 | 35 | 80 | Soul Alchemia x 10 Arcane Alchemia x 5 | 12.9M | ||||||||||||||||||||||||||||||||||||||||||||||||||||||||||||||||||||||||||||||||||||||||||||||||||||||||||||||||||||||||||||||||||||||||||||||||||||||||||||||||||||||
| Greed | 1 | 5 | 0 | 0 | 5 | 0 | 500K | ||||||||||||||||||||||||||||||||||||||||||||||||||||||||||||||||||||||||||||||||||||||||||||||||||||||||||||||||||||||||||||||||||||||||||||||||||||||||||||||||||||
| 2 | 10 | 5 | 10 | 10 | 0 | 800K | |||||||||||||||||||||||||||||||||||||||||||||||||||||||||||||||||||||||||||||||||||||||||||||||||||||||||||||||||||||||||||||||||||||||||||||||||||||||||||||||||||||
| 3 | 15 | 10 | 15 | Goddess Jar x 5 (Jar) Rainbow Goddess Jar x 5 | 15 | 0 | 1.5M | ||||||||||||||||||||||||||||||||||||||||||||||||||||||||||||||||||||||||||||||||||||||||||||||||||||||||||||||||||||||||||||||||||||||||||||||||||||||||||||||||||||
| 4 | 20 | 15 | 20 | Goddess Pot x 20 Rainbow Goddess Pot x 10 | 20 | 0 | 3M | ||||||||||||||||||||||||||||||||||||||||||||||||||||||||||||||||||||||||||||||||||||||||||||||||||||||||||||||||||||||||||||||||||||||||||||||||||||||||||||||||||||
| 5 | 60 | 50 | 30 | 30 | Retribution for Sin x 2 | 15M | |||||||||||||||||||||||||||||||||||||||||||||||||||||||||||||||||||||||||||||||||||||||||||||||||||||||||||||||||||||||||||||||||||||||||||||||||||||||||||||||||||||
| Total | 110 | 80 | 80 | Goddess Jar x 5 Rainbow Goddess Jar x 5 | 20.8M | ||||||||||||||||||||||||||||||||||||||||||||||||||||||||||||||||||||||||||||||||||||||||||||||||||||||||||||||||||||||||||||||||||||||||||||||||||||||||||||||||||||||
| Pride | 1 | 10 | 0 | 5 | 10 | 0 | 1M | ||||||||||||||||||||||||||||||||||||||||||||||||||||||||||||||||||||||||||||||||||||||||||||||||||||||||||||||||||||||||||||||||||||||||||||||||||||||||||||||||||||
| 2 | 20 | 20 | 10 | 15 | 0 | 1.5M | |||||||||||||||||||||||||||||||||||||||||||||||||||||||||||||||||||||||||||||||||||||||||||||||||||||||||||||||||||||||||||||||||||||||||||||||||||||||||||||||||||||
| 3 | 30 | 30 | 15 | Goddess Pot x 5 Mana Golem x 20 | 20 | 0 | 3M | ||||||||||||||||||||||||||||||||||||||||||||||||||||||||||||||||||||||||||||||||||||||||||||||||||||||||||||||||||||||||||||||||||||||||||||||||||||||||||||||||||||
| 4 | 40 | 40 | 20 | Soul Alchemia x 30 (Soul) Arcane Alchemia x 10 | 25 | 6M | |||||||||||||||||||||||||||||||||||||||||||||||||||||||||||||||||||||||||||||||||||||||||||||||||||||||||||||||||||||||||||||||||||||||||||||||||||||||||||||||||||||
| 5 | 100 | 50 | 30 | 30 | Sinful Bubble x 2 | 30M | |||||||||||||||||||||||||||||||||||||||||||||||||||||||||||||||||||||||||||||||||||||||||||||||||||||||||||||||||||||||||||||||||||||||||||||||||||||||||||||||||||||
| Total | 200 | 140 | 80 | Soul Alchemia x 30 Arcane Alchemia x 10 | 41.5M | ||||||||||||||||||||||||||||||||||||||||||||||||||||||||||||||||||||||||||||||||||||||||||||||||||||||||||||||||||||||||||||||||||||||||||||||||||||||||||||||||||||||
| Total | 770 | 465 | 560 | Soul Alchemia x 120 Arcane Alchemia x 40 Note: Units that are below 5 star rarity use only one Sinful Bubble for maxing gate 6 and one Final Acquittal Stamp for maxing gate 7 instead of two. Common Configurations [ ]Collaboration Unit Enlightenment Items [ ]For collaboration units, there are alternative items you can use in place of standard items for enlightenment. Note that this does not include units like Sacred Stone Memories and time limited units, only ones from external game collaborations. This eye is used for unlocking enlightenment on some (but not all) free units from collaborations. Other collaboration units use standard eyes based on the unit rarity. Otherworlder Enlightenment Shard [ ]These shards can be used in place of standard unit shards when enlightening a collaboration unit. They can only be used once you have consumed all shards of a unit. These shards will work for crossover units such as EO Chloe and EO Shenmei. These do not work for Nero or Bianca. Otherworldly Indulgence [ ]These are used instead of sinful indulgence for units from other (such as collaboration units). Note that these are only usable by full collaboration units and not crossover units such as EO Chloe and EO Shenmei- they use standard sinful indulgence. Otherworldly Retribution [ ]These are used instead of retribution for sin for units from other (such as collaboration units). Note that these are only usable by full collaboration units and not crossover units such as EO Chloe and EO Shenmei- they use standard retribution for sin. Otherworldly Bubble [ ]These are used instead of sinful bubble for units from other (such as collaboration units). Note that these are only usable by full collaboration units and not crossover units such as EO Chloe and EO Shenmei- they use standard sinful bubble. Otherworldly Acquittal Stamp [ ]These are used instead of final acquittal stamp for units from other (such as collaboration units). Note that these are only usable by full collaboration units and not crossover units such as EO Chloe and EO Shenmei- they use the standard final acquittal stamp. Special Unit Enlightenment Items [ ]For some units, they use special items for parts of their enlightenment which are only obtainable in events associated with the units. Many Genesis units can only obtain certain enlightenment items from Godless Revolution. Gilfred can only obtain some of his enlightenment items from Mystic World Mobius. For a full list of where to find these specialized items, see Specialized Enlightenment Materials. The Alchemist Code WikiThe Alchemist Code Wiki/Top sectionThe Alchemist Code is a free-to-play mobile strategy role-playing game developed by Gumi for iOS and Android devices. It is designed as a turn-based tactical role-playing game, using elements similar to titles such as Final Fantasy Tactics and Tactics Ogre. As part of the game’s gacha system, players can summon characters from the game’s story or other fan titles, which players can use to build a party of four units. Game play is presented in a 3D isometric view. Read more. Welcome to The Alchemist Code Wiki, an unofficial resource site created and maintained by the community. 31,178,893 users have helped the wiki maintain 208,250 pages (20,276 articles). Contribute Community Register The Alchemist Code WikiTeam BuildingContentsPreview [ ]When you start playing The Alchemist Code, you’ll be encountering easier quests and don’t need to worry too much about team synergy. You also won’t have a large collection of units to build focused teams. As a new player you’ll want to prioritize your best units regardless of team dynamics. Once you’ve built up a good collection of units in late game, team building becomes very important. By building a team with good synergy, well matched to the content you’re doing, you can make your team perform much better. You’ll want to have the ability to field teams of each element and tweak your teams for specialized needs. Advantages you’ll want to consider in Team Building [ ]Leader Skill [ ]Your first member of the team is the leader. Generally speaking some of the best leader skills are those focused on increasing the team’s damage. Select your units wisely to take advantage of the leader skill you choose, it will significantly improve their stats if you build your team appropriately. Check out the Leader Skills page if you need some directed advice. The 3 types of unit leader skills: Note: Some enlightenment leader skills can be a mixture of element and full team focused. Memento Leader Skill [ ]If you have access to max limit break mementos which provide leader skills, you can also use a memento leader skill in place of the unit leader skill. This gives more flexibility as to how to construct your teams, but this requires that all units in the party wear a memento in the same group as the memento leader skill (note the memento the unit is wearing does not have to belong to them). For more information, see Memento Leader Skills. Memento Groups [ ]Choosing mementos is a bit more complex. You’ll want to be mindful of not only who triggers a group buff, but the units that actually receive it. Choosing the right mementos can benefit others in your group and, if done right, each units memento can benefit multiple team members. Most memento group buffs are based around region, but some are more specific. For example, Desert Zone units have a lot of strong mementos that benefit each other, and there are several strong wind units in Desert Zone, so with the right mementos and a good wind leader, you can build a strong Desert Wind team. How to build a balanced team [ ]If you are aiming to deal with hard content like EX+/EX Hell, you might want to run through it a few times to decide which units best suit the challenges provided so you can clear them with a bit more ease. You can also check the quest details on Alchemist Code Database to see what enemies you’ll need to deal with before you go in. Choose a unit with a good leader skill for your whole team to take advantage of. If you have problems with stat debuffs (such as PATK or slash damage debuffs) on the map or stat buffs on enemy units (such as defense or resist buffs), you may want to bring someone who can remove them, like an Enchanter. If enemies on the map are vulnerable to status effects, you may want to bring units that can inflict those. For example, a Chronomancer can inflict stop, a Wild Beast Tamer can inflict rage, a Professor can inflict charm. This is also important, some Gear gives very good stat increases and/or abilities for you to handle the challenges of your quest. For example Wadatsumi Brush can give your unit very high Missile Resistance and Magic Resistance during the opening turns of battle. Wanderer Hat can give your unit added initial jewels so they can use a certain skill immediately or earlier (this thing is broken). Equipping mementos lets your team members have extra stats (either specific to them, for other members of the team, or both), and some have great vision abilities. For example Burning Desert Vow has a very good vision ability buff for whole team to do extra damage. The starting position can be very important on some maps, units may need to start in specific positions to do their jobs more effectively. You can check Alchemist Code Database or the Discord Bot to get a map of the quest and determine the starting position of each unit, or you can enter the quest to see where each unit will start. Note: You don’t need to follow these steps. Sometimes you may need to make exceptions. For example, you can take units that don’t take advantage of your leader skill if you think that unit will be the best option for the map. Team types commonly used in late game [ ]Mono Element Team [ ]The most prevalent and commonly used structure. Often preferred because many maps and quest missions are oriented towards a specific element. Example: If the map is primarily comprised of enemy units from Wind, you’ll likely want to bring a Fire team. These mono element teams can also be effective on maps with mixed element enemies simply due to the synergy provided by a good elemental leader skill. Regional Team [ ]The second most common teams are constructed using units from the same region/origin. These can be as powerful as a mono team, with the right unit selection, leader skill synergy and mementos. Example: This example team is very strong for farming enlightenment statues with the right gear and mementos equipped. Damage Modifier Team [ ]The third most common team is centered around a specific damage type. These are used less due to lower damage output, but they are sometimes required by the quest due to enemy resistances. Example: These teams are less viable in high end content like EX/EX+/EX-Hell/EX-Nightmare maps, but are perfectly suited for clearing normal quests quickly. The Alchemist Code WikiMementoMementos (called Nensou in Japan) are a mechanic that adds something similar to a fourth gear slot, although the attributes do stack with gear attributes. A memento will grant a minor attribute bonus to whomever equips it. Then, depending on the memento, it will also grant additional, larger attributes to units of a certain group (such as a country) and/or specific units. In the example to the right, all units get a minor health bonus, units from Slothenstein get a large health bonus, and Fiona, Edgar, and Veloz get an agility bonus on top of their other bonuses. Mementos can also provide special abilities or skins to the unit wearing it. ContentsMemento Benefits [ ]Base Stats [ ]The base stats provided by a memento are only given to the unit who equips it. These stats scale with the level of the memento. Group Skills [ ]The group skills of a memento are provided to all units within the unit group that are present in the party, as long as one unit in that group has the memento equipped. The group skills will not stack if multiple units in the group have the same memento equipped or in general if you receive the same stat bonus from multiple group mementos in the party. There may be multiple group skills on a memento with different unit triggers- often one group skill is for a single or small group of units, and another is for a much larger group of units. These stats scale with the level of the memento and also may gain additional bonuses with limit breaks. Group skill benefits are only provided in combat, which means that if the unit dies you will lose the buff. If the unit is in subs, you will not get the benefit until they enter combat. Vision Abilities [ ]Vision abilities on the memento are generally available without limit breaks or level requirements, but some scale based on the limit break of the memento. Some vision abilities are available to all units, but others may be restricted based on various factors such as unit, job or origin. Some vision abilities are triggered manually, others are bonuses that apply when entering the map. Vision Clear Reward [ ]Vision Clear Rewards (VCR) are rewards provided for each 100% reached on a memento (the memento starts with 100% cap and gains 100% cap per limit break). This is often, but not always, a gear that is exclusively obtained through that memento. This gear is usually fairly powerful, and when obtained from a character’s memento, these gears will often provide a special benefit to that unit. The vision clear reward is displayed in the upper right of the memento screen. Some mementos provide a special character skin when the memento is equipped. Leader Skill [ ]When a memento is at max limit break, it may provide an alternative leader skill that can be selected instead of the standard leader skill when worn by the party leader. Any unit in the party can wear a memento within the same memento group to activate the leader skill. The memento does not have to be worn by a unit that is a member of the group to activate the leader skill. Many memento groups exist to provide leader skills- more will be added gradually. Memento leader skills can’t be provided or activated by mementos equipped in the enlightenment gate 6 sub-memento slot. Note: When using a mercenary, if your leader is using a memento leader skill, instead of gaining the mercenary’s leader skill you will get no leader skill from the mercenary unless the mercenary is wearing a memento in the same memento group (doesn’t have to be max limit break), in which case you will get double the benefit from the party leader’s memento leader skill. Leader Skill Strengthening [ ]The benefit from the memento leader skills are increased based on the number of mementos of the same group that are equipped. For each additional unit in the party equipping a memento in the group (including sub party members), you gain a 2% bonus to the leader skill (multiplied against the base leader skill, not added). Using a mercenary with a memento in the group will double the entire leader skill including the bonus, but will not add an individual bonus for an extra copy of the memento. Leader Skill Subgroups [ ]There are some mementos who also belong to a subgroup (such as Torchlight Through a Looking Glass). These mementos can also used to activate a leader skill in the subgroup, but can only provide their leader skill to the primary group. Sub-Mementos [ ]When a memento is equipped in the sub-memento slot provided by maxing enlightenment gate 6, it does not provide full benefits. It will not activate or provide memento leader skills. It will also provide a reduced amount of benefit to base stats, group skills and limit reached bonuses (scaling from 10% at 0 limit breaks to 50% at 5 limit breaks rounded down). Mementos in the sub-memento slot do not receive alchemic boundary from quests.
Obtaining [ ]Most mementos are obtained through summons, and will have their own roll. This will typically start with a 2500 gem pull. Typically memento banners only contain mementos. Some memento are provided through other sources such as temporary or permanent events. Occasionally memento tickets will be given as a reward. One memento ticket is provided monthly through the login bonus. Upgrading Mementos [ ]Limit Breaking [ ]Limit breaking a memento will increase the stats granted by it, the maximum level, adds 100% to the alchemic boundary cap, increases the alchemic boundary % gained from quests, and sometimes gives additional bonus stats at max limit break. A memento maximum limit break is 5. The vision abilities provided by memento will often also scale based on limit breaks and some are only available at max limit break. You can view the enhancements to group bonuses from limit breaks under «Enhancement Bonus». In addition, some mementos give a Memento Leader Skill at max limit break. Mementos equipped in the sub-memento slot from enlightenment gate 6 also will provide more benefit per limit break (stats, group bonuses and limit reached bonuses are scaled from 10% benefit at 0 limit breaks to 50% at 5 limit breaks). Some mementos also give unit shards for related mementos when limit broken, see Memento Limit Break Milestones for a list. A memento must be fed a duplicate memento or relief to limit break. Unlike with gear, you don’t need to be at max level to limit break. You’ll have to feed the memento five copies of itself to fully max it out. If the copy also has limit breaks, those will be copied to the memento you are feeding it to. Each copy of itself will also provide +5% alchemic boundary towards the Vision Clear Reward, plus whatever alchemic boundary the copy was at and experience towards leveling the memento based on the level of the duplicate copy. You can limit break a memento under «Enhance». Relief [ ]Reliefs are special wildcard items that can be used in place of a duplicate memento when limit breaking. Each relief is tied to a specific region and can only be used on mementos of that region. Reliefs can be obtained via the Vision Coin Exchange Shop, the TAC Coin Exchange (1 per month), the Phantom Battle Coin Exchange Shop (1 per month), level 12 Port Shop (1 per month), or sometimes through rewards or other means. Leveling [ ]Memento cards gain experience by being «fed» other memento cards. See the Memento Experience Chart to check how much experience is required to level. Leveling mementos will increase the base and group stat bonuses. Leveling Specific Mementos [ ]There are special memento cards called Apple Ratties that provide a large experience bonus. These are primarily obtained through Apple Garden event quests, but can also be obtained through milestones, missions, and events such as Vision Quest. Increasing the level of a memento will increase the stats provided by it. You can level a memento under «Enhance [Bulk]».
Alchemic Boundary [ ]Vision Clear Rewards, or VCR are rewards provided for each 100% of alchemic boundary on a memento. This is often, but not always, a gear that is exclusively obtained through that memento. This gear is usually fairly powerful, and when obtained from a character’s memento, these gears will often provide a special benefit to that unit. The current alchemic boundary of a memento is displayed in the upper right of the memento screen. There is no benefit from alchemic boundary aside from the VCR that you get when you reach 100%. For each limit break on the memento, another 100% alchemic boundary cap is added, and you can receive another copy of the VCR at each additional 100% breakpoint. Limit breaks also increase the % of alchemic boundary added from quests, for 1% increase per limit break. The memento does have a memory of how many VCRs have already been given, which is also added to the VCR limit when merging. Note: Free memento generally have a limit of 1 VCR reward transmuted. Any VCR which gives only shards for a gear usually is limited to 1, but sometimes has a higher limit (you can view the transmute limit in game or on the wiki page for the VCR). To gain alchemic boundary: References/Guides [ ]Currently Available Mementos [ ]For a list of all currently available mementos, see List of Mementos The Alchemist Code WikiEnlightened Gear SkillsGear enlightenment can be performed for certain weapons upon reaching level 30 and provides the weapon with a special skill. ContentsAcquiring Skills [ ]There are several factors and conditions to be met when determining the added special skill. You may need to hit an enemy with a unit holding the gear, you may need to use a specific unit and/or job, a specific enemy or type of enemy that needs to be attacked, or the unit’s level and/or enemy’s level and/or the stage where these conditions need to be met. All these conditions can be checked on the relevant gear page in Alchemist Code DB. Note that the % chance to get the skill listed there does not seem to be accurate but the other data should be. There are 3 levels of the enlightenment skills:
• Tier 1: There are always three tier 1 skills for each weapon type. Each can be evolved into multiple tier 2 skills and some tier 2 skills can evolved from multiple tier 1 skills; • Tier 2: These are more specialized versions of the tier 1 skill with improvements to that skill. A tier 2 skill can generally only be evolved into a single tier 3 skill; • Tier 3: A more powerful version of the tier 2 skill. There are some weapons with unique tier 3 skills restricted to that specific weapon. Typically you will look to see which Tier 3 skill you wish to get, then determine which skills lead to that skill. You can’t have more than one enlightened skill on the weapon at a time. Resetting Skills [ ]Because the skill is acquired randomly you may get a skill other than your intended- if so make sure to reset the skill in the Gear > Enlightened Skill interface so that you can continue working to get the skill you desire. You can reset the skill 1 level at a time (i.e. if it’s a level 2 skill you wish to reset, you don’t have to reset to the beginning, you can go back to the level 1 skill). Example of how to reset weapon skill. Setting Skills [ ]When you acquire a skill, you must first go to Gear > Enlightened Skill to select the gear and go under the enlightened skill tab on the gear details screen to set the skill. Until you set the skill it will not show up as an option to use in combat. Setting the skill will not prevent you from learning new skills or resetting the skill if you need to. Leveling Skills [ ]Once you have acquired the tier 3 skill you desire, you will want to level the skill to maximize the power of it. There are 3 levels of the skill, so you must level up twice to get to the maximum power. There are 3 ways to level the skill: Note: If you fuse a level 30 copy of the same weapon that also has the same skill it will fully level the skill since it counts as 2 level ups. Weapon Type Skill Trees [ ]Note: This is a mechanic is released gradually for different weapon types. Sword [ ]
Unlocked by: Blade of Silence, Caliburn-Sword of Truth, Charming Blade, Dark Corpse-Slasher, Dazzling Blade, Electrospike Blade, Joyful Blade [Hagoita], Lexida, Light Metal Rapier, Mirage Sword Mystic Blade Tyrfing, Poison Fang Blade, Protector Shield and Sunblade Prometheus when used by a Dark unit Cross Slash: Slash ATK on units within area [Range: 2, Area: Cross (3), Height Range: 2] | Ultimate Execution: Dark Slash ATK on enemy unit & greatly lowers probability of activating Reactions for three turns & disables all Reactions to this attack [Range: 4, Height Range: 2] | Excalibur Exclusive: Unlocked by using Excalibur on a Dark unit (in place of Crystal Drain) Water Sword: Water Mag Slash ATK on units within area [Range: 3, Area: Cross (3), Height Range: 2] | Aqua Blade: Water Mag Slash ATK on units within area & lowers all attacks for targeted Fire units (Only usable and unlocked by Magic Swordsman [Fenrir]) [Range: 3, Area: Cross (3), Height Range: 2] | Cross Sweep: Slash ATK on units within area that increases according to own PDEF [Range: 3, Area: Cross (3), Height Range: 2] | Wall of Blades: Slash attack on units within area that increases according to own PDEF [Range: 3, Area: Cross (3), Height Range: 2] | Lumiere Fleurir: Light Slash ATK on units within area that increases according to own PDEF [Range: 4, Area: Cross (3), Height Range: 2] | Sparkling Crystal Sword Lumiere Exclusive: Unlocked by using Sparkling Crystal Sword Lumiere on a Light unit (in place of Wall of Blades) Indomitable Cleave:Fire Slash ATK on units within area that increases according to own PDEF [Range: 3, Area: Square (3), Height Range: 2] | Angled Smash: Light Slash ATK on units within area [Range: 3, Area: Cross (3), Height Range: 2] | Vengeful Blade of Greed: Light Slash ATK on units within area (Strong vs Greed) & raises Power if Light unit (Only unlocked by using a Light unit against a Demon type enemy) [Range: 4, Area: Cross (3), Height Range: 2] | Smash: Slash ATK on enemy unit [Range: 2, Height Range: 2] | Greed End: Light Slash ATK on units within area (Strong vs Greed) & raises Power if used by Kanon/Zain [Range: 4, Area: Cross (3), Height Range: 2] | Excalibur Exclusive: Unlocked by using Excalibur on Kanon/Zain (in place of Vengeful Blade of Greed) Tri-Blaze: 3-hit Fire Slash ATK on enemy unit [Range: 2, Height Range: 2] | Flame Rend of Envy: 4-hit Fire Slash ATK on enemy unit (Strong vs Envy) & raises Power if Fire unit (Only unlocked by using a Fire unit against a Demon type enemy) [Range: 3, Height Range: 2] | Toiling Rend: 4-hit Fire Slash ATK on random unit within area (Only usable by the unit «Lambert») [Area: Diamond (5), Height Range: 2] | Broadsword Exclusive: Only usable and unlocked by using Broadsword on Lambert (in place of Flame Rend of Envy) Plasma Sword: Thunder Mag Slash ATK on enemy unit [Range: 3, Height Range: 2] | Lightning Blade: 2-hit Thunder Mag Slash ATK on enemy unit & lowers all attacks for targeted Water unit (Only usable and unlocked by the job Magic Swordsman [Ixion]) [Range: 4, Height Range: 2] | Blue Flame Shining Slash: Light Slash ATK on enemy unit [Range: 3, Height Range: 2] | Crowley Sword Exclusive: Unlocked by Crowley Sword (only weapon to have Blue Flame Shining Slash) Valorous Slash of the Blue Flame: Light Slash ATK on enemy unit & raises Power if used by Logi/Zeke/Bud [Range: 4, Height Range: 2] | Crowley Sword Exclusive: Unlocked by using Crowley Sword on Logi/Zeke against a Wrathris General unit. Staff/Rod [ ]
Nina’s Pointing Stick Exclusive: Unlocked by attacking a Dark unit with Judgement, Crusade Judge or Call of the Crusade while equipped with Nina’s Pointing Stick Blizzard Spell: Water Mag ATK on units within area [Range: 3, Area: Cross (3), Height Range: 2] | Blizzard Magic: Water Mag ATK on units within area & lowers all attacks for targeted Fire units for three turns (Only usable and unlocked by the jobs Sage [Carnac] & Luminous Immortal) [Range: 3, Area: Cross (3), Height Range: 2] | Scattering Crystal: Water Mag ATK on units within area & lowers All DEF for targeted Fire units for three turns [Range: 3, Area: Cross (3), Height Range: 2] | Illusion Rod Exclusive: Only usable by the unit Othima, but unlocked by the jobs Sage [Carnac], Luminous Immortal and Blue Ice General while geared with Illusion Rod Spark Spell: 2-hit Thunder Mag ATK on enemy unit [Range: 3, Height Range: 2] | Spark Magic: 2-hit Thunder Mag ATK on enemy unit & lowers all attacks for targeted Water units for three turns (Only usable and unlocked by the jobs Sage [Monolith] & Night Agent) [Range: 4, Height Range: 2] | Lust Thunderstruck: 2-hit Thunder Mag ATK on enemy unit & Strong vs Lust/Strong vs Insects & Power is based on user and target’s LUCK [Range: 4, Height Range: 2] | Helkovara Family Staff Exclusive: Only usable by units from Lustburg and unlocked by Lisbeth/Rebecca attacking Queen or Venus with Helkovara Family Staff Soundless Thunder: Thunder Mag ATK on enemy unit & lowers All DEF for targeted Water units for three turns [Range: 4, Height Range: 2] | Illusion Rod Exclusive: Only usable by the unit Dark Phantom Othima, but unlocked by attacking a Water unit with the jobs Sage[Monolith], Night Agent or Greedy Phantom Master Cursed Cross: Mag ATK on units within area & lowers Mag ATK for three turns [Range: 3, Area: Cross (3), Height Range: 2] | Dual Curse: 2-hit Mag ATK on enemy units within area & lowers MATK for three turns [Range: 4, Area: Cross (3), Height Range: 2] | Curse: Lowers MATK for units within area for three turns [Range: 2, Area: Cross (3), Height Range: 2] | [Cursed Incense] Fusillade: 2-hit Mag ATK on enemy units within area & lowers MATK for three turns & removes buffs [Range: 4, Area: Cross (3), Height Range: 2] | Harmony Rod/Silencing Rod Exclusive: Only usable by Templar units. Unlocked by using either rod on Vier or Fury Third Curse: Lowers PATK/MATK of enemy unit for two turns [Range: 4, Height Range: 2] | Heavy Curse: Greatly lowers PATK/MATK of enemy units within area for two turns [Range: 4, Area: Cross (3), Height Range: 2] | Flame Spell: Fire Mag ATK on enemy units within area & lowers PATK for three turns [Range: 3, Area: Lateral (3), Height Range: 2] | Flame Magic: Fire Mag ATK on enemy units within area & lowers PATK for three turns & lowers all attacks for targeted Wind units for three turns (Only usable and unlocked by the job Sage [Obelisk]) [Range: 3, Area: Lateral (3), Height Range: 2] | Sacrilegious Conflagration: Fire Mag ATK on enemy units within area (Strong vs Templars) & lowers PATK for three turns & lowers all attacks for targeted Wind units for three turns [Range: 3, Area: Lateral (3), Height Range: 2] | Takemikazuchi Exclusive: Unlocked by attacking Acht or Sol with Takemikazuchi Blast Spell: Wind Mag ATK on enemy unit & lowers PATK for three turns [Range: 3, Height Range: 2] | Blast Magic: Wind Mag ATK on enemy unit & lowers PATK for three turns & lowers all attacks for targeted Thunder units for three turns (Only usable and unlocked by the job «Sage [Rozetta]») [Range: 5, Height Range: 2] | Moonglow: Raises ally unit’s Max HP for three turns & recovers amount raised [Range: 3, Height Range: 2] | Moonlight: Raises PATK/MATK/Max HP (amount of HP gained will be added to current HP) for ally units within area for three turns (Only unlocked by using a Light unit) [Range: 3, Area: Cross (3), Height Range: 2] | Healing Droplet: Recovers ally unit’s HP [Range: 3, Height Range: 2] | Absolute Sanctuary: Raises Max HP (amount of HP gained will be added to current HP)/All Elements Res of ally units within area around self for three turns (Can only be used by the jobs «Battle Mage», «Magical Honor Student», & «Powerful Witch») [Area: Diamond (5), Height Range: 2] | Easter Star Rod Exclusive: Only usable by Battle Mage, Magical Honor Student & Powerful Witch, but additionally unlocked by Battle Mage Job Enchantments as well Healing Tear: Recovers HP of ally units within area [Range: 2, Area: Cross (3), Height Range: 2] | Healing Water: Recovers HP of ally units within area (Only unlocked by using a Water unit) [Range: 2, Area: Diamond (5), Height Range: 2] | Restoration Delivery: Casts Auto Heal/Jewel Auto Charge on ally units within area (Can only be used by the jobs «Merchant» & «Battle Maid») [Range: 2, Area: Diamond (5), Height Range: 2] | Good-Luck Staff [Kumadesu]/Staff of Rich Harvest/Staff of Thriving Business Exclusive: Only usable by the jobs Merchant & Battle Maid, but unlocked by Merchant, Battle Maid and all Merchant Job Enchantments while using any of the three gear Divine Cleansing: Removes debuffs from ally units within area & raises Jewel Auto Charge (Macherie only) [Range: 2, Area: Cross (3), Height Range: 2] | Yune Spirit Staff Exclusive: Only usable by Macherie and unlocked by level 85 Macherie Spear [ ]
Holy Lance Longinus/Deadly Lance Exclusive: Unlocked by attacking Eldritch with Longinus or Dark Longinus Charge: Pierce ATK on units within area & units are not lockable [Range: 2, Area: Cross (3), Height Range: 2] | Gluttonous Wind Spear: Wind Pierce ATK on units within area (Strong vs Gluttony) & raises Power if user is a Wind unit & units are not lockable [Range: 2, Area: Cross (3), Height Range: 2] (Cast Speed: 350) | Gluttonous Blast: Wind Pierce ATK on units within area (Strong vs Gluttony/Powerfully Strong vs Amorphous) & units are not lockable [Range: 2, Area: Cross (3), Height Range: 2] (Cast Speed: 400) | Helix Wind Wolf Spear Exclusive: Unlocked by attacking demons or jams with Mocca Guardian: Strike ATK on enemy unit (Powerfully Strong vs Demon Golem) & inflicts Slow & moves target 3 sq back (only usable by King) [Range: 3, Height Range: 2] | Spirit Spear Chastiefol Exclusive: Unlocked by attacking a specific enemy only available during Seven Deadly Sins (see ACDB for details) with level 85 unit Spin Thrust: Pierce ATK on units within area around self & lowers Pierce Res by 25% for three turns [Area: Cross (7), Height Range: 2] | Hurricane Thrust: Pierce attack on units within area around self & lowers Pierce Res by 25% and probability of activating Reactions by 50% for three turns (only usable/unlockable by unit from Envylia) [Area: Cross (7), Height Range: 2] | Thrusts: Lowers Pierce Res of enemy units within area for three turns [Range: 2, Area: Line (2), Height Range: 2] | Anti-Magic Spear: Pierce ATK on units within area & inflicts Jewel Dmg [Range: 3, Area: Special (Double Laser), Height Range: 2] | Destruction Magic Dual Thunder: Thunder Pierce ATK on units within area & absorbs 20 Jewels & raises Power if user is a Thunder unit [Range: 4, Area: Special (Double Laser), Height Range: 2] | Stone Thrust: Pierce ATK on units within area & chance of inflicting Petrify [Range: 2, Area: Line (2), Height Range: 2] | Jailing Thrust: Pierce ATK on units within area (Strong vs Undead) & 30% chance of inflicting Petrify [Range: 3, Area: Line (3), Height Range: 2] | Knock Flat: Pierce ATK on units within area [Range: 1, Area: Lateral (3), Height Range: 2] | High-Speed Jab: Pierce ATK on units within area after moving [Move Area: 3, Move Height Range: 2, Area: Cross (5), Height Range: 2] | High-Speed Spiral: Pierce ATK on units within area after moving & absorbs part of Dmg inflicted back as HP [Move Area: 4, Move Height Range: 2, Area: Cross (7), Height Range: 2] | Blood Spray Sweep: Consumes own HP to perform a Pierce ATK on units within area [Range: 1, Area: Lateral (3), Height Range: 2] | Blood Bident: Consumes own HP to perform a Pierce ATK on units within area [Range: 4, Area: Special (Double Laser), Height Range: 2] | Bloody End: Consumes own HP to perform a Dark Pierce ATK on units within area (Strong vs Pride) [Range: 2, Area: Special (Fork), Height Range: 2] | Piercing Dawn Spear Exclusive: Unlocked by attacking Kanon or Zain with Kudanstein Katana [ ]
Kaiko Samonji Exclusive: Usable only by Kuza, unlocked by attacking Orion with Kuza (in place of Crescent Moon Slash and Bamboo Split) Dark Memory Blade Exclusive: Usable only by Zehn and Cadanova, unlocked by attacking level 85 unit with Zehn or Cadanova (in place of Ceaseless Flurry Blade) Twofold Blade: Slash ATK on units within area [Range: 3, Area: Cross (3), Height Range: 2] | Twofold Exorcizing Blade: Slash ATK on units within area & lowers MATK for three turns [Range: 4, Area: Cross (3), Height Range: 2] | Sealing Blade of Greed: Slash ATK on units within area (Strong vs Greed) & lowers MATK for three turns [Range: 4, Area: Cross (3), Height Range: 2] (Sealed Blade Kagomurasaki only) | Sealed Blade Kagomurasaki Exclusive: Unlocked by attacking a Discarnate Power with Yomi (in place of Twofold Exorcizing Blade) Horizontal Ceaseless Blade: 2-hit Pierce ATK on units within area & chance of critical [Range: 3, Area: Line (3), Height Range: 2] | Four Horizontal Gates: 4-hit Slash ATK on units within area & inflicts Daze & chance of critical & raises Power when attacking from the side & greatly raises Power when attacking from behind (Only unlocked and usable by Ren) [Range: 3, Area: Line (3), Height Range: 2] | Slip-Strike Blade: Slash ATK on units within area [Range: 2, Area: Line (2), Height Range: 2] | Blood Flecked-Blade: Consumes own HP to perform a 2-hit Slash ATK on enemy units within area & chance of critical [Range: 2, Area: Line (2), Height Range: 2] | Blood Spray Blade: Consumes own HP to perform a Slash ATK on units within area that increases according to number of dead allies & chance of critical [Range: 3, Area: Line (3), Height Range: 2] | Bloody Edge: Consumes own HP to perform a Slash ATK on units within area that increases according to number of dead allies & inflicts Jewel Dmg [Range: 3, Area: Lateral (3), Height Range: 2] | Greatsword [ ]
Leo Falchion Exclusive: Usable only by Orion, unlocked by attacking level 85 unit with Orion (in place of Crushing Slash) | ||||||||||||||||||||||||||||||||||||||||||||||||||||||||||||||||||||||||||||||||||||||||||||||||
| Shredding Crimson Cuts: Fire Slash ATK on enemy unit (Strong vs Eldritch) [Range: 1, Height Range: 2] (Masamune Blade and Dark Corpse-Slicer only, Masamune/Dark Masamune only, replaces other skill) Masamune Blade and Dark Corpse-Slicer Exclusive: Usable only by Masamune and Dark Masamune, unlocked by attacking Eldritch with Masamune or Dark Masamune (in place of Crushing Slash) | |||||||||||||||||||||||||||||||||||||||||||||||||||||||||||||||||||||||||||||||||||||||||||||||||||||||||||||||||||||||||||||||||||||||||||||||||||||||||||||||||||||||||||
| Sonic Boom: Slash ATK on units within area & lowers PDEF for three turns [Range: 2, Area: Lateral (3), Height Range: 2] | Flare Sonic: Fire Slash ATK on units within area & greatly lowers PDEF for three turns (only usable and unlocked by Fire unit) [Range: 4, Area: Lateral (3), Height Range: 2] | ||||||||||||||||||||||||||||||||||||||||||||||||||||||||||||||||||||||||||||||||||||||||||||||||||||||||||||||||||||||||||||||||||||||||||||||||||||||||||||||||||||||||||
| Immortal Sonic: Slash ATK on enemy units within area & inflicts Death Sentence curse [Range: 3, Area: Lateral (3), Height Range: 2] (Necromancer only, only available on scythes, replaces other skill) Scythe Weapon Exclusive: Usable and unlockable only by Necromancer based jobs (in place of Flare Sonic) | |||||||||||||||||||||||||||||||||||||||||||||||||||||||||||||||||||||||||||||||||||||||||||||||||||||||||||||||||||||||||||||||||||||||||||||||||||||||||||||||||||||||||||
| Blade Spin: Slash ATK to units within area around self [Area: Cross (3), Height Range: 2] | Blade Spiral: Slash ATK to units within area around self [Area: Cross (3), Height Range: 2] | ||||||||||||||||||||||||||||||||||||||||||||||||||||||||||||||||||||||||||||||||||||||||||||||||||||||||||||||||||||||||||||||||||||||||||||||||||||||||||||||||||||||||||
| Rolling Slash: Slash ATK to units within area around self [Area: Cross (3), Height Range: 2] | |||||||||||||||||||||||||||||||||||||||||||||||||||||||||||||||||||||||||||||||||||||||||||||||||||||||||||||||||||||||||||||||||||||||||||||||||||||||||||||||||||||||||||
| Grating Wheel: Slash ATK on units within area around self & inflicts Jewel Dmg [Area: Square (3), Height Range: 2] | Biting Wheel: Slash ATK on units within area around self & absorbs Jewels [Area: Square (3), Height Range: 2] | ||||||||||||||||||||||||||||||||||||||||||||||||||||||||||||||||||||||||||||||||||||||||||||||||||||||||||||||||||||||||||||||||||||||||||||||||||||||||||||||||||||||||||
| Spark Spin: Thunder Slash ATK on units within area around self & inflicts Silence & disables all Reactions to this attack (only usable by Thunder units) [Area: Square (3), Height Range: 2] | |||||||||||||||||||||||||||||||||||||||||||||||||||||||||||||||||||||||||||||||||||||||||||||||||||||||||||||||||||||||||||||||||||||||||||||||||||||||||||||||||||||||||||
| Guilty Rose: Slash attack on units within area around self & absorbs Jewels [Area: Square (3), Height Range: 2] Blossom Claymore Exclusive: Unlockable only by Dark units (in place of Biting Wheel and Spark Spin) | |||||||||||||||||||||||||||||||||||||||||||||||||||||||||||||||||||||||||||||||||||||||||||||||||||||||||||||||||||||||||||||||||||||||||||||||||||||||||||||||||||||||||||
| Great Sweep: Slash ATK on units within area around self [Area: Diamond (5), Height Range: 2] | Blizzard Spin: Water Slash ATK on enemy units within area around self & moves targets 2 sq back & inflicts Bind (only usable by Water units) [Area: Diamond (5), Height Range: 2] | ||||||||||||||||||||||||||||||||||||||||||||||||||||||||||||||||||||||||||||||||||||||||||||||||||||||||||||||||||||||||||||||||||||||||||||||||||||||||||||||||||||||||||
| Shine Spin: Light Slash ATK on enemy units within area around self (only usable by Light units) [Area: Diamond (7), Height Range: 2] | |||||||||||||||||||||||||||||||||||||||||||||||||||||||||||||||||||||||||||||||||||||||||||||||||||||||||||||||||||||||||||||||||||||||||||||||||||||||||||||||||||||||||||
| Earth-Splitting Sever: Slash ATK on units within area that ignores DEF [Range: 2, Area: Line (2), Height Range: 2] | Earth-Sweeping Rend: Slash ATK on units within area that ignores DEF [Range: 3, Area: Line (3), Height Range: 2] | ||||||||||||||||||||||||||||||||||||||||||||||||||||||||||||||||||||||||||||||||||||||||||||||||||||||||||||||||||||||||||||||||||||||||||||||||||||||||||||||||||||||||||
| Rouge Reaper: Dark Slash ATK on units within area that ignores DEF (Strong vs Wrath) [Range: 4, Area: Lateral (3), Height Range: 2] Bloody Death Scythe Exclusive: Unlocked by attacking demon or diablo using Dark unit (in place of Earth-Sweeping Rend) | |||||||||||||||||||||||||||||||||||||||||||||||||||||||||||||||||||||||||||||||||||||||||||||||||||||||||||||||||||||||||||||||||||||||||||||||||||||||||||||||||||||||||||
| Flying Cut: Slash ATK on enemy unit [Range: 3, Height Range: 2] | |||||||||||||||||||||||||||||||||||||||||||||||||||||||||||||||||||||||||||||||||||||||||||||||||||||||||||||||||||||||||||||||||||||||||||||||||||||||||||||||||||||||||||
| Impact Slash: Slash ATK to enemy unit [Range: 4, Height Range: 2] | Dark Force: Dark Slash ATK on enemy unit (usable and unlockable only by Dark Cavalier based jobs) [Range: 4, Height Range: 2] | ||||||||||||||||||||||||||||||||||||||||||||||||||||||||||||||||||||||||||||||||||||||||||||||||||||||||||||||||||||||||||||||||||||||||||||||||||||||||||||||||||||||||||
| Quasar Zero: Dark Slash ATK on enemy unit [Range: 5, Height Range: 2] Dark Blade Grausam Exclusive: Unlockable and usable only by Zahar (in place of Dark Force) | |||||||||||||||||||||||||||||||||||||||||||||||||||||||||||||||||||||||||||||||||||||||||||||||||||||||||||||||||||||||||||||||||||||||||||||||||||||||||||||||||||||||||||
| Wide Flying Cut: Slash ATK on units within area [Range: 3, Area: Cross (3), Height Range: 2] | Flying Blade Shock Wave: Slash ATK on units within area [Range: 3, Area: Cross (3), Height Range: 2] | ||||||||||||||||||||||||||||||||||||||||||||||||||||||||||||||||||||||||||||||||||||||||||||||||||||||||||||||||||||||||||||||||||||||||||||||||||||||||||||||||||||||||||
| Ruinous Flying Cut: Slash ATK on units within area & lowers PATK for three turns [Range: 3, Area: Diamond (5), Height Range: 2] | |||||||||||||||||||||||||||||||||||||||||||||||||||||||||||||||||||||||||||||||||||||||||||||||||||||||||||||||||||||||||||||||||||||||||||||||||||||||||||||||||||||||||||
| Infernal Lightning Sword: Thunder Slash ATK on units within area (Strong vs Eldritch) & lowers PATK for three turns [Range: 3, Area: Diamond (5), Height Range: 2] (Mystic Blade Laevateinn/Dark Corpse-Shredder only, Laevateinn and Dark Laevateinn only, replaces other skills) Mystic Blade Laevateinn and Dark Corpse-Shredder Exclusive: Usable only by Laevateinn and Dark Laevateinn, unlocked by attacking Eldritch with Laevateinn or Dark Laevateinn (in place of Flying Blade Shock Wave and Ruinous Flying Cut) Cestus [ ]
Machina Cestus Exclusive: Unlockable only by Fire units on Wind enemies (in place of Rolling Trance Impact) Haas Family Gauntlets Exclusive: Unlockable only by Alma (in place of Mind’s Eye Blow) | |||||||||||||||||||||||||||||||||||||||||||||||||||||||||||||||||||||||||||||||||||||||||||||||||||||||||||||||||||||||||||||||||||||||||||||||||||||||||||||||||||||||||||
| Revenge Impact: Strike ATK to enemy unit that grows more powerful the lower own remaining HP is [Range: 1, Height Range: 2] | Envious Dark Palm: Dark Strike ATK on target enemy unit & very strong vs Envy & raises Power if user is a Dark unit [Range: 1, Height Range: 2] | ||||||||||||||||||||||||||||||||||||||||||||||||||||||||||||||||||||||||||||||||||||||||||||||||||||||||||||||||||||||||||||||||||||||||||||||||||||||||||||||||||||||||||
| Crashing Gust of Greed: Wind Strike ATK on target enemy unit & very Strong vs Greed & Raises Power if user is a Wind unit [Range: 1, Height Range: 2] | |||||||||||||||||||||||||||||||||||||||||||||||||||||||||||||||||||||||||||||||||||||||||||||||||||||||||||||||||||||||||||||||||||||||||||||||||||||||||||||||||||||||||||
| Shining Mastema: Light Strike ATK on enemy unit that increases in strength according to number of dead allies & very Strong vs Lust & raises Power if user is a Light unit [Range: 1, Height Range: 2] (limited to female units) Mittens of Binding Ties Exclusive: Unlockable only by attacking Lust enemies (in place of Envious Dark Palm and Crashing Gust of Greed) | |||||||||||||||||||||||||||||||||||||||||||||||||||||||||||||||||||||||||||||||||||||||||||||||||||||||||||||||||||||||||||||||||||||||||||||||||||||||||||||||||||||||||||
| Taunting Counterattack: Penetrating Strike ATK to enemy unit [Range: 1, Height Range: 2] | Incurred Wrath: Strike ATK on enemy unit & inflicts Rage (lowers all ATK while inflicted with Rage) & greatly raises own counterattack power for 3 turns [Range: 1, Height Range: 2] (limited to Holy Brawler type jobs, unlockable only by Holy Brawler [Fudo] or Don of Little Heaven jobs) | ||||||||||||||||||||||||||||||||||||||||||||||||||||||||||||||||||||||||||||||||||||||||||||||||||||||||||||||||||||||||||||||||||||||||||||||||||||||||||||||||||||||||||
These skills are currently unreleased in Global! (Released June 2021 in Japan)
| Tier 1 | Tier 2 | Tier 3 |
|---|---|---|
| Needle Shot: Missile ATK on enemy unit [Range: 4, Height Range: Unlimited] | Spike Shot: Missile ATK on enemy unit [Range: 5, Height Range: Unlimited] | Piercing Shot: Missile ATK on enemy unit & lowers Missile Res for three turns & 100% Hit & Strong vs Jumping Opponents & interrupts JUMP [Range: 5, Height Range: Unlimited] |
| Charted Shot: Missile ATK on enemy unit [Range: 4, Height Range: Unlimited] | Charging Bolt: Missile ATK on enemy unit & inflicts Stun for three turns [Range: 4, Height Range: Unlimited] | |
| Burning Charge: Fire Missile ATK on enemy unit & raises own Missile ATK Power for three turns [Range: 4, Height Range: Unlimited] (restricted to fire units) | ||
| Godwolf Storm Fang: Wind Missile ATK on enemy unit & doubles own Missile ATK Power for one turn before activation & removes all statuses inflicted on self [Range: 4, Height Range: Unlimited] (Seida only) Tranquil Bow Alizehan Exclusive: Unlockable only by Seida (in place of other skills) | ||
| Needle Arrow: Missile ATK on target units within area around self & moves target 2 sq back [Area: Square (3), Height Range: 3] | Spiral Arrow: Missile ATK on target units within area around self & moves targets 3 sq back [Area: Diamond (5), Height Range: 3] | |
| Shadow Swift Funeral Manifest: Dark Missile ATK on enemy units within area around self & raises Power if target is inflicted with a status [Area: Diamond (7), Height Range: 5] (Failnaught only) Arcane Bow [Failnaught] Exclusive: Unlockable only by Failnaught (in place of other skills) | ||
| High Arrow: Missile ATK on target units within area [Range: 4, Area: Cross (3), Height Range: Unlimited] | Quarreling Rain: Missile ATK on target units within area around self [Area: Special (Square-Cross 2), Height Range:3] | |
| Quickbow Cactus: After moving, Missile ATK on target units within area around self & greatly lowers probability of activating Reactions for three turns [Move Area: Diamond (9), Area: Square (3), Height Range: 3] | ||
| Fallen Arrow: Missile ATK on target units within area [Range: 4, Area: Square (3), Height Range: Unlimited] | Low Latio Arrow: Missile ATK on target units within area [Range: 5, Area: Diamond (5), Height Range: Unlimited] | |
| New Moon Storm: Penetrating 4-hit Wind Missile ATK on target units within area & chance of CRIT [Range: 4, Area: Diamond (5), Height Range: Unlimited] (Artemis and Dark Artemis only) Deadly Bow and Divine Purity Bow Artemis Exclusive: Unlockable only by Artemis or Dark Artemis (in place of other skills) | ||
| Pure Flowers of Love: Light Missile ATK on target units within area & powerfully Strong vs Dark & Strong vs Eldritch [Range: 6, Area: Diamond (5), Height Range: Unlimited] (Eros only) Cupid Bow Eros Exclusive: Unlockable only by Eros (in place of other skills) | ||
| Kill the Purgatory: Fire Missile ATK on target units within area & Strong vs Eldritch & greatly raises target’s Jewels Spent [Range: 4, Area: Square (3), Height Range: Unlimited] (Shekinah only) Dazzling Shekinah Bow Exclusive: Unlockable only by Shekinah (in place of other skills) | ||
| Deep Abyss Ray: Dark Missile ATK on target units within area & inflicts powerful Blind & raises own PATK/DEX for three turns [Range: 5, Area: Square (3), Height Range: Unlimited] (Dark Princess Yomi only) Bow of Darkness Exclusive: Unlockable only by Dark Princess Yomi (in place of other skills) | ||
| Quarreling Arrow: Missile ATK on target units within area that ignores DEF [Range: 2, Area: Lateral (3), Height Range: 2] | Arrowsphere: Missile ATK on target units within area that ignores DEF [Range: 3, Area: Lateral (3), Height Range: 2] | |
| Warning Drop Arrow: Missile ATK on targets units within area & lowers PATK/MATK for three turns [Range: 4, Area: Cross (3), Height Range: Unlimited] | Offense Chain Rigid Arrow: Missile ATK on enemy units within area & greatly lowers PATK/MATK for three turns [Range: 4, Area: Square (3), Height Range: Unlimited] | |
| Warning Arrow: Missile ATK on enemy unit & lowers PATK/MATK for three turns [Range: 4, Height Range: Unlimited] | Sharp Arrow Shadow Shot: Missile ATK on enemy units within area & lowers AGI for three turns & lowers MOVE by 1 & greatly raises Power if target has had their AGI lowered [Range: 4, Area: Square (3), Height Range: Unlimited] | |
| Wings of the Blue Sky: Missile ATK on enemy units within area & greatly raises Power if target has had their hit rate lowered & grants Quicken on self [Range: 4, Area: Square (3), Height Range: Unlimited] (restricted to male units) | ||
| Offense Chain Arrow: Missile ATK on enemy unit & greatly lowers PATK/MATK for three turns [Range: 4, Height Range: Unlimited] | Cursed Arrow Assault: Missile ATK on enemy unit & sets PATK/MATK to zero for one turn [Range: 4, Height Range: Unlimited] | |
| Unknown Dark Thumb: Dark Missile Mag ATK on enemy unit & sets PATK/MATK to zero for one turn [Range: 4, Height Range: Unlimited] (restricted to female units) Inact Jaeger Exclusive (in place of other skills) Источники:
|


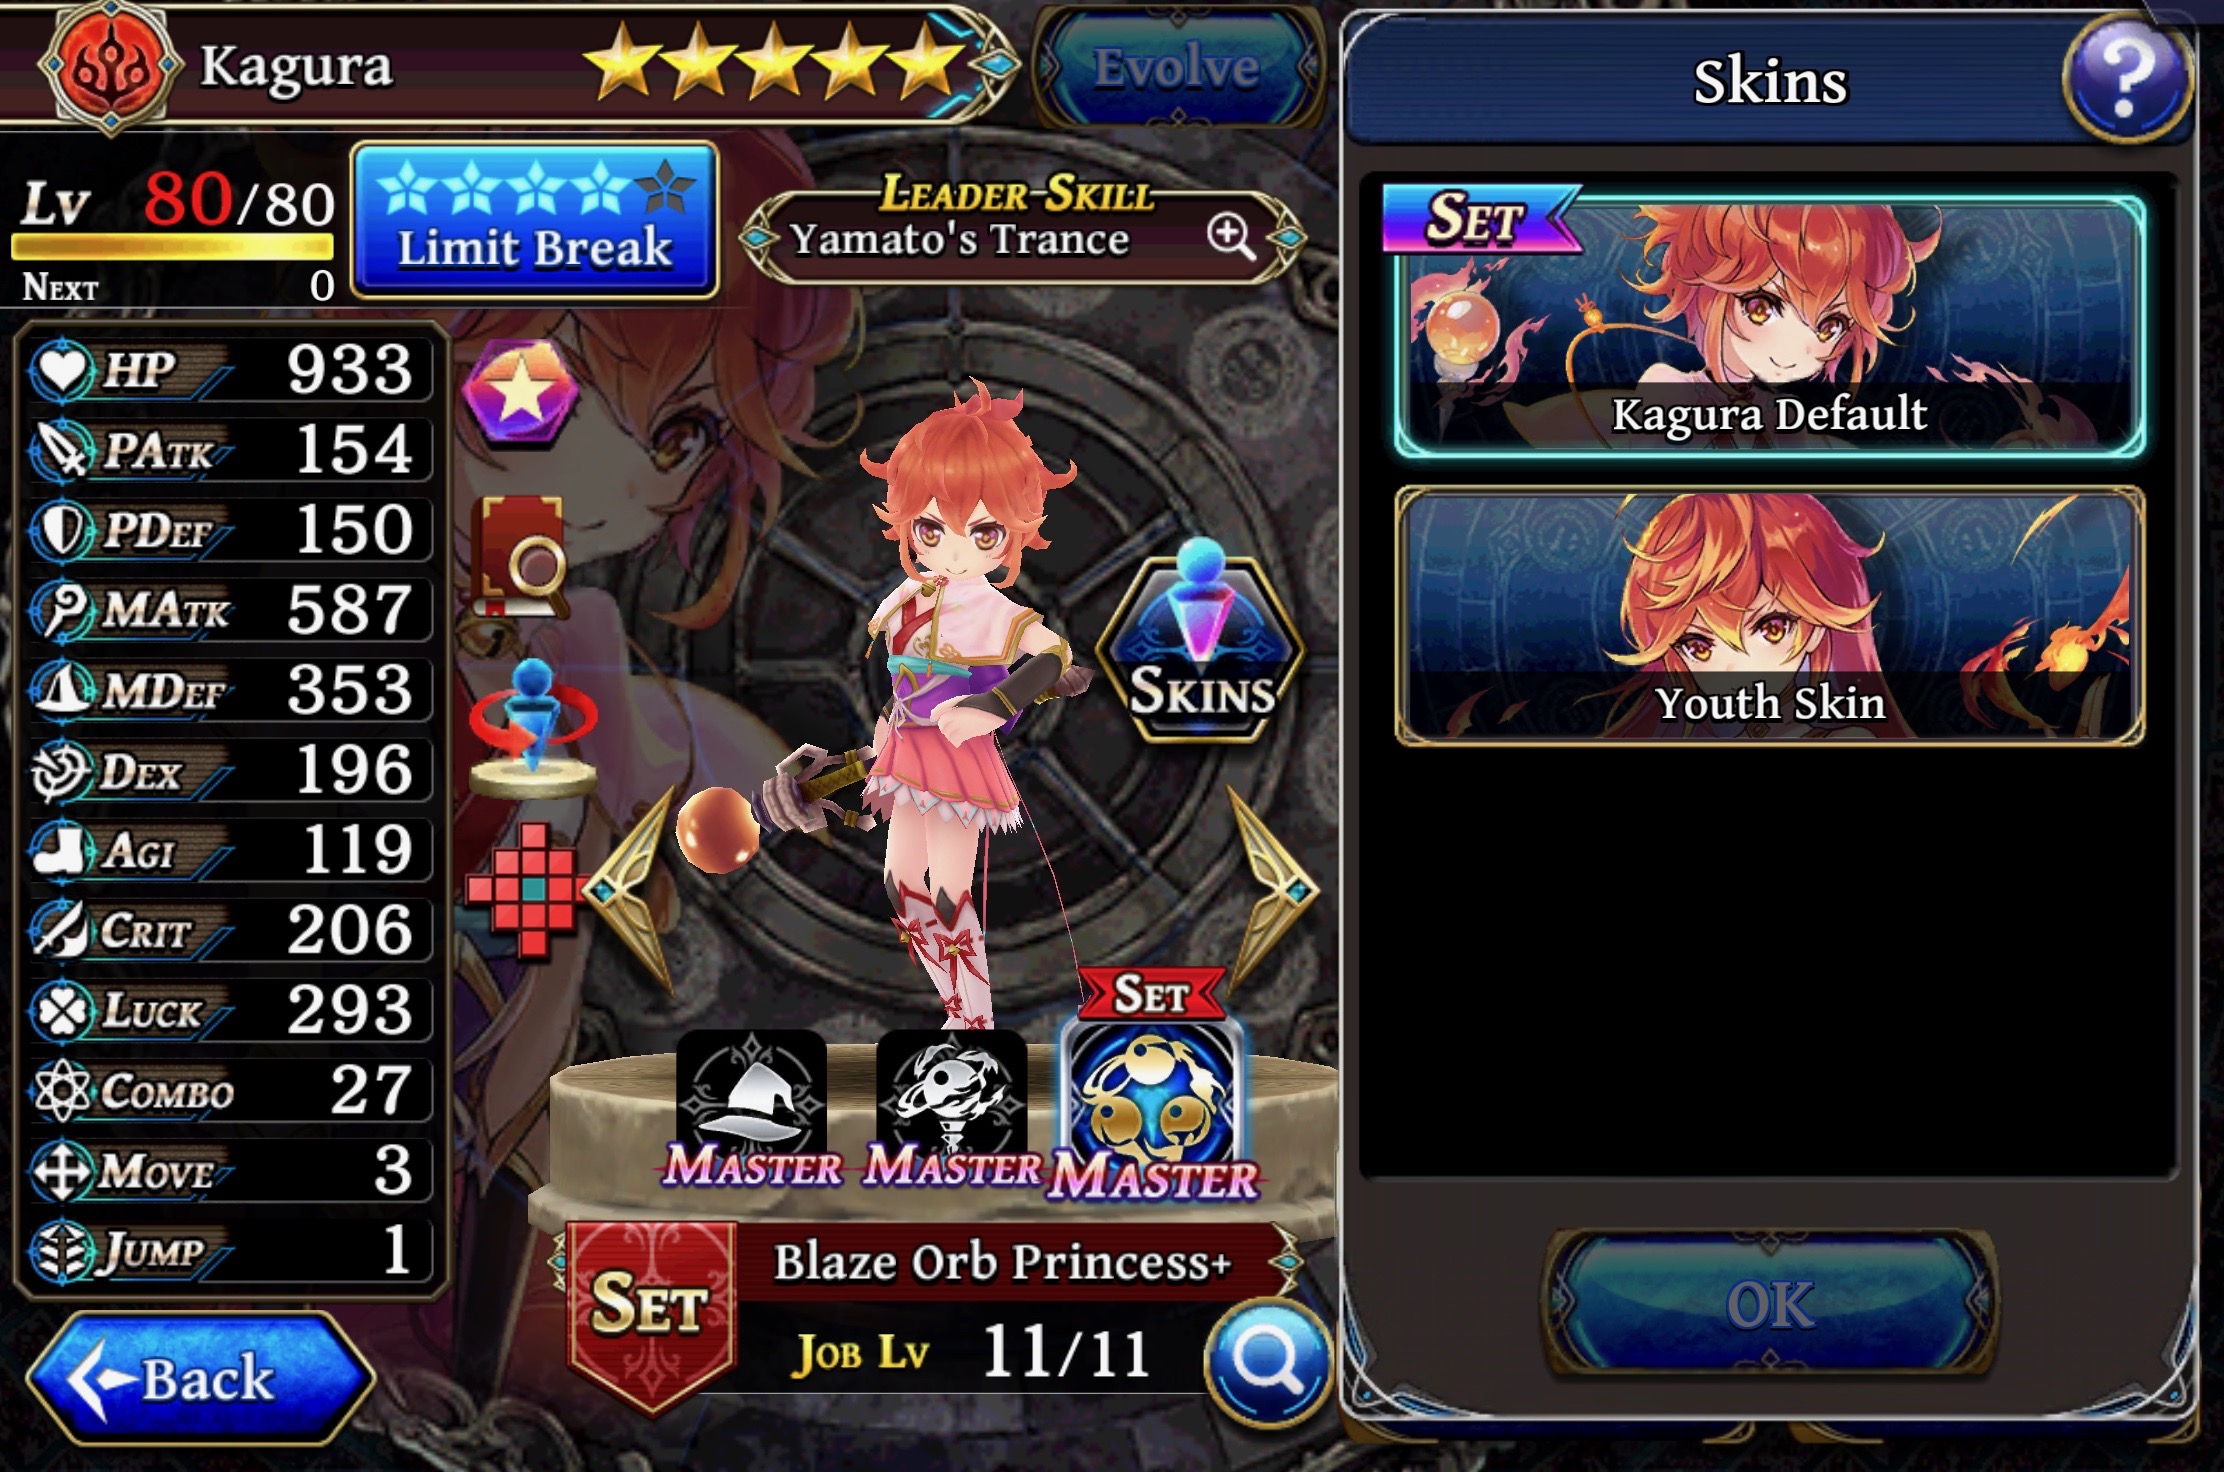
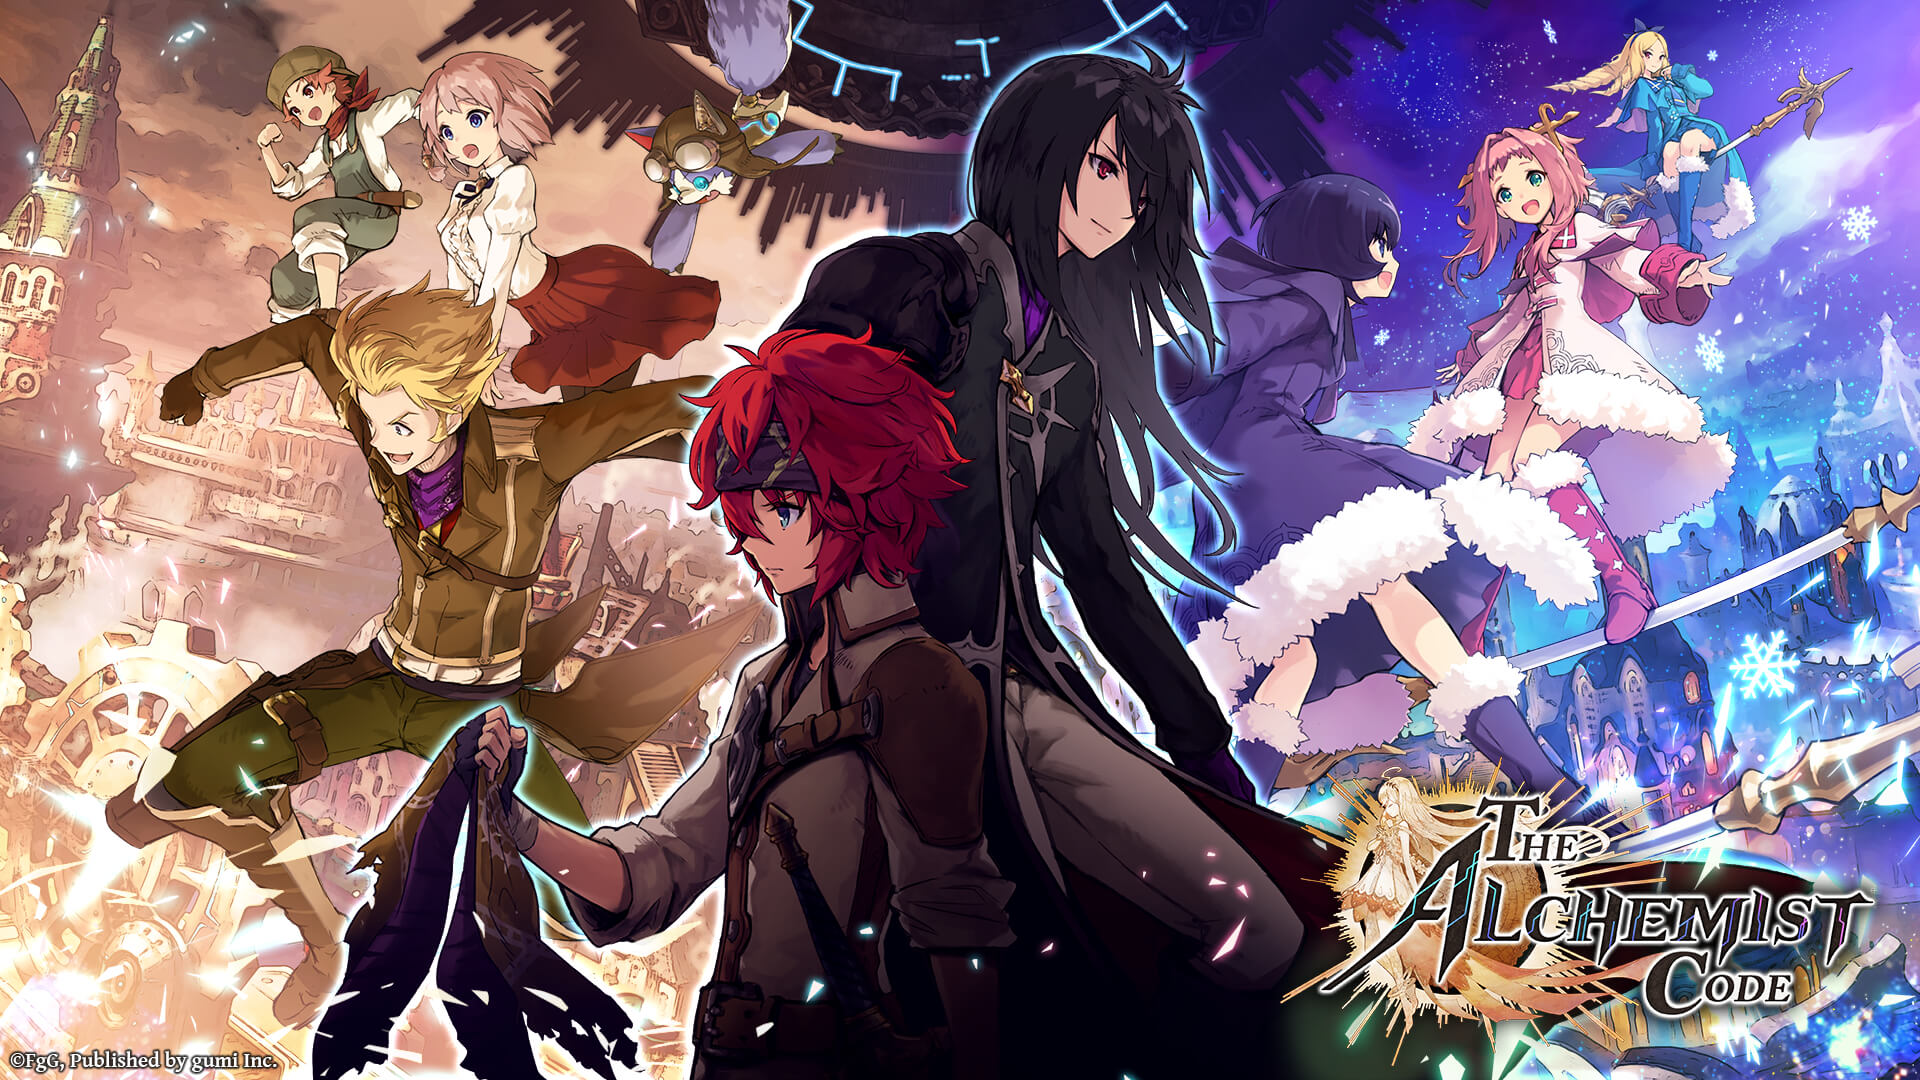
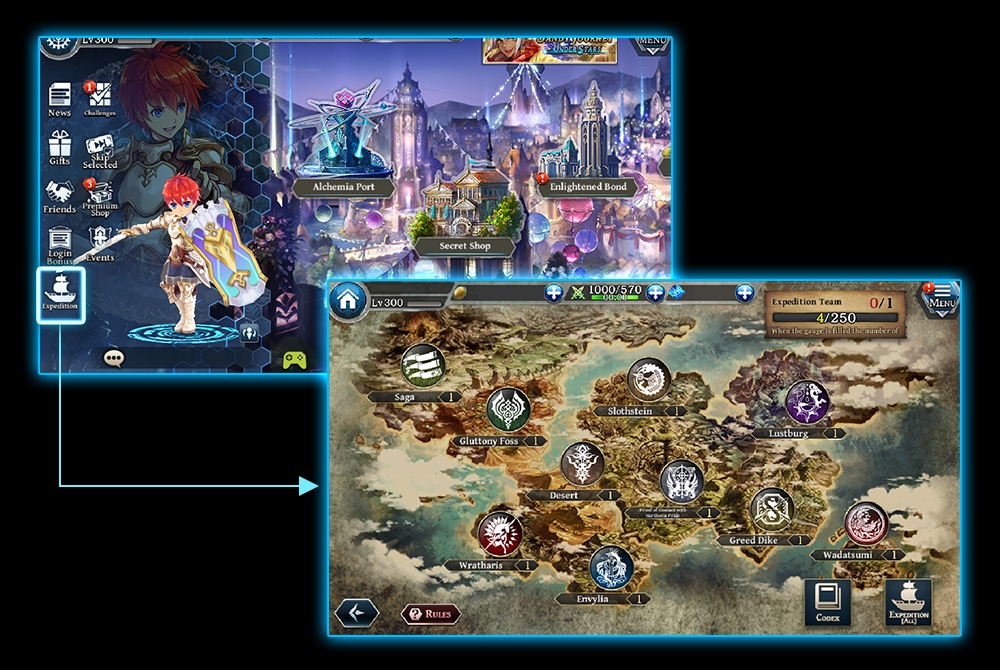
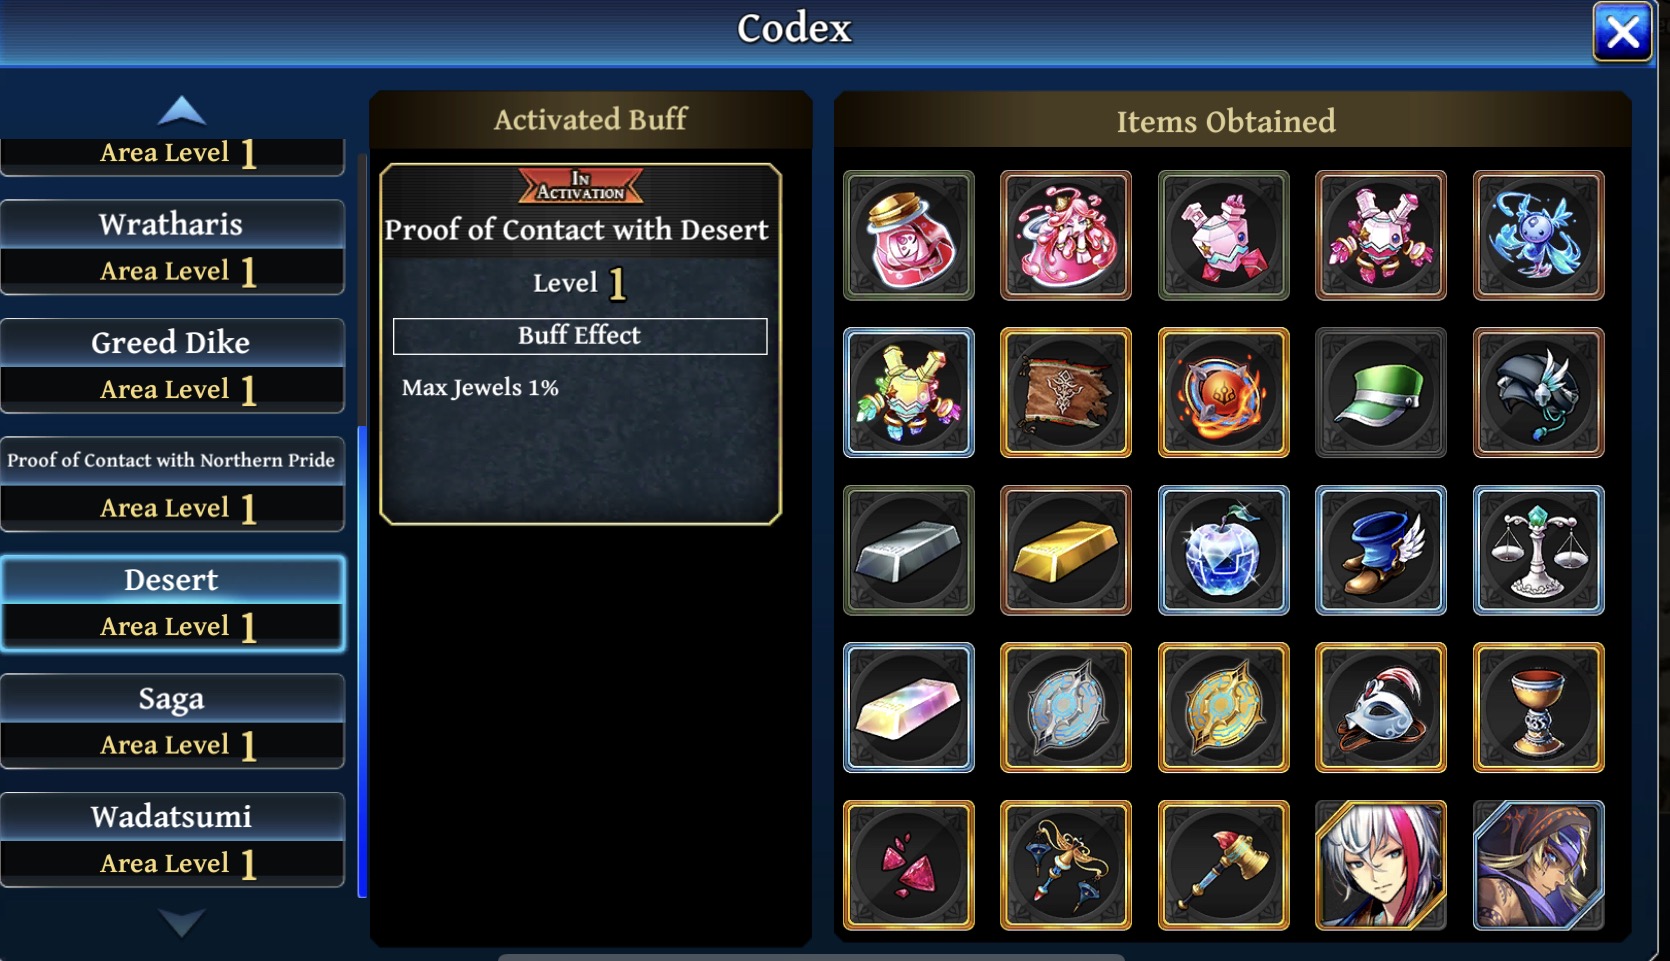
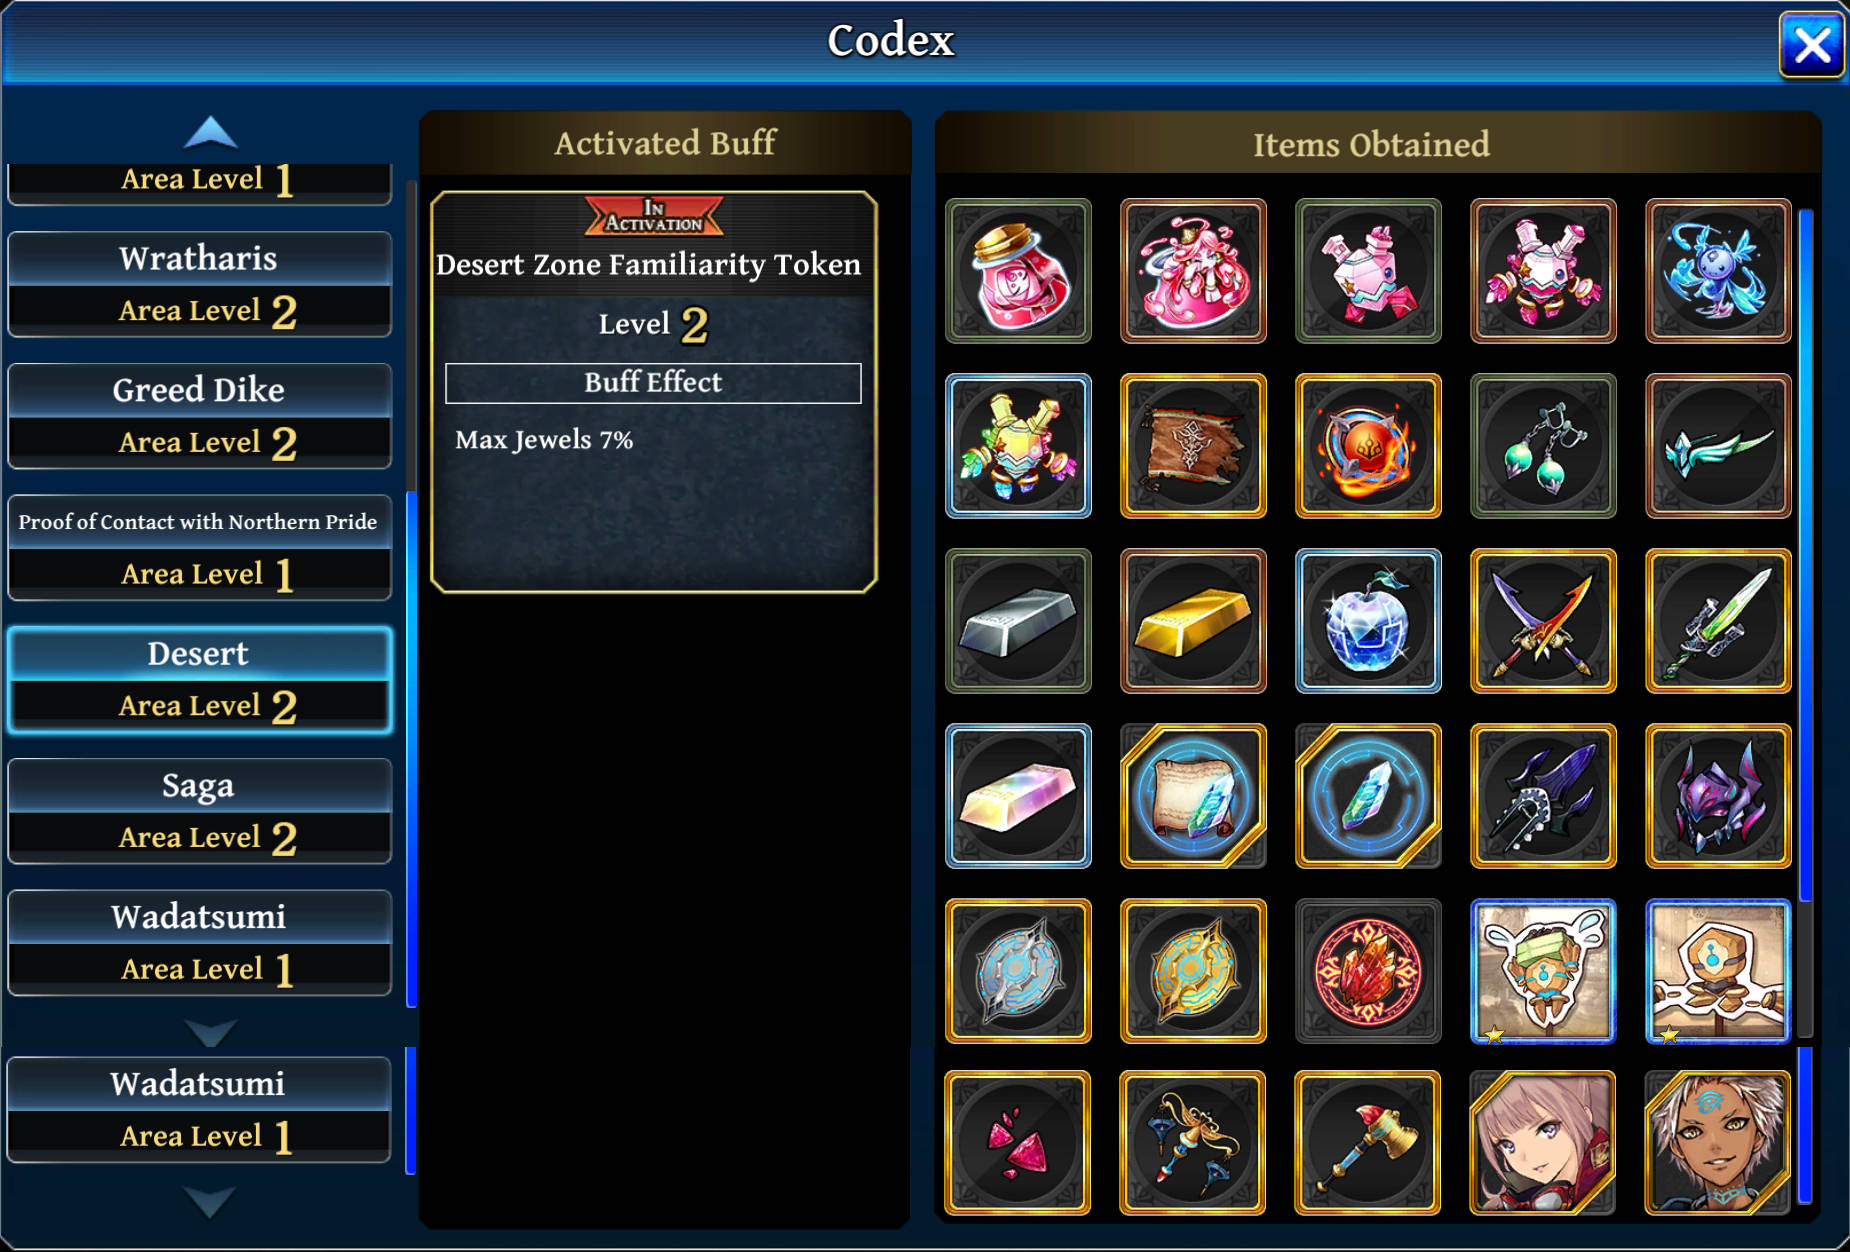
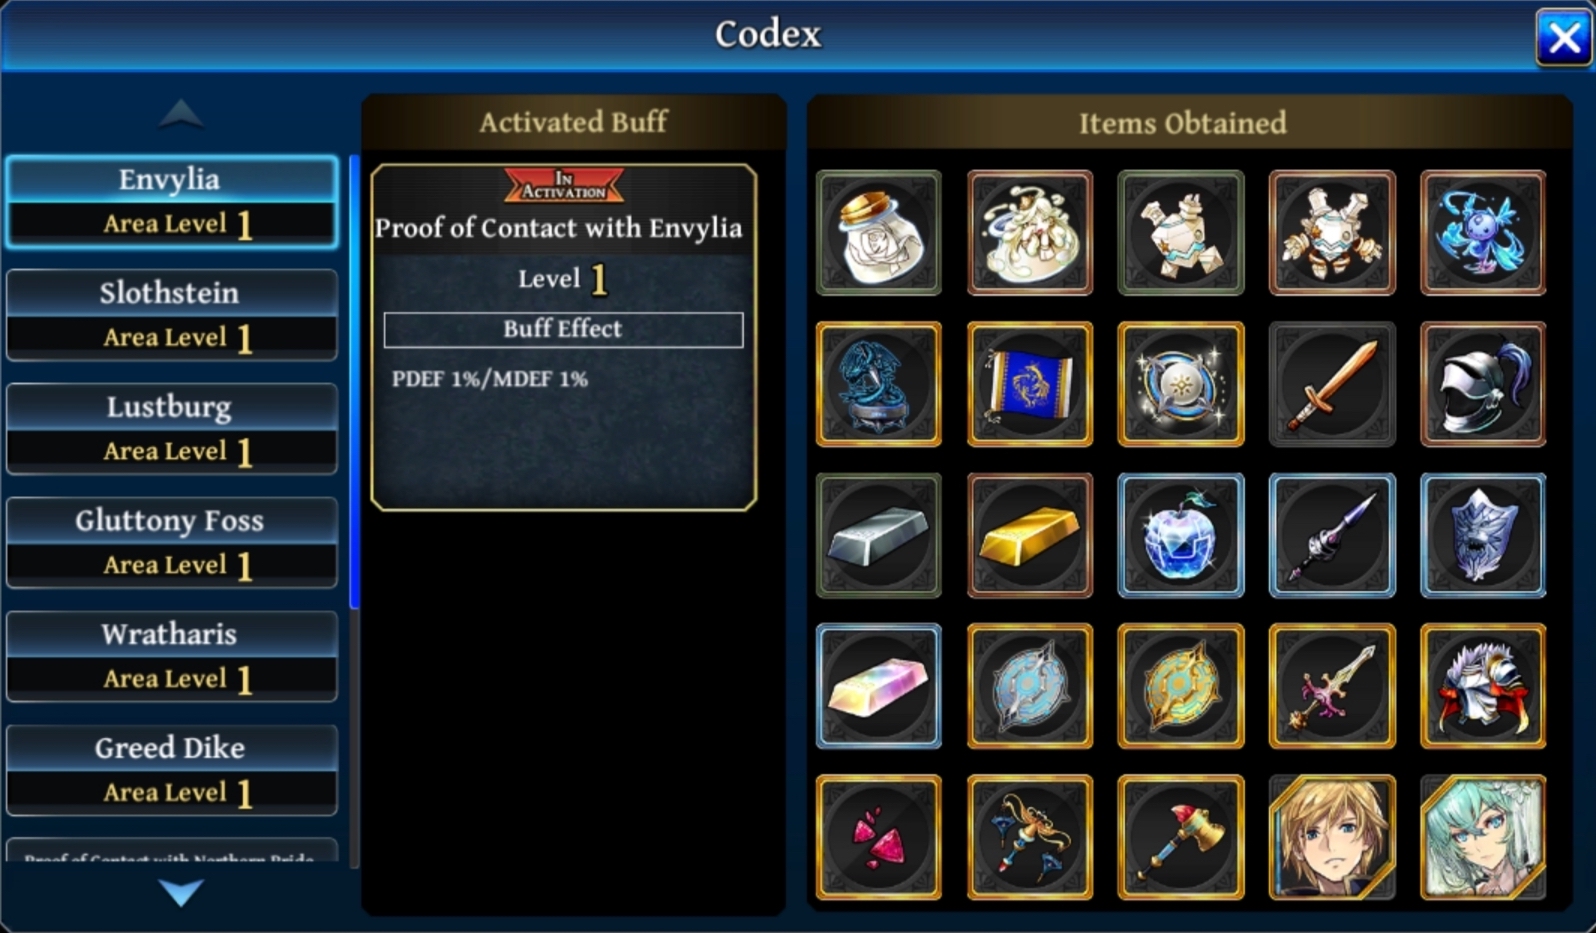
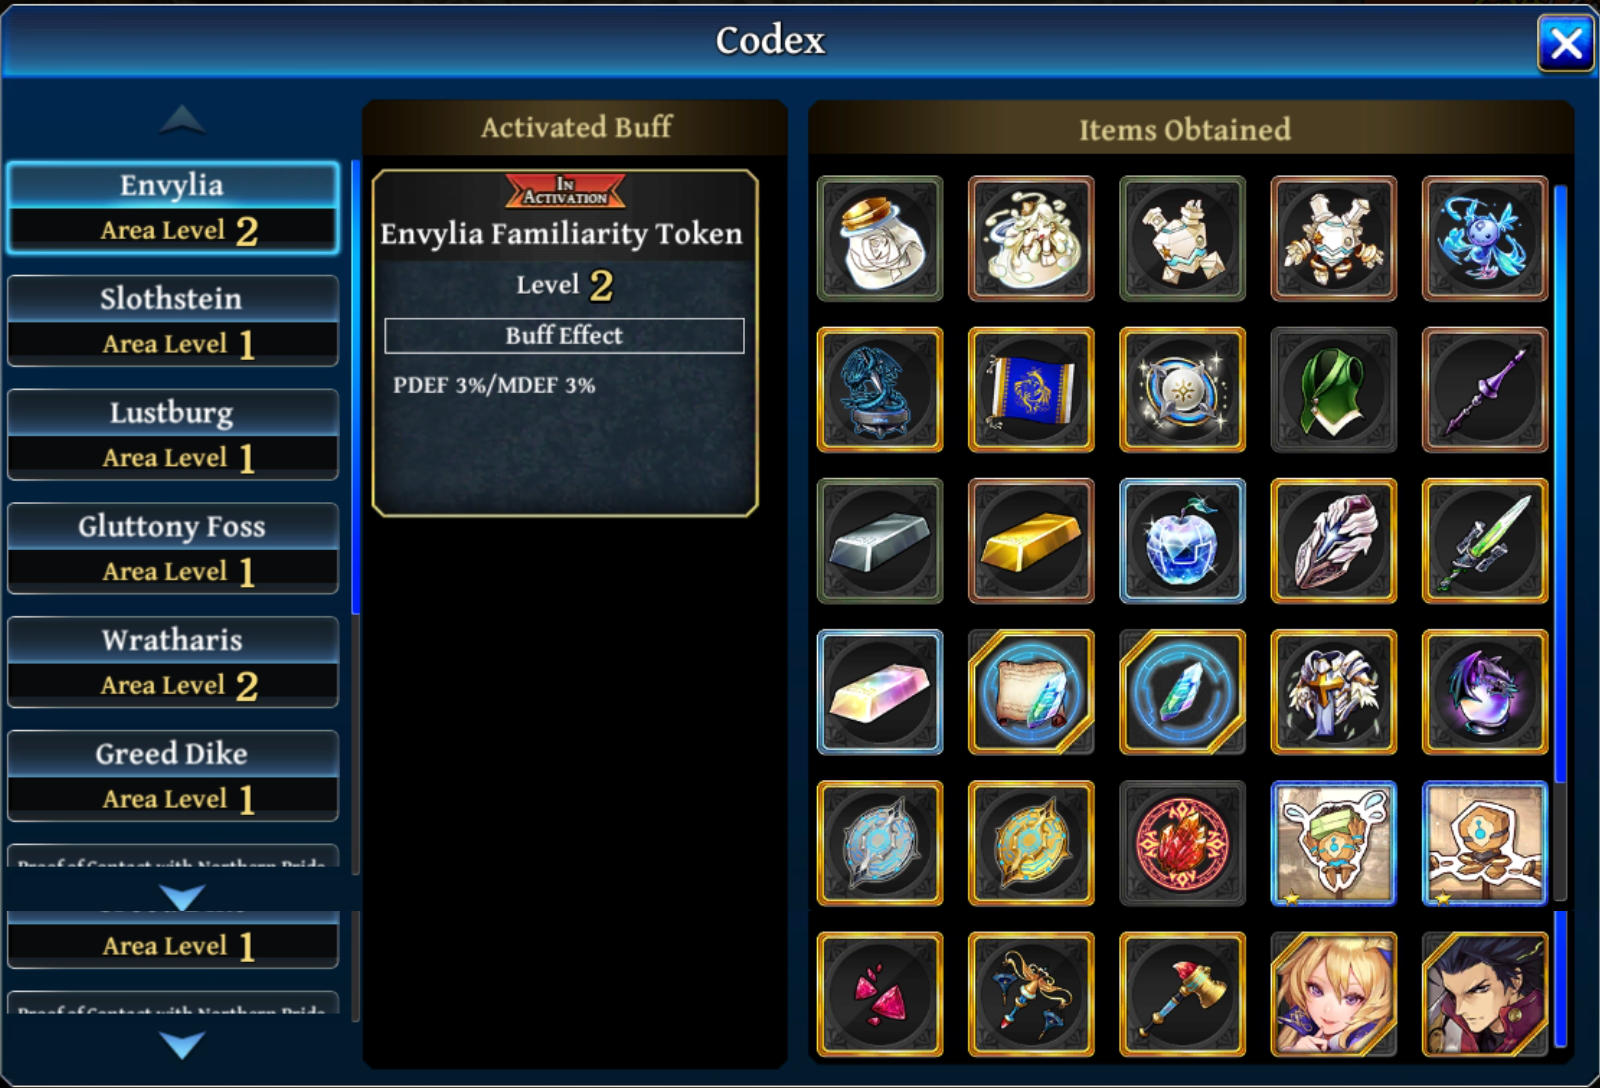
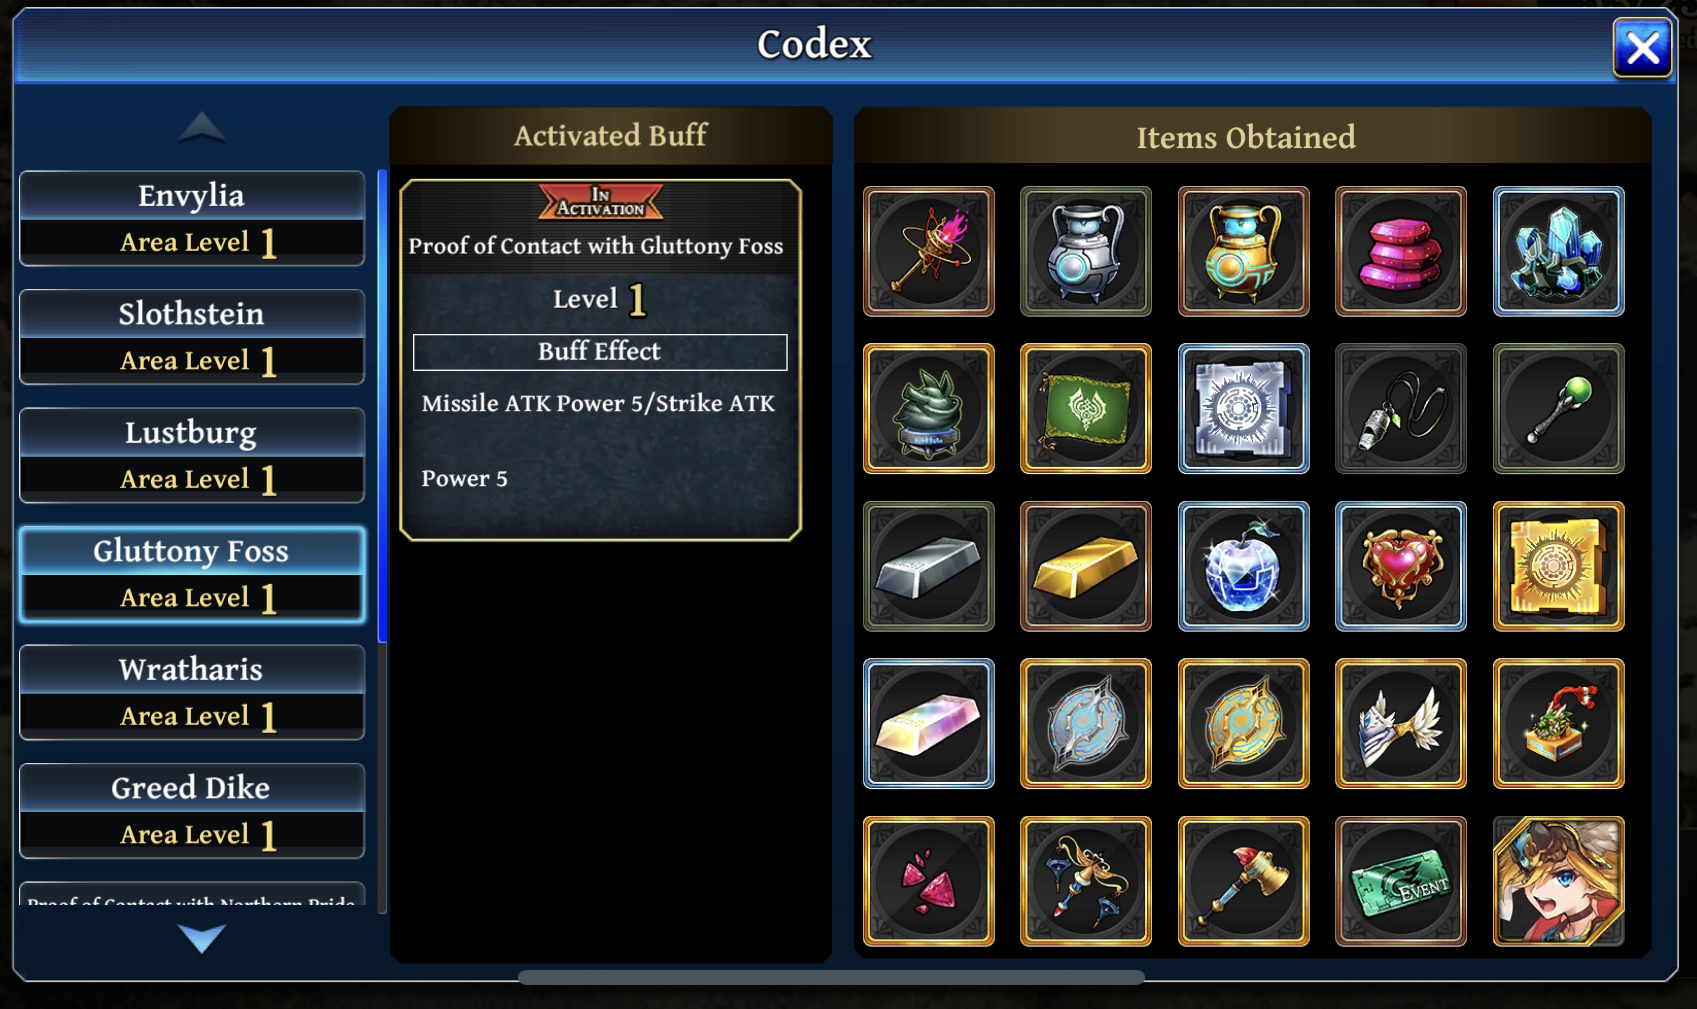
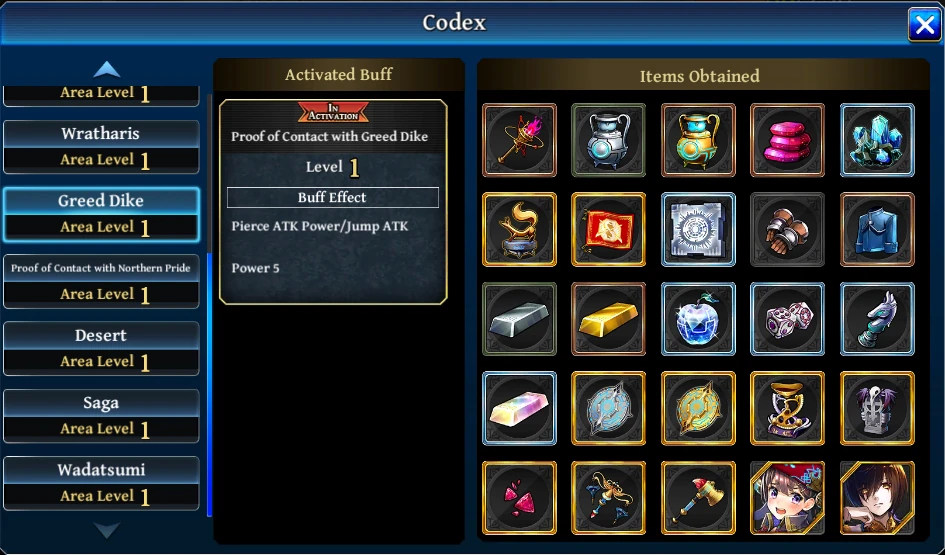
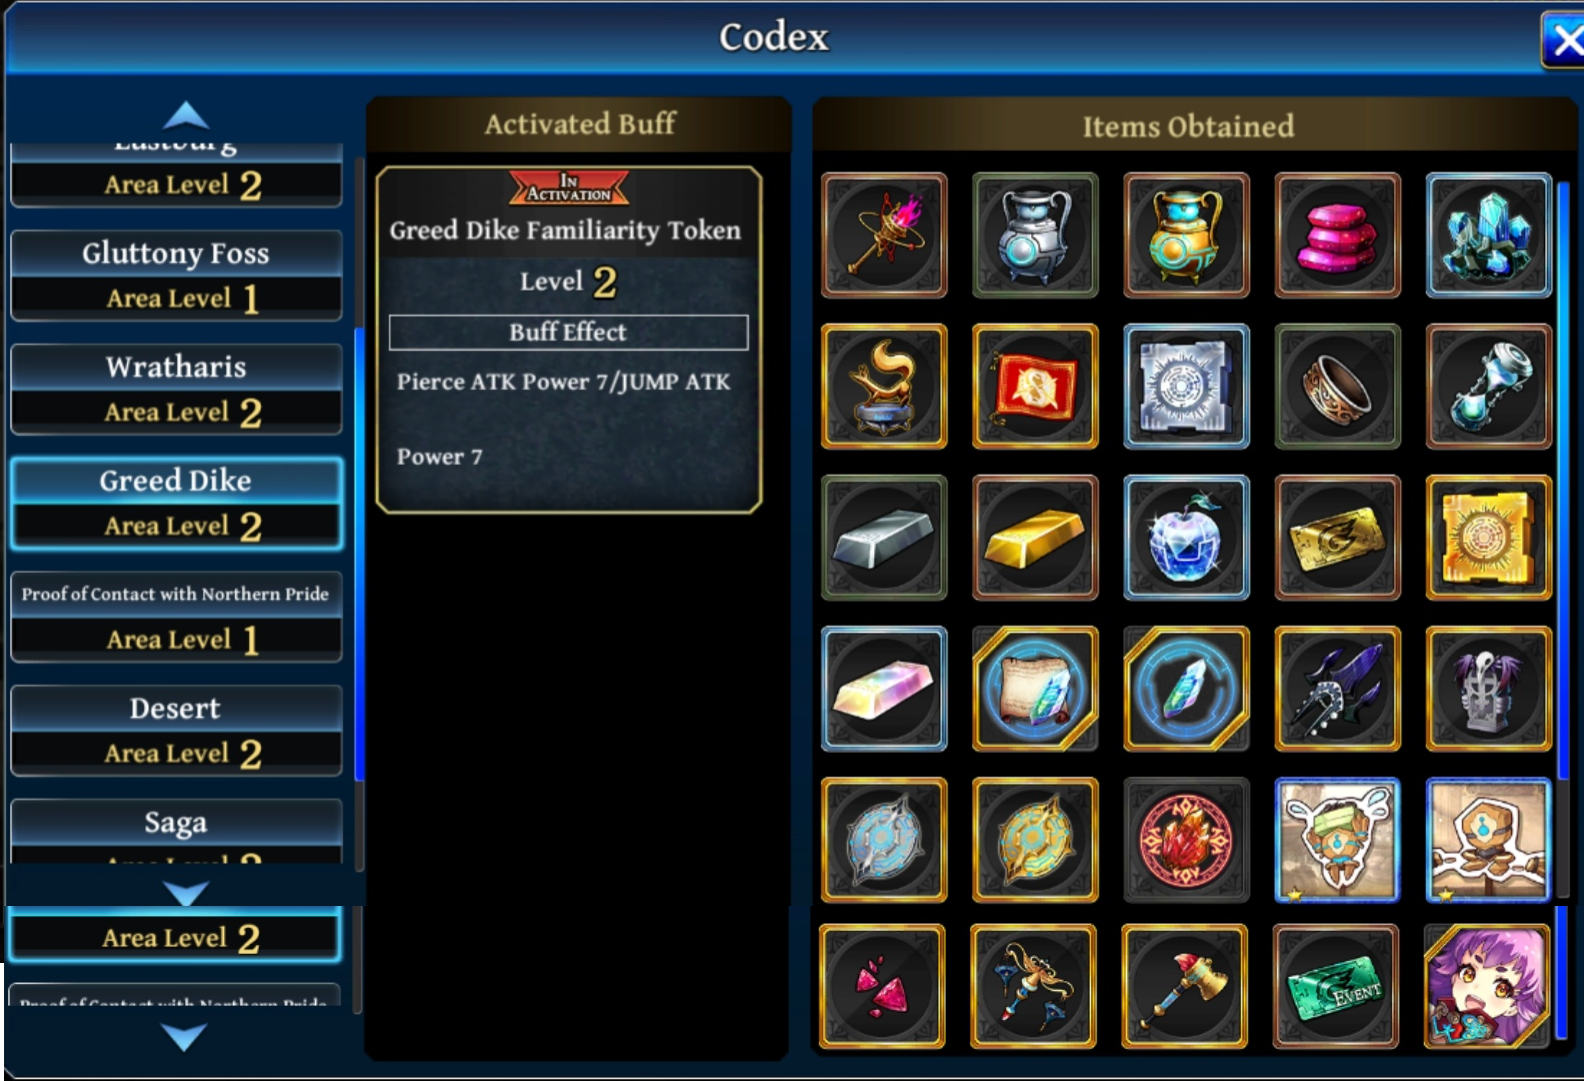
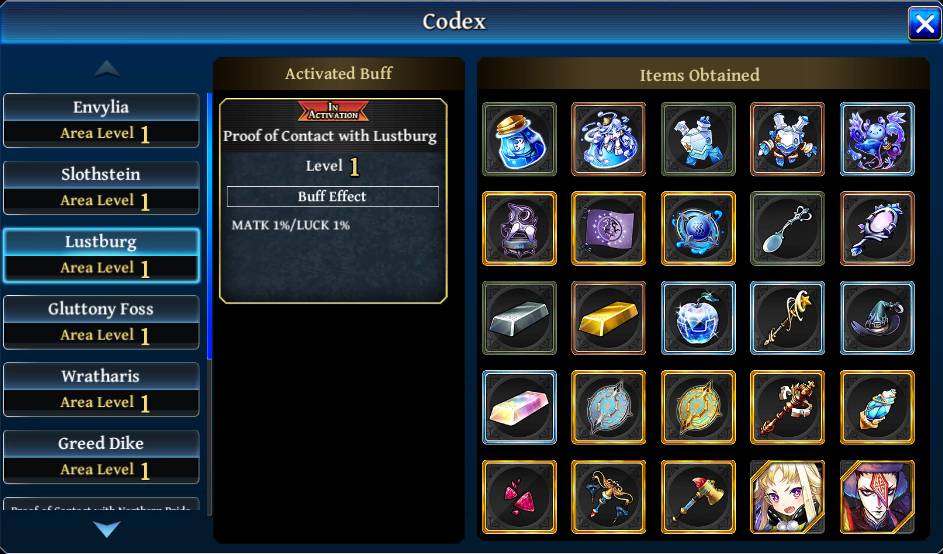
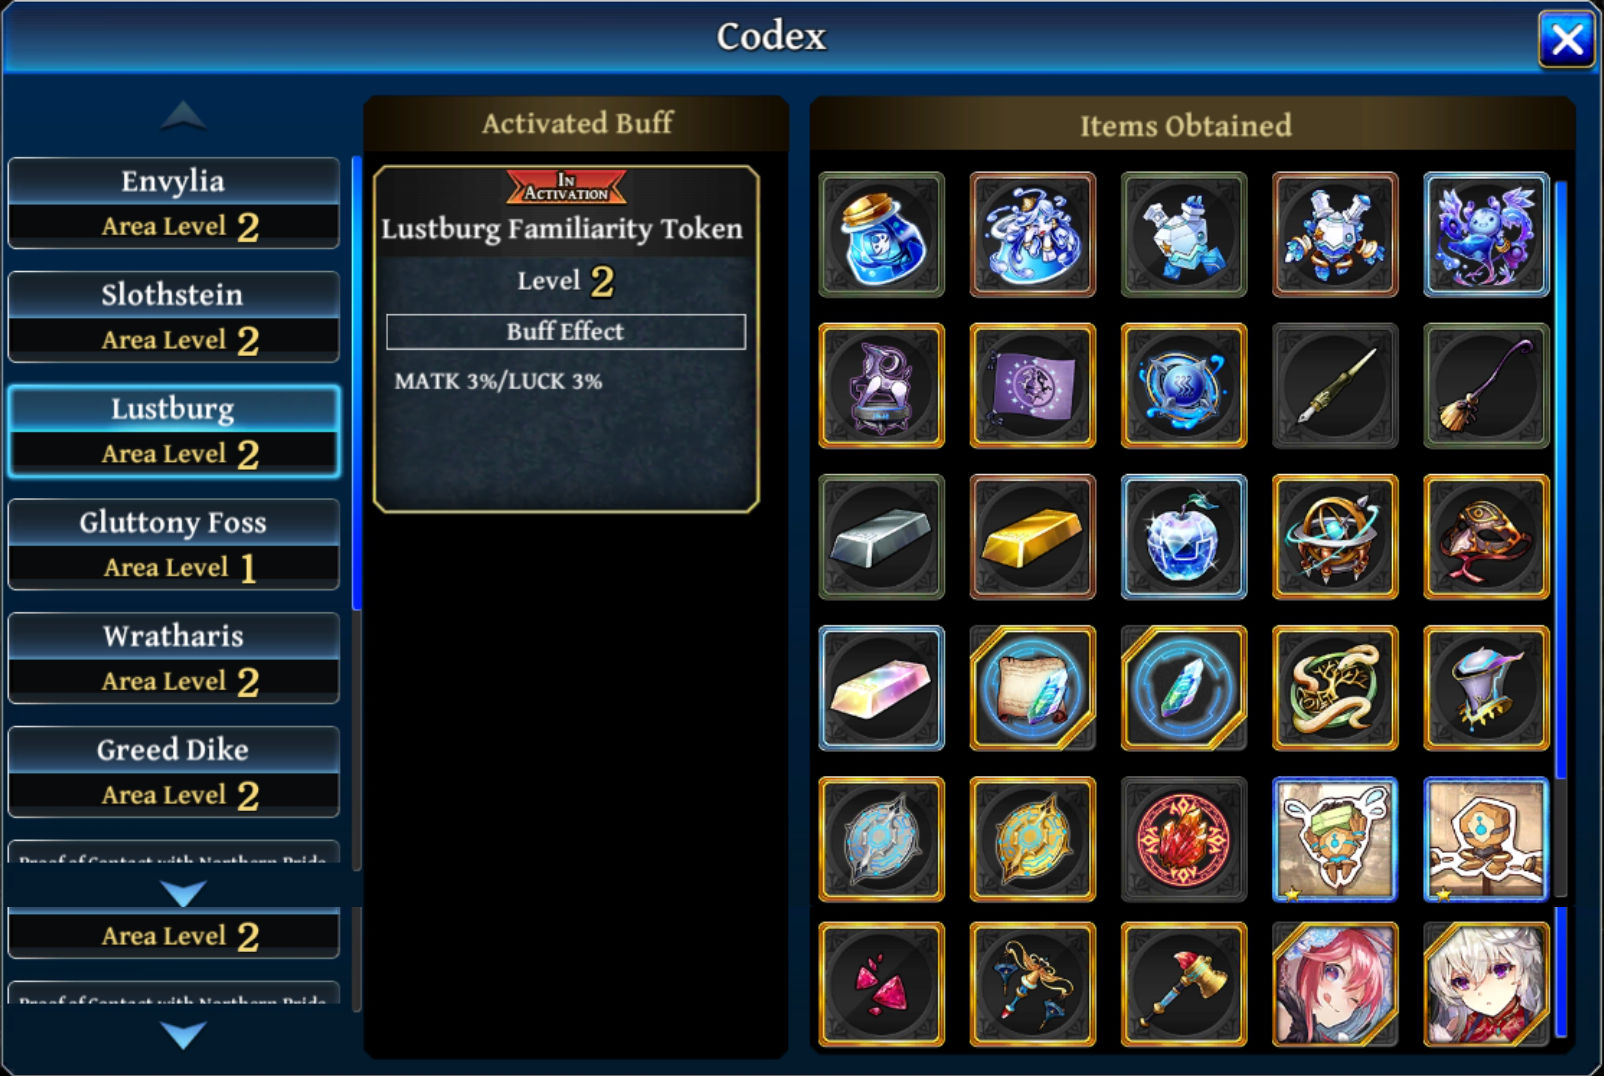
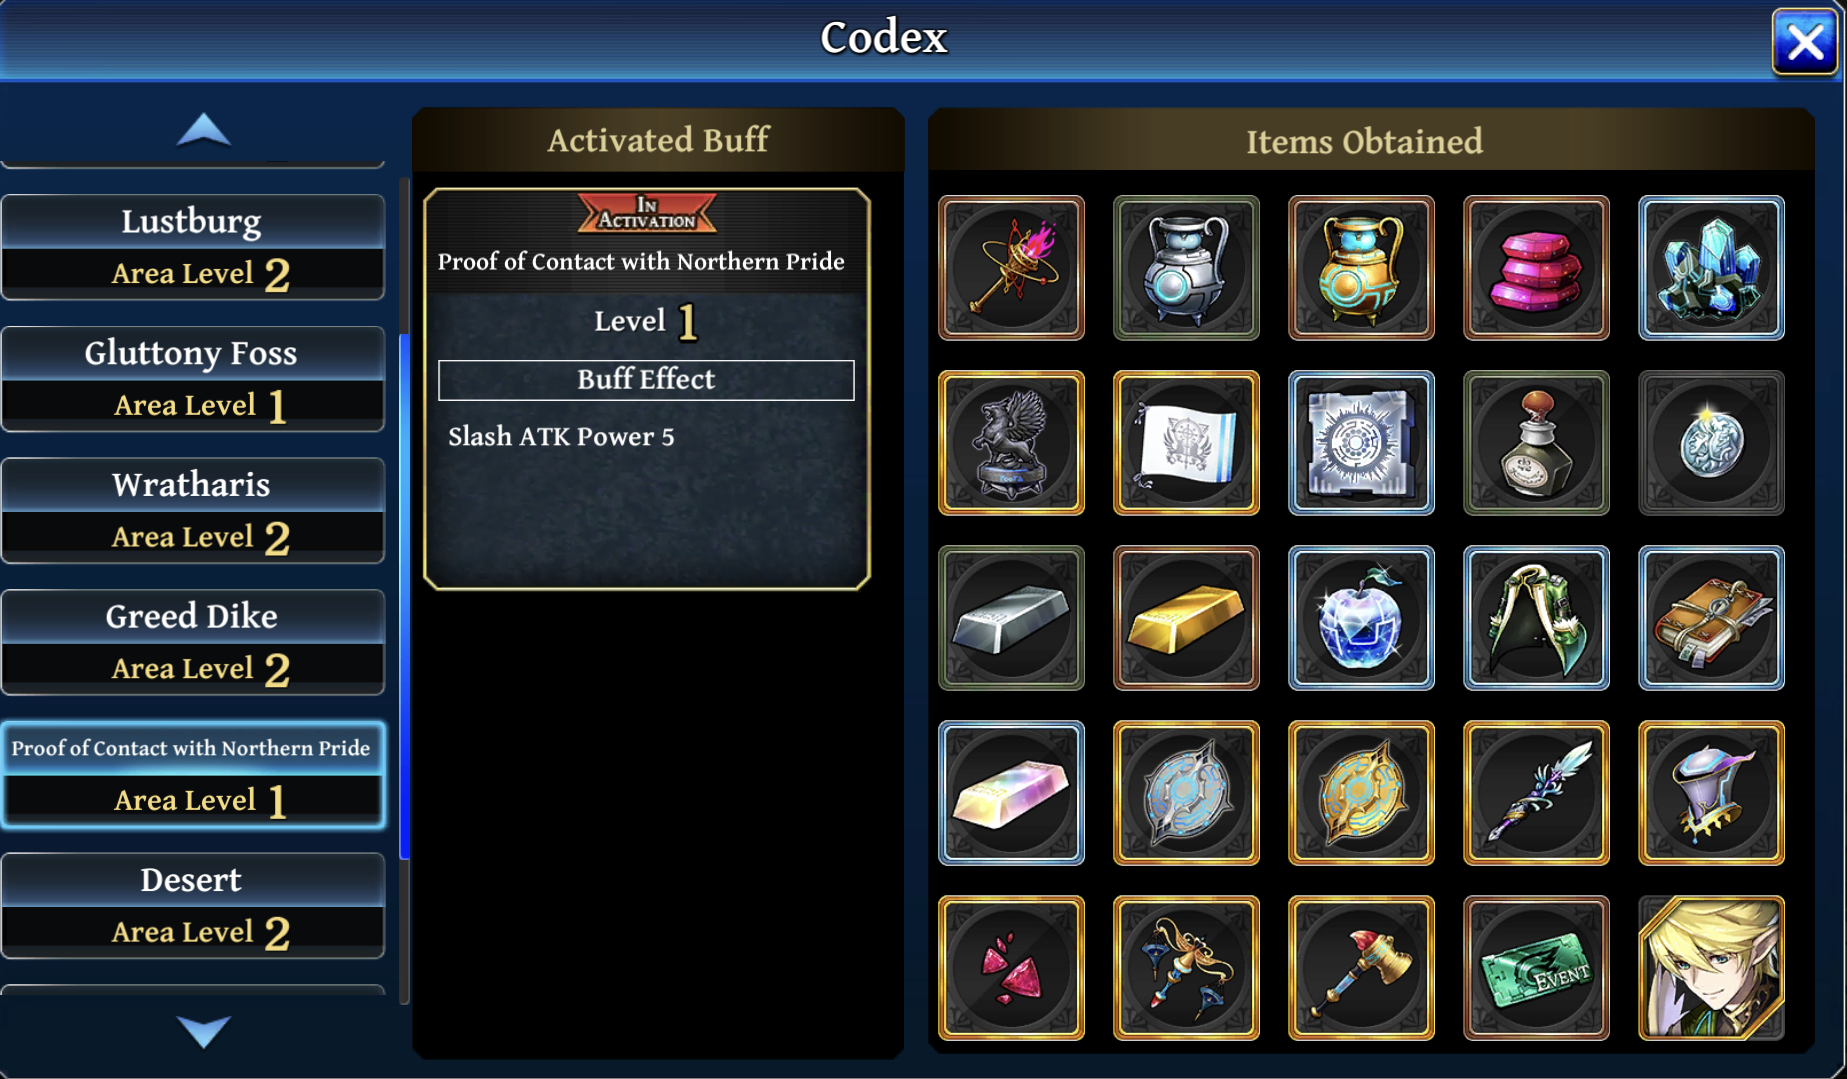
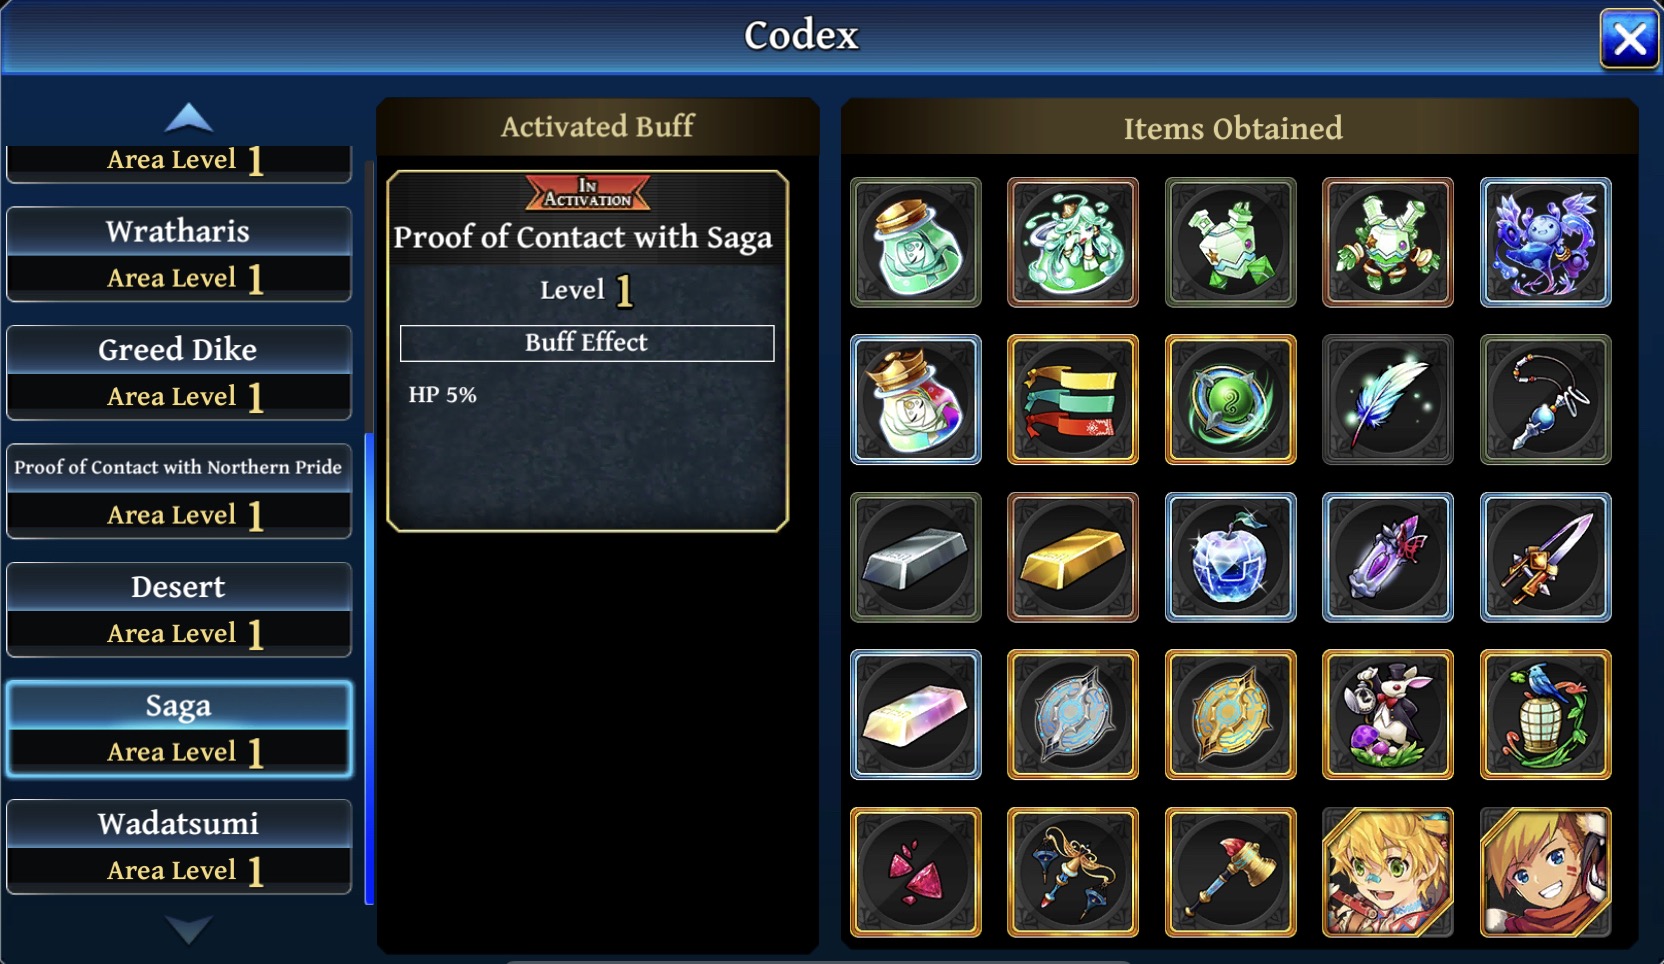
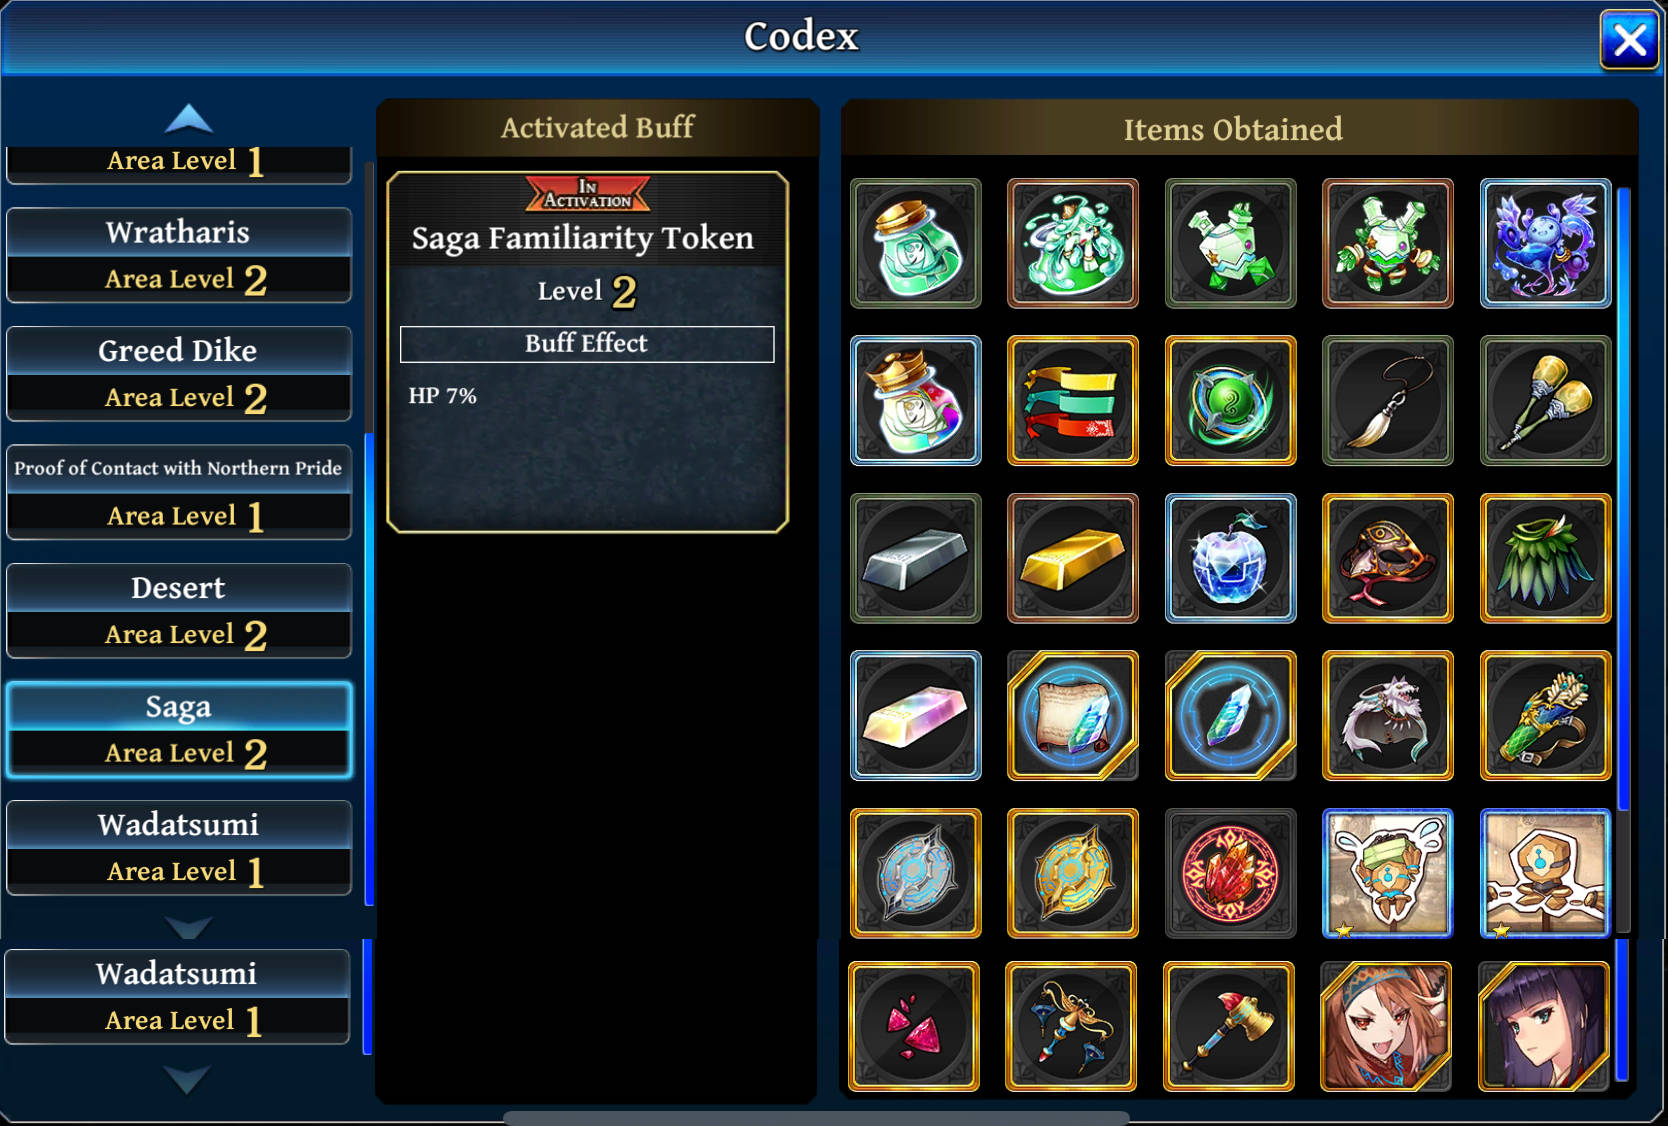
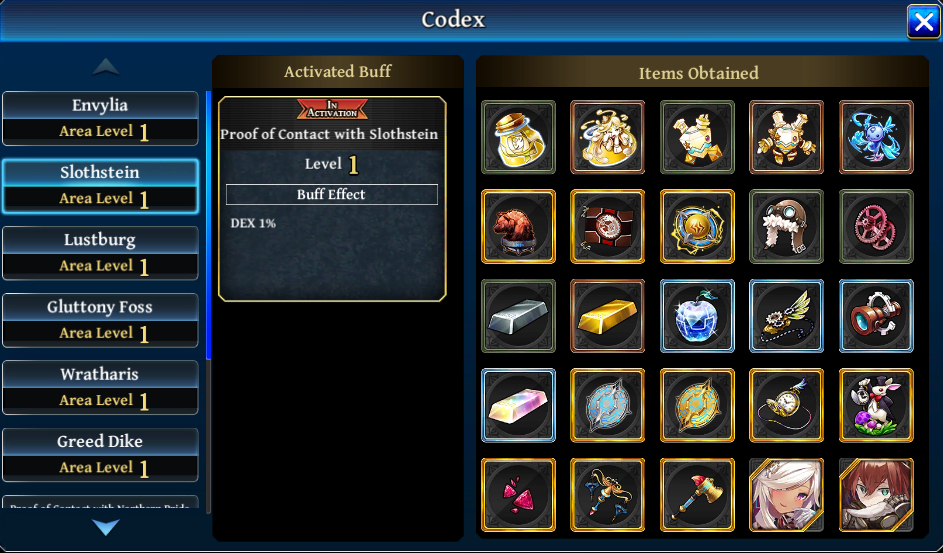
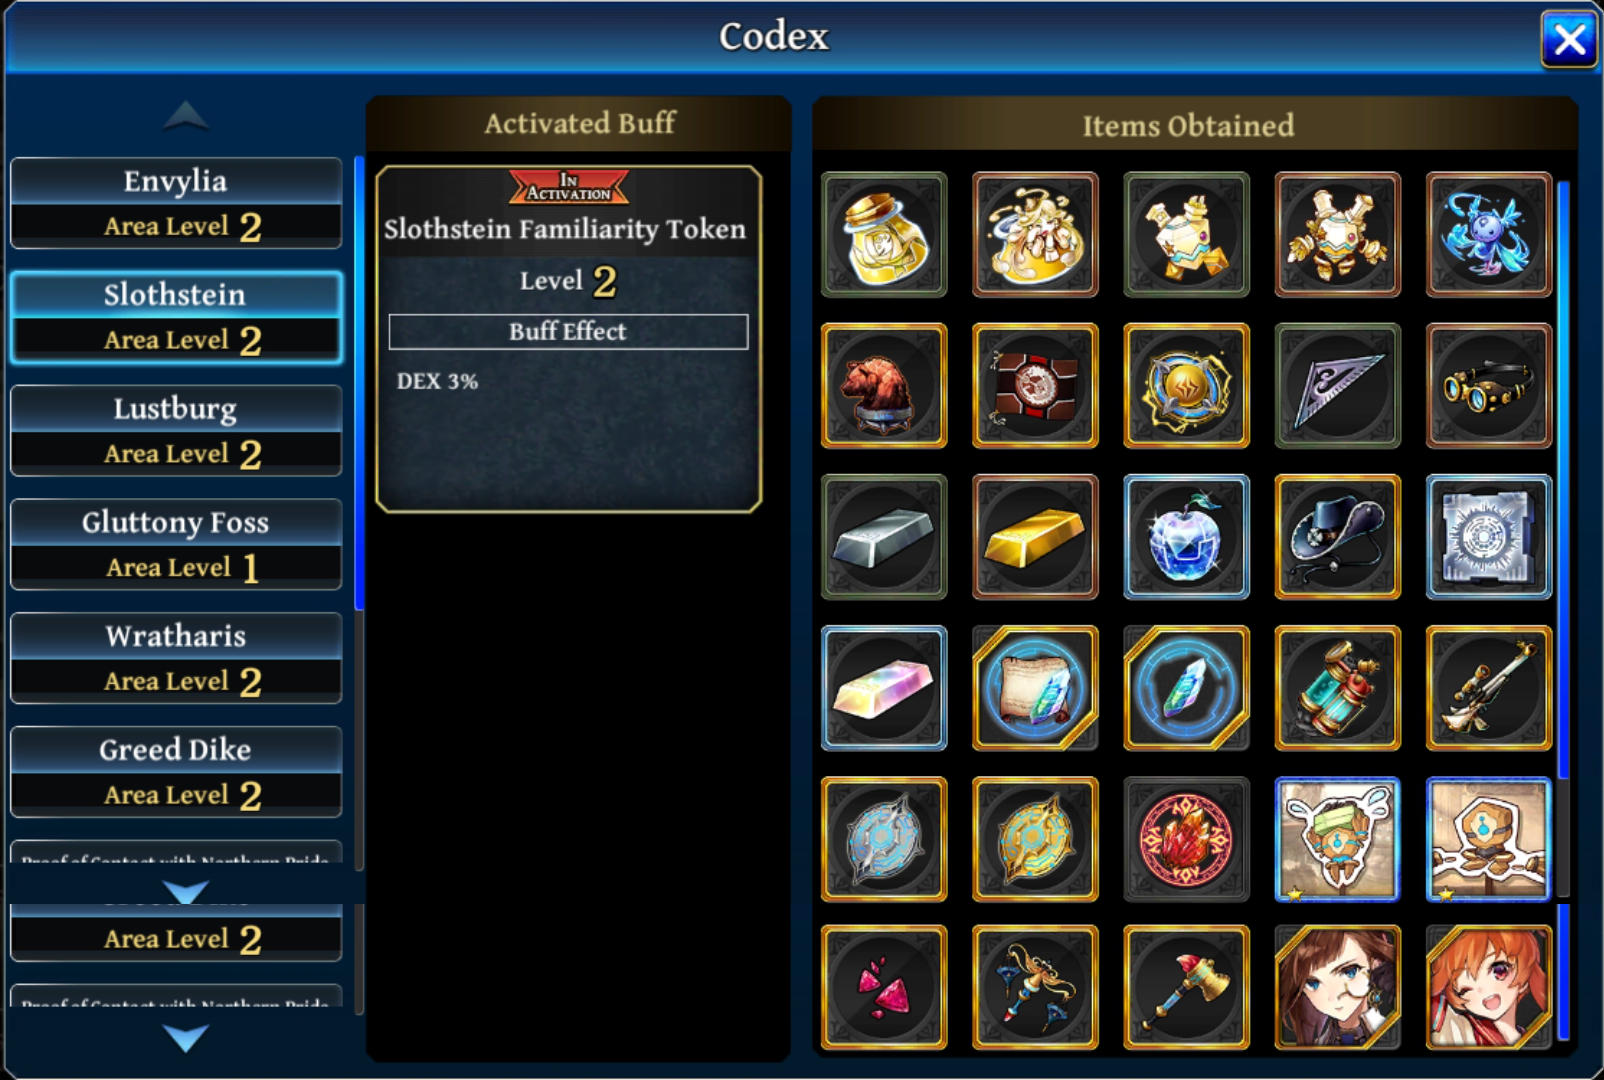
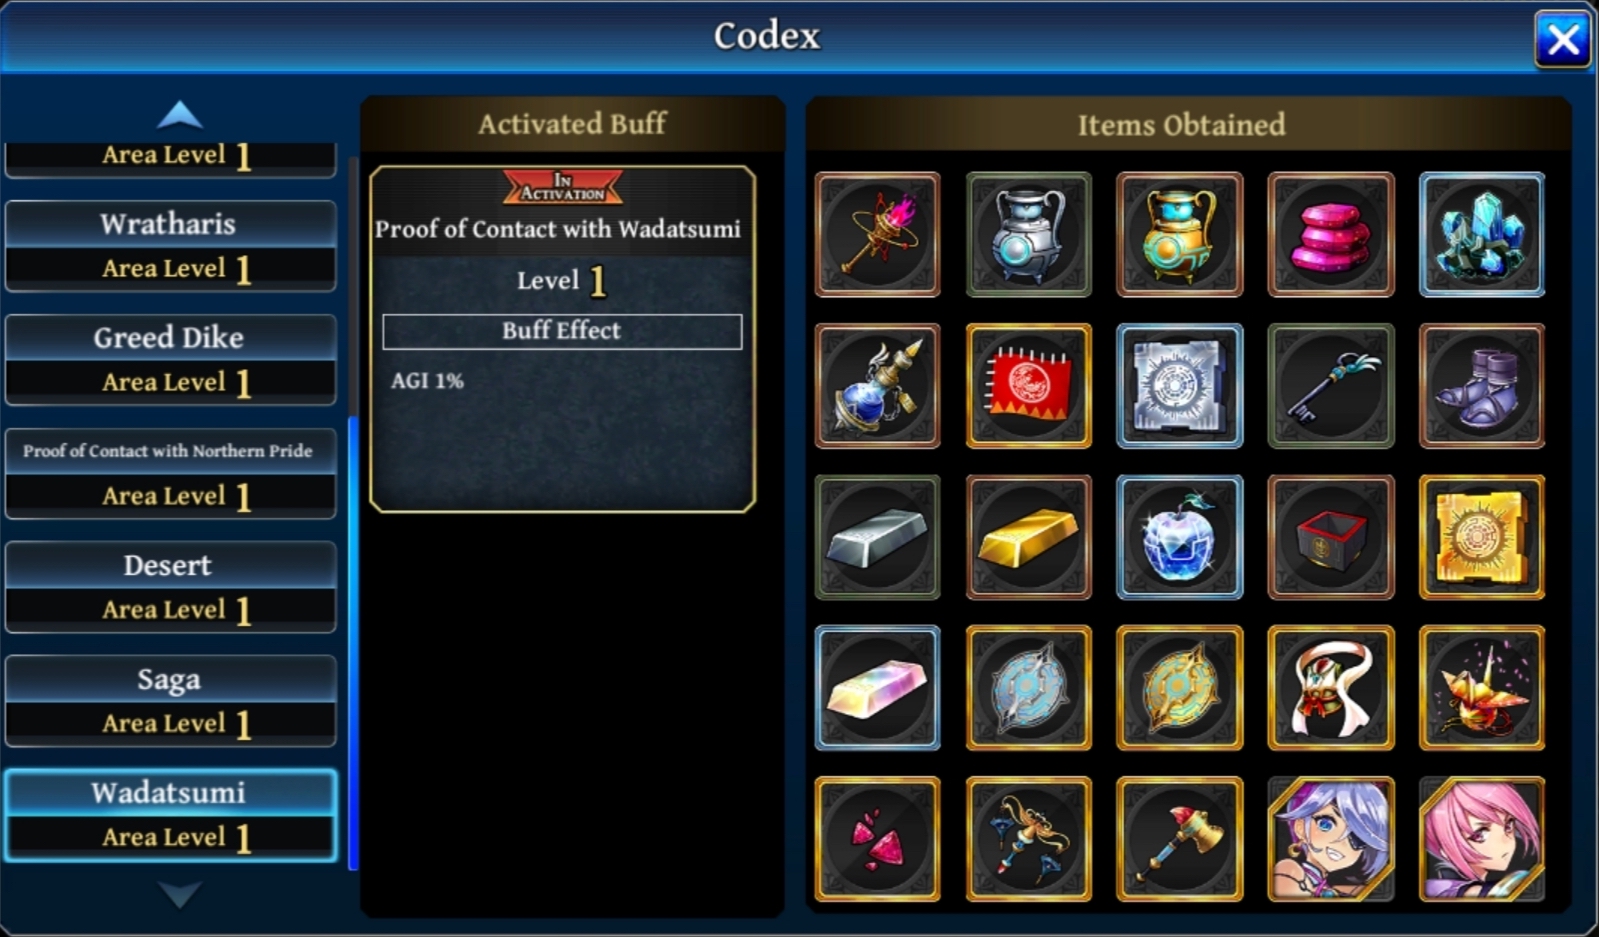
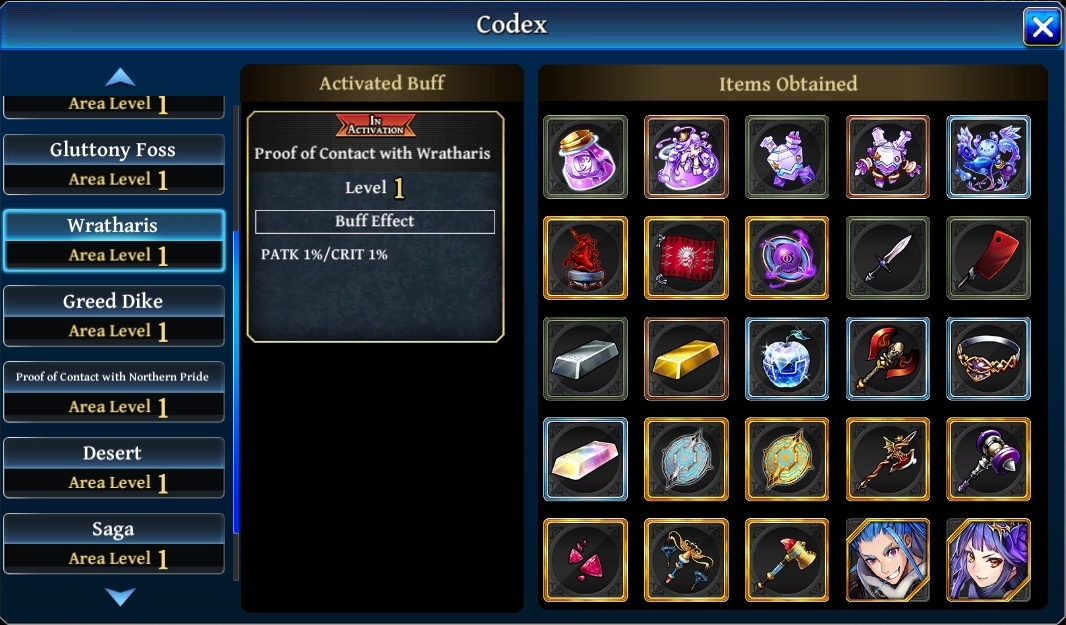
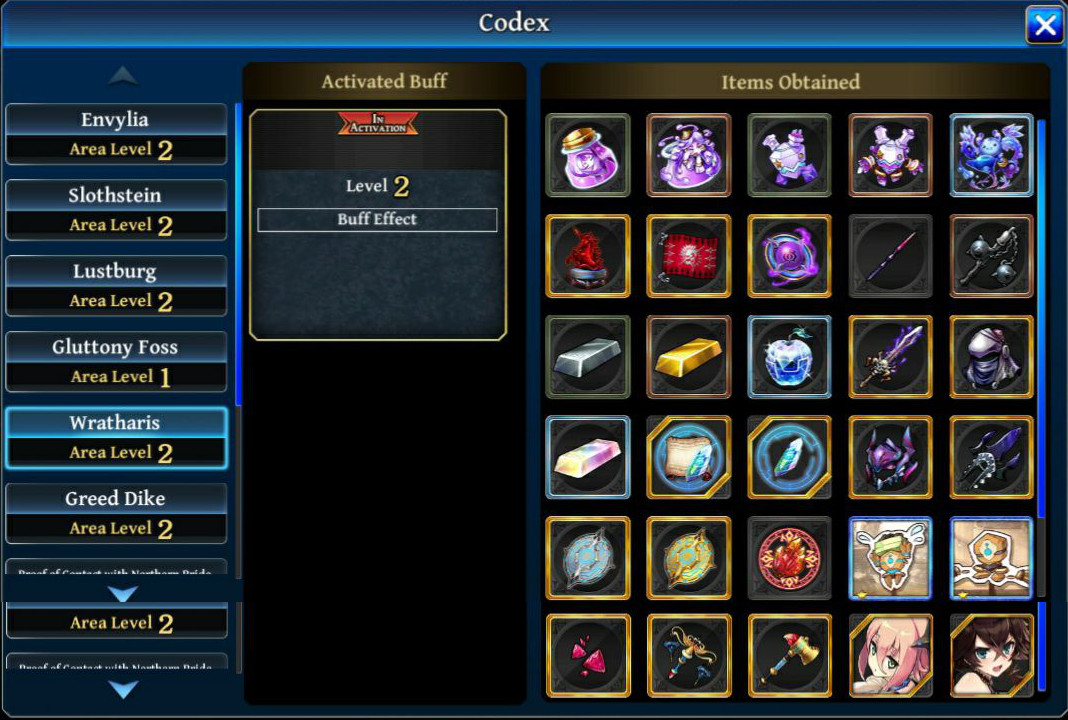
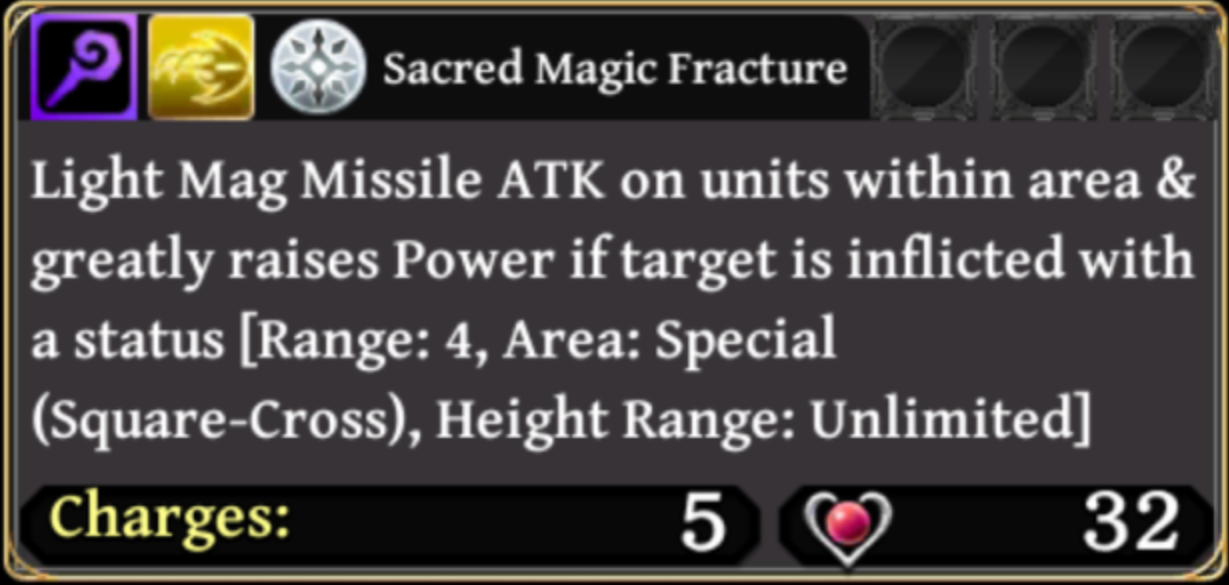
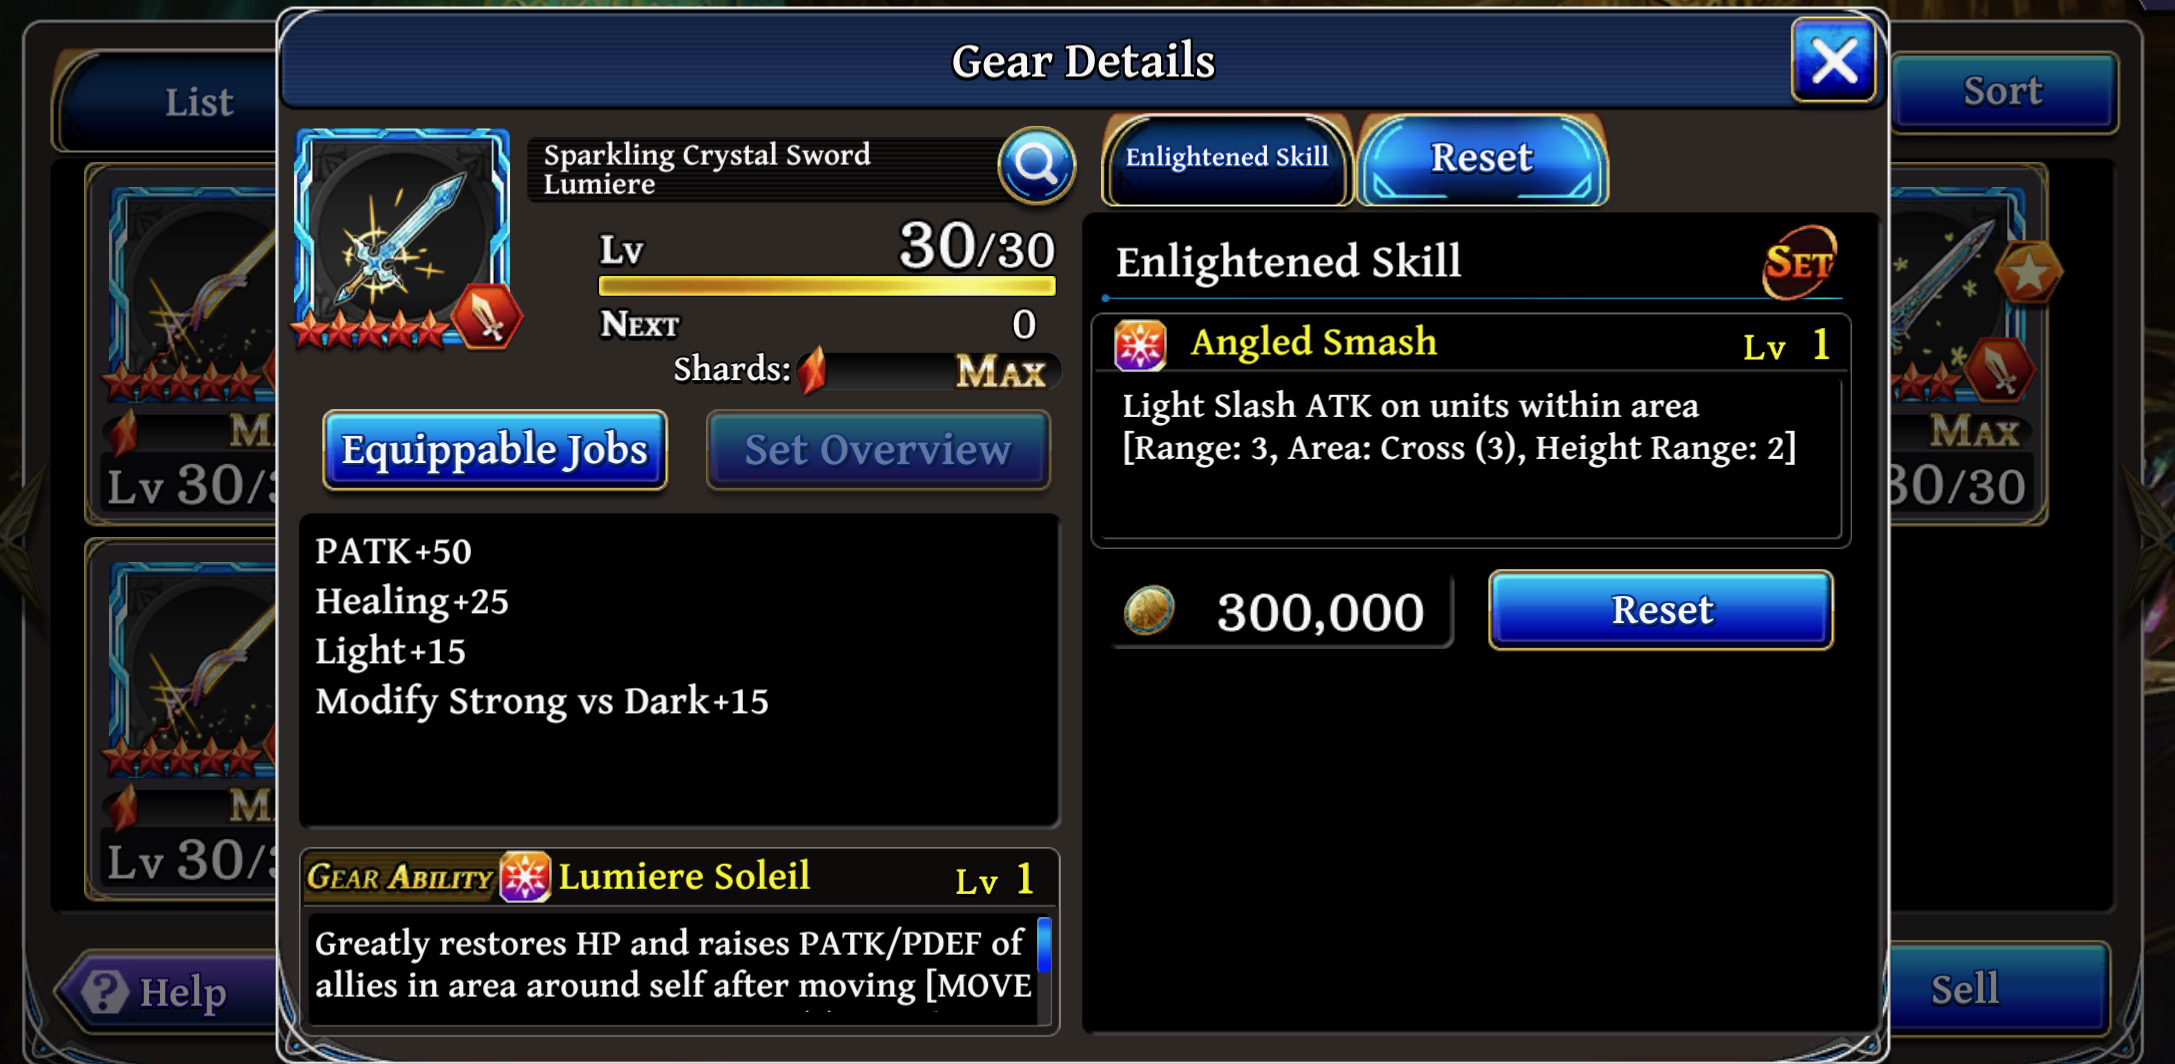
 The Alchemist Code (так же известная под названиями For Whom the Alchemist Exists и Ta ga Tame no Alchemist) – онлайн-аниме-игра для мобильных устройств от разработчиков Fuji Games и Gumi в жанре пошаговой тактической РПГ. И в отличие от того, что рекламируется под громкими названиями вроде «Лучшая аниме-игра» и бла-бла-бла, это действительно аниме-игра. Хотя бы потому, что создана и издана японцами, а не их корейскими коллегами и, уж тем более, не сомнительными конторками, жаждущими заработать лёгких денег на некомпетентных анимешниках. Огромный минус для обывателей лишь в том, что доступный для масс сервер на английском. Ну хоть не на японском.




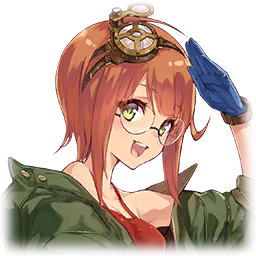 Judith,
  Leafah.
 Rebecca as Leader with
  Emma
Emma  Othima and
  Alma as your other core members. You can fill in the rest of your team with units like
  Lupinus
  Minerva
  Wilhelm or pretty much any other unit from that region that benefits from the your chosen leader skill.
 Roxanne as leader with
  Magnus and
 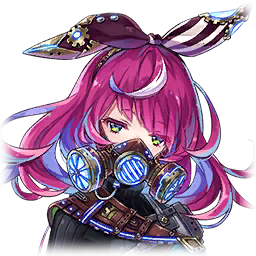 Albea as your other core members. Keep in mind any missile type unit can be your other core and sub members in this case.